I’m moving. Actually I already moved in April, but the process has been ongoing for a while, since January to be exact. There have been no posts or updates to projects since I don’t have a lot of time to focus on that at the moment.
The new place is about 4 hours away. It’s on old home with some history and charm. I took it on as a project too. It’s got great bones and lots of potential, although it has been neglected the last few years and needs a lot of TLC. It’s taking most of my time but I am really enjoying doing something different for a change.
Once everything is settled and more organized I’ll be able to dedicate more time to my projects again. More space means a new lab and rec room. Hopefully that means no more working on the floor and dining room table, and pissing off the wife, but we’ll have to see about that.
I live in Canada. Unfortunately the arcade market in Canada is pretty weak most of the time, so to get all the good stuff I have to buy games from the US every so often.
Most eBay users that sell internationally from the US, are “encouraged” into using Pitney Bowes’ GSP program for shipping abroad.
Ebay users pay for shipping to the Pitney Bowes GSP hub in Kentucky, which is cheap. What they don’t realize is that the cost that they see for shipping is only a fraction of what GSP will cost the buyer. As an example, a $100USD PCB may cost around $10USD to ship a typical PCB to KY, but a Canadian user will likely pay around $35USD plus about $15USD in customs fees. A similar package to Canada via USPS direct, would cost about $16-20USD and it would most likely avoid customs fees.
The benefit to the sellers are pretty obvious though. There is no need to fill out customs forms and GSP shields the sellers from negative feedback as long as the item arrives at the hub in one piece.
Upon receiving the items Pitney Bowes will typically repack the items to save on the remaining shipping costs. This is where my story begins.
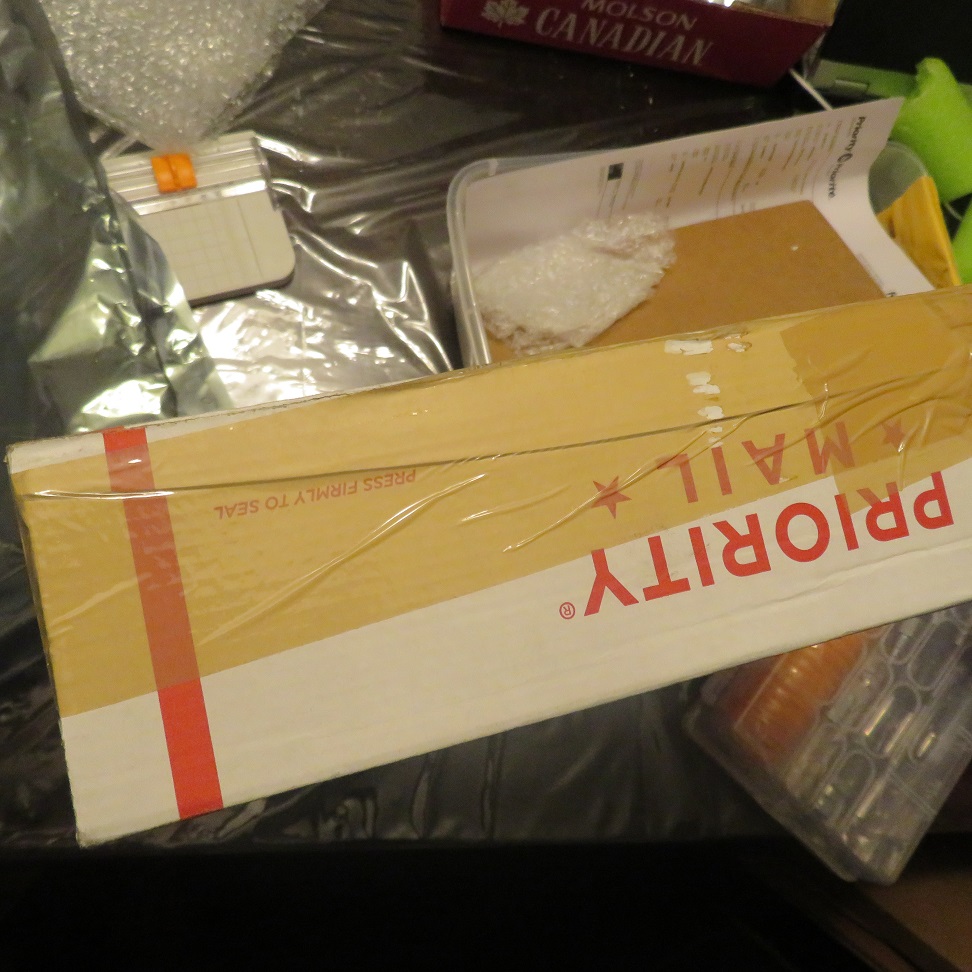
A few months ago, I ordered a Sega ST-V motherboard and Die Hard Arcade cart. The package arrived in a crushed box. There was very little protection in the box, basically only the anti-static bag and the PCB itself.
I connected the PCB and turned in on and got nothing… black screen… DOA. Upon closer inspection I noticed a long, deep gash on the PCB that ran across at least 2 inches in length. It looked hopeless. The cut went across several small pitch IC legs knocking them completely off. It severed many, very thin traces, it damaged vias, and appeared to be deep enough to penetrate at least a couple of inner layers of the PCB.
GSP repacking gone too far.
I contacted the seller. Seller swears the game was tested and worked before he sent it. I check the packaging and sure enough, the gash appears in both the anti-static bag and the box iteself.
Cut right through anti-static bag… proof that the blade that cut open the box, got too close to the PCB.…and here’s how they sealed the box after cutting it open and removing “excess” padding.
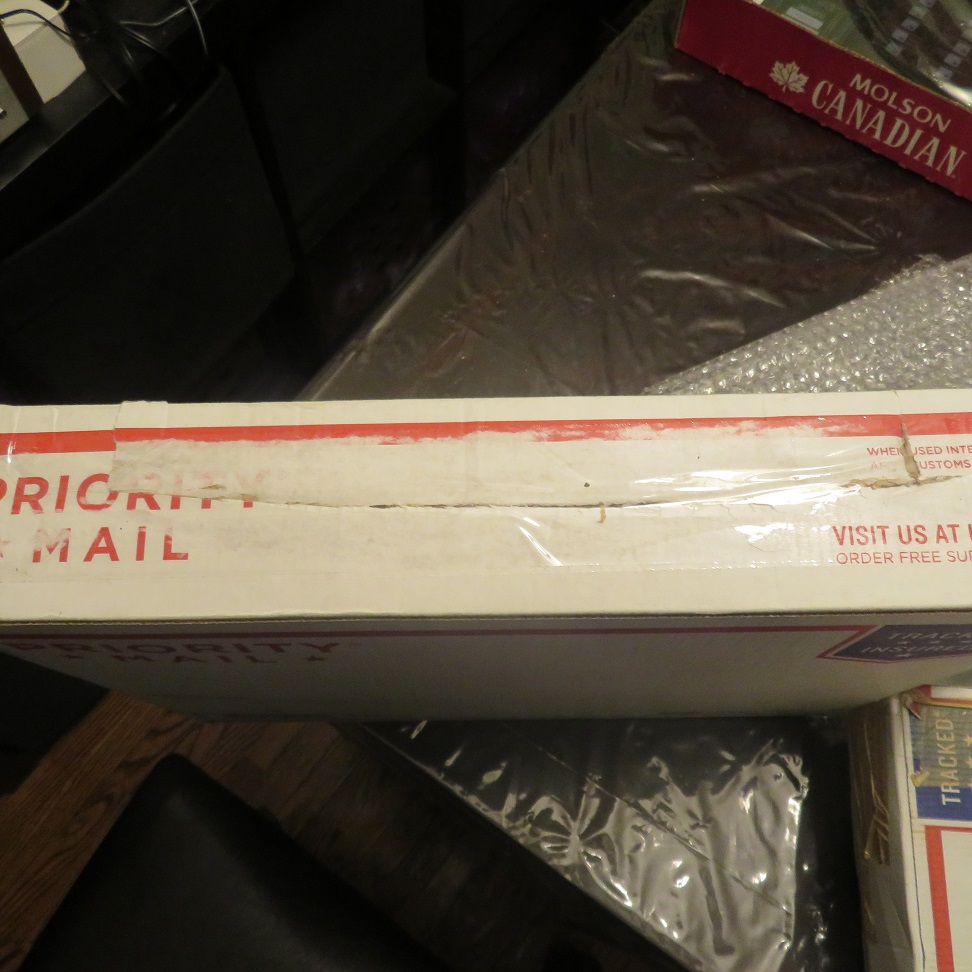
I became curious, and went through all the boxes that I still had from previous purchases, and sure enough, similar cuts appear on those boxes as well.
Another sliced box from earlier.
I contacted eBay about the situation. They made it very easy to get my money back for this purchase, but I was made to feel like they’re doing me a favor and in the future this favor may no longer be available. Strange, because I’ve been seeing lots of similar problems from other eBay users, and you’d think they would take more ownership of something that seems to be a pretty widespread problem.
This item was easily replaced, but what if you bought something that’s one of a kind? What if Ebay or Pitney Bowes deny any wrong doing and you are stuck with a broken item? They obviously don’t care about your items to begin with if they’re willing to slice the packaging open in this manner and remove padding to save a few bucks.
You may want to keep this in mind the next time you chose to use eBay’s GSP program.
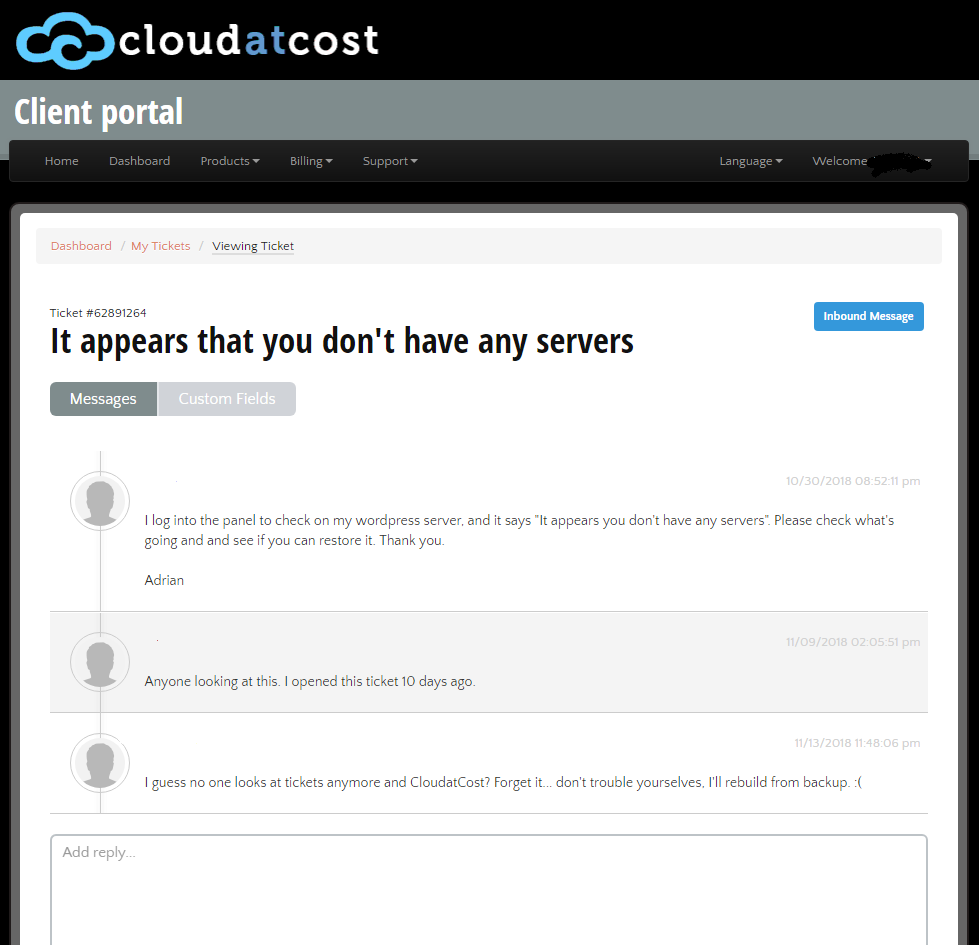
They lost my site again. Hilarious and sad at the same time, because I just made a number of updates and I thought that I made backups along the way. It turns out that the backups I made stayed on the VM and were not all downloaded to my home PC.
I normally keep a backup of this site on a secondary VM that can be swapped in when the primary is lost. The backup site was almost up to date too. I thought I was pretty safe here, and since there hasn’t been a major problem in a while, I let my guard down.
But, Cloud at Cost is awesome at keeping you on your toes. They showed me that I’m not as clever as I seem to think I am. By wiping all of my VMs simultaneously, they made it clear who’s the boss around here.
So I managed to combine a 2 month old backup along with some info from Google cache to restore this to what you are seeing right now.
Silly me, I even opened a ticket to inquire, politely at first, to see whether there is a way to maybe find out what happened, and maybe get my data back. Given how it’s been 3 weeks and I don’t even have an acknowledgment yet, I may be waiting on this for a while I think.
It’s been a lazy summer. Not very motivated to do work. Being addicted to the internet isn’t helping. Stuff that should have been done months ago is still on the back burner.
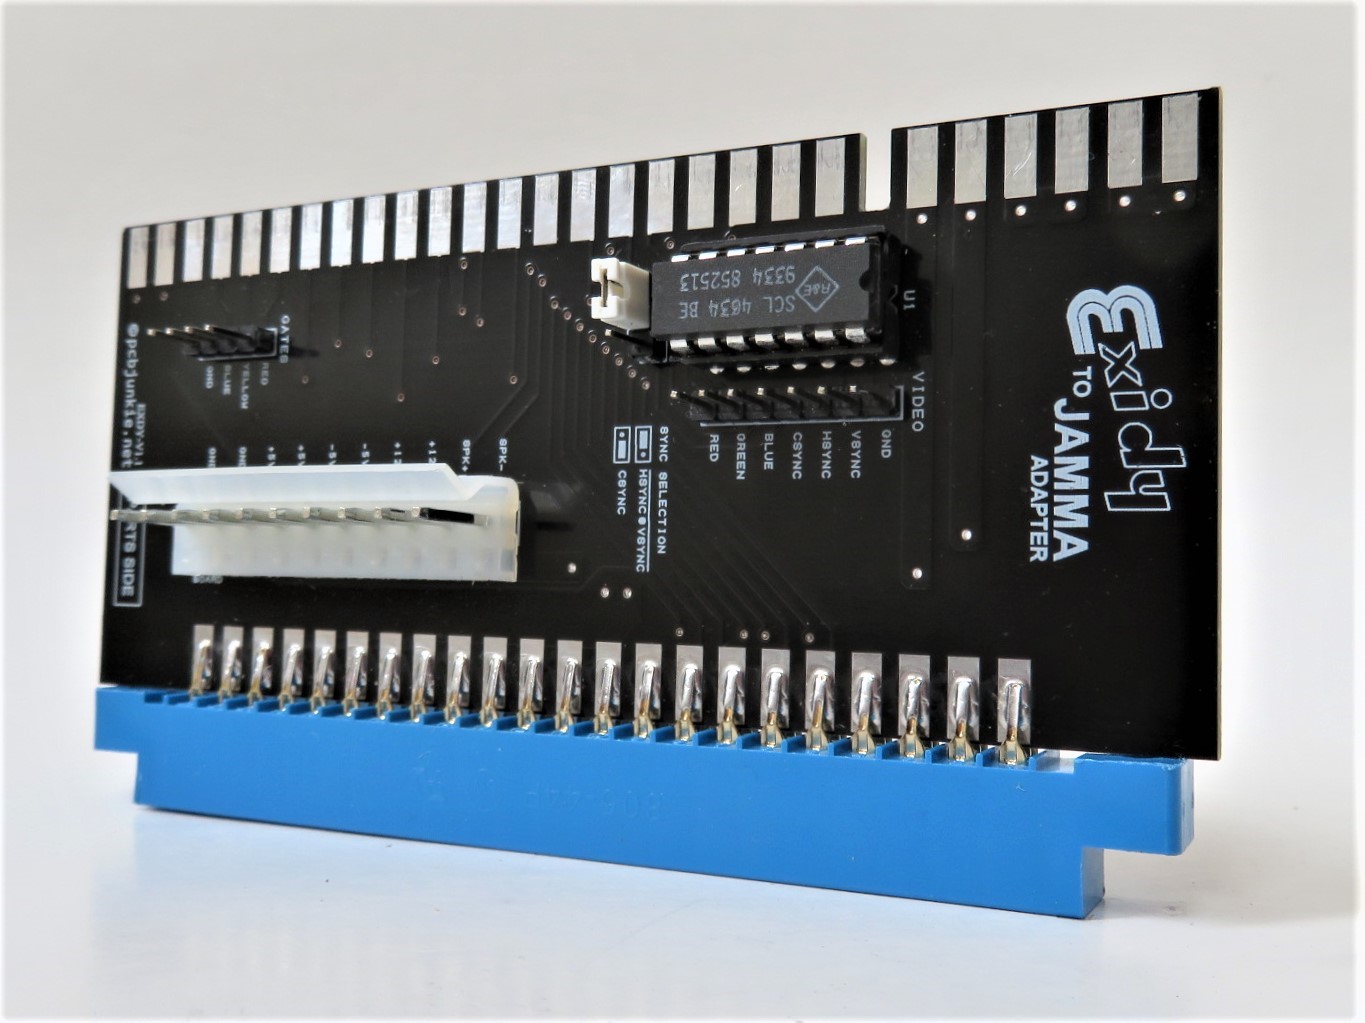
But… I’ve somehow been able to get a number of things accomplished. There are four new JAMMA adapters that I’m about to release. These are:
Exidy to JAMMA – For games like Mousetrap, Venture, Targ, Spectar, Pepper II and Victory
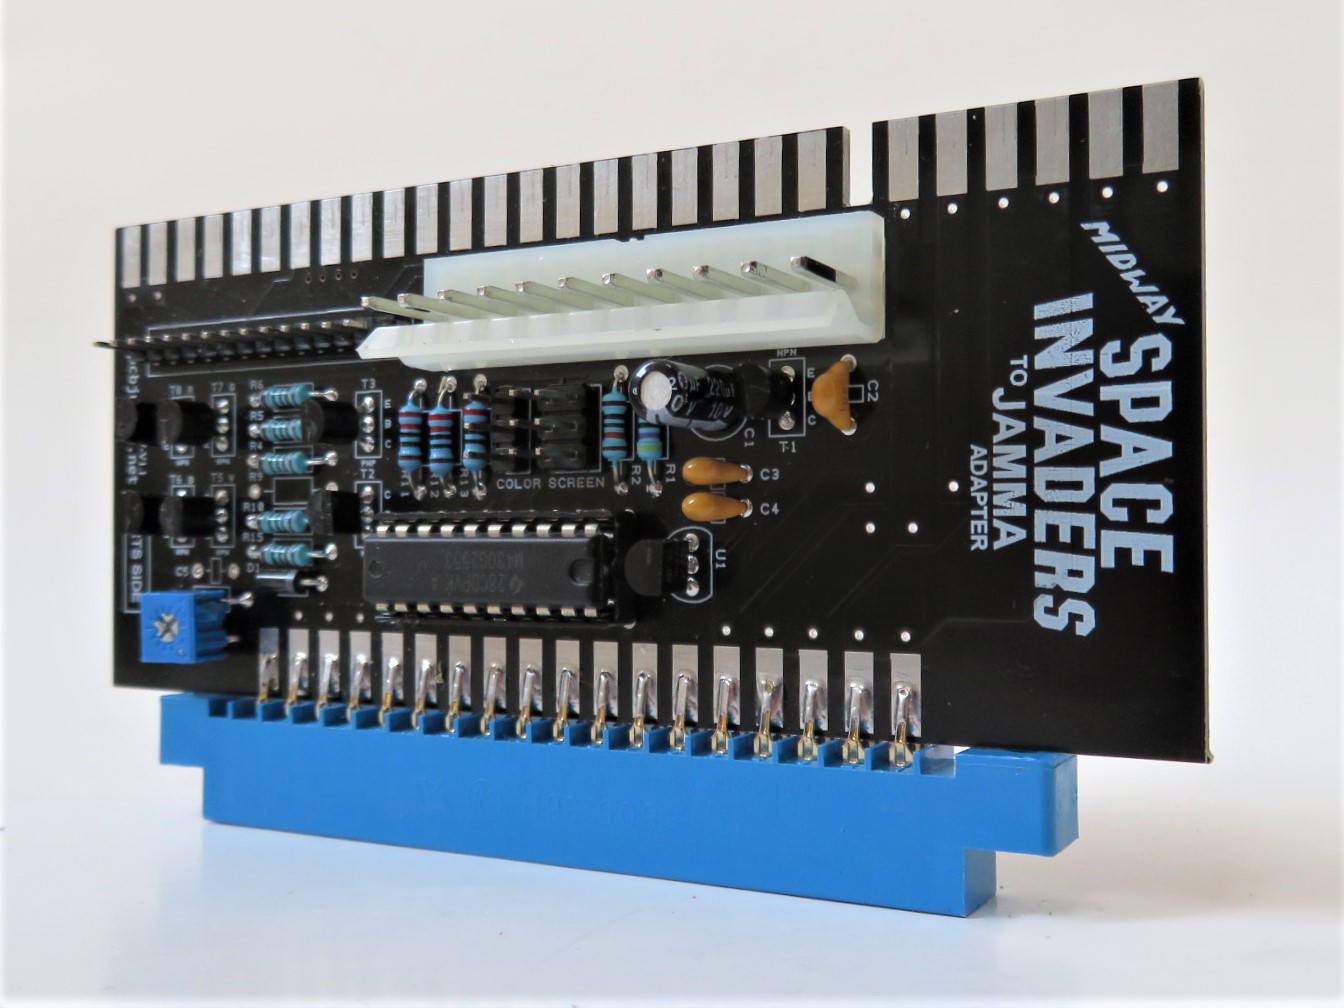
Space Invaders to JAMMA – For the Midway variant of Space Invaders and Space Invaders Deluxe
8 Liner to JAMMA – for your poker and video slot games.
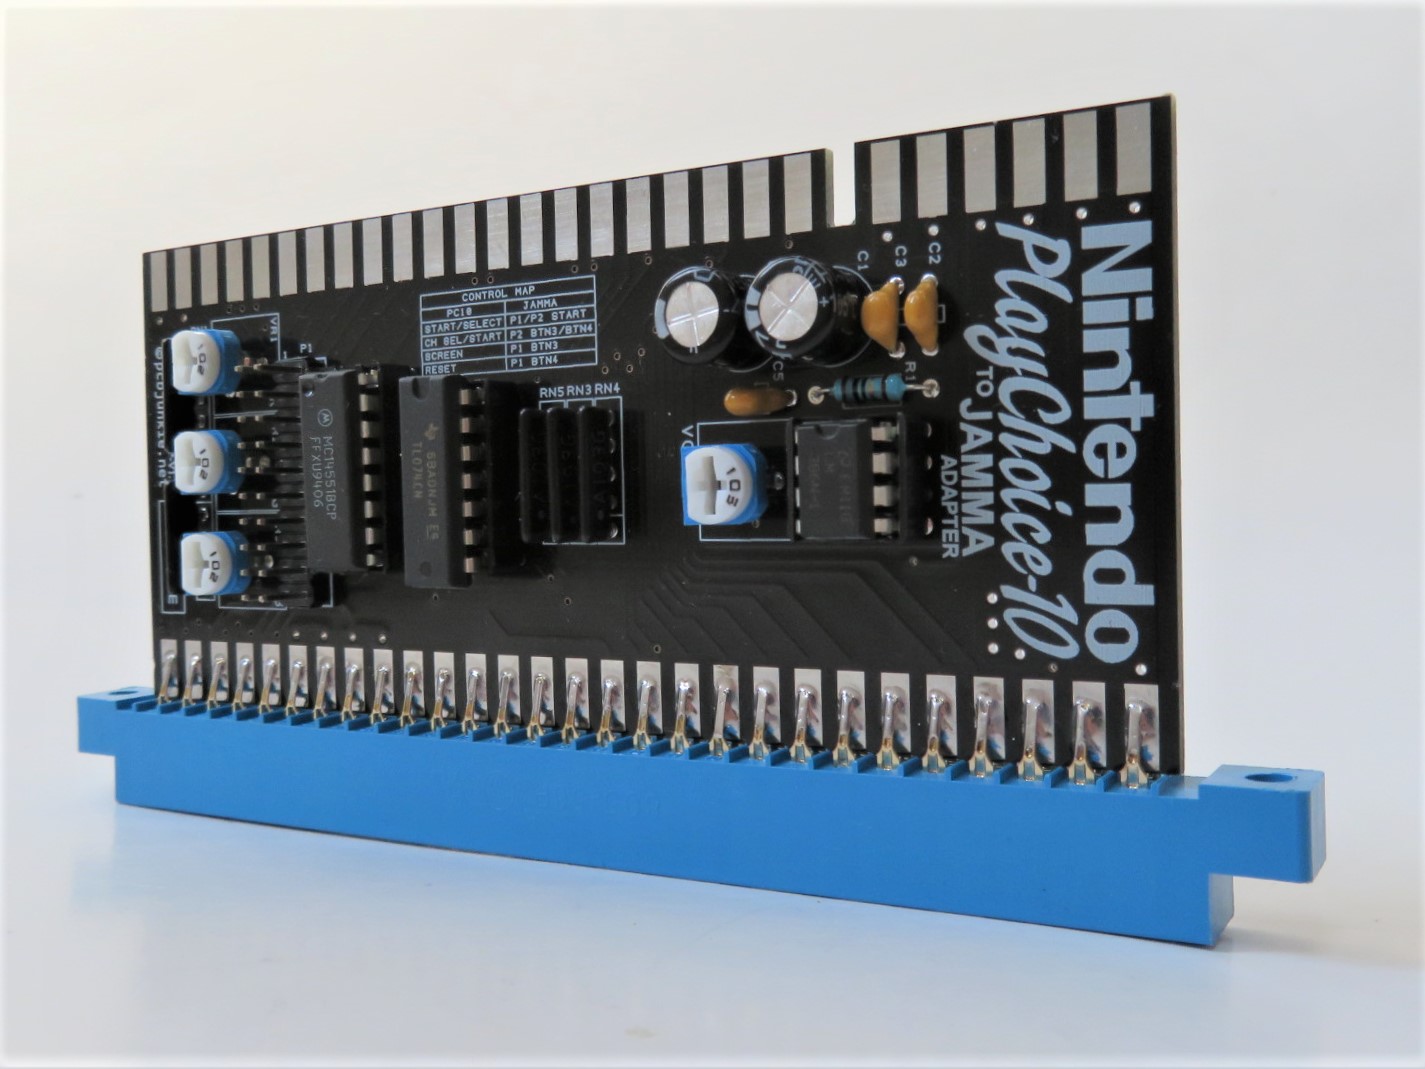
Nintendo Playchoice 10 to JAMMA – for the dual monitor version of the PlayChoice 10 board. Still looking for the single monitor version of the PCB if anyone has one and wants to sell it.
These adapters are fairly complex and took a few months to develop. I hope you’ll appreciate the quality, functionality and the price of these adapters and support my work by buying a few of them, from my Ebay page here.
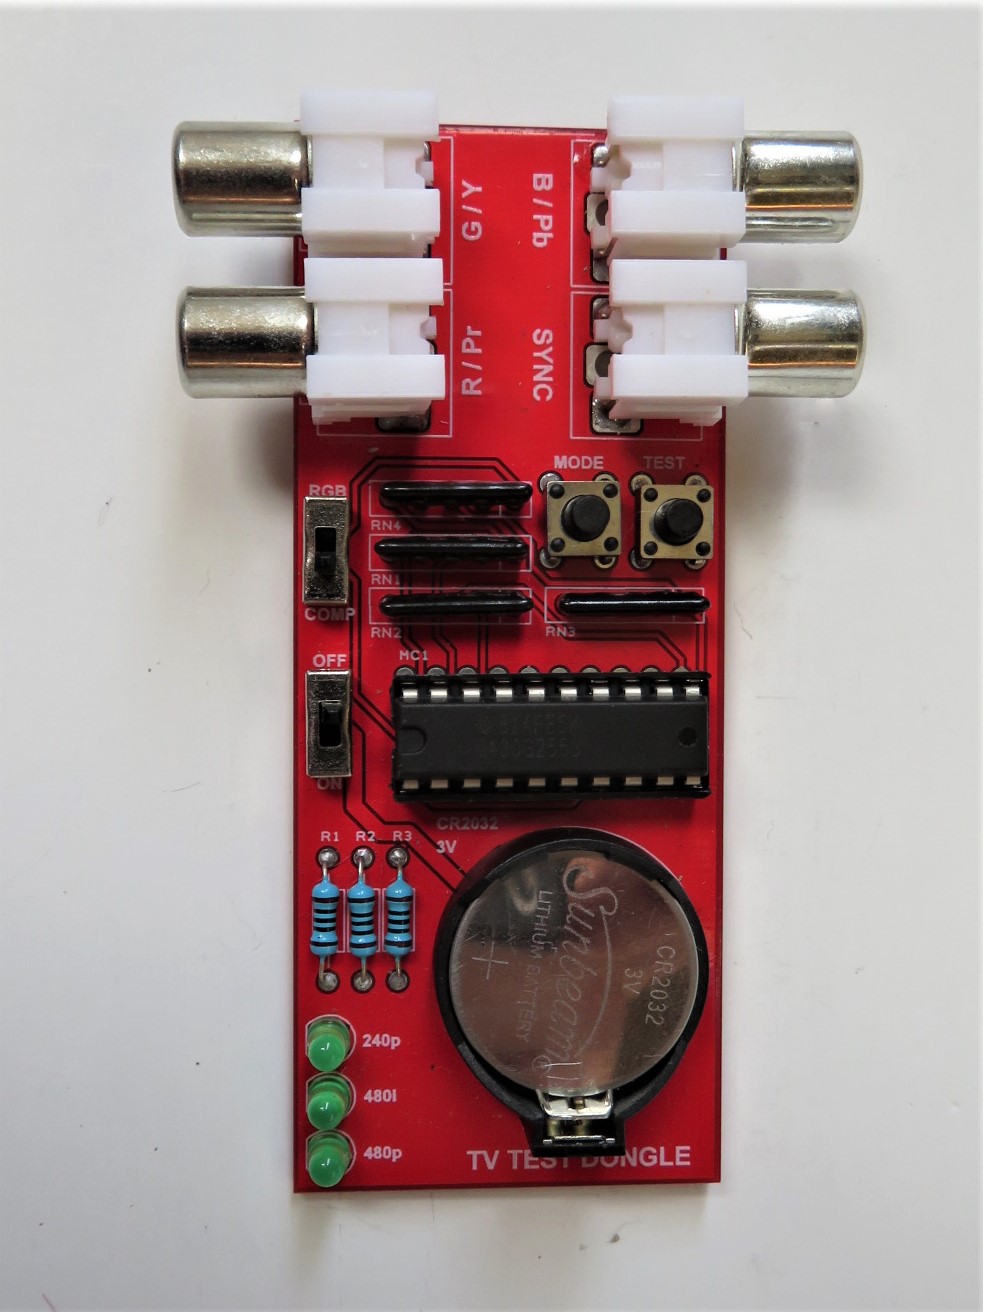
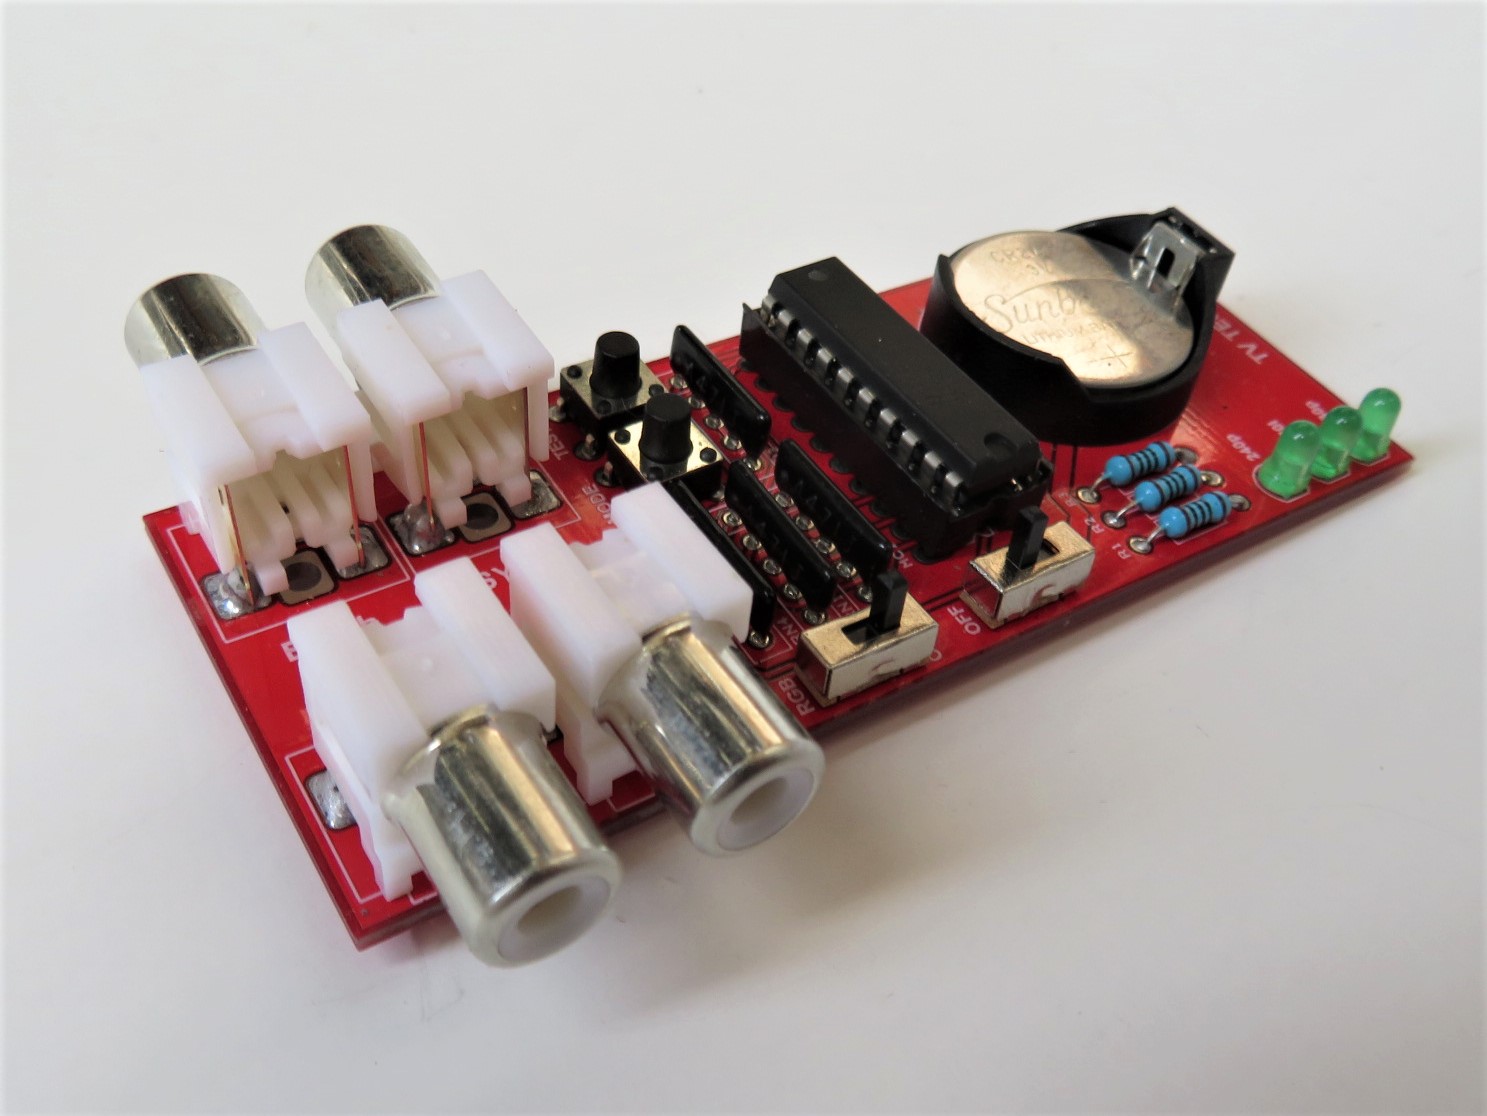
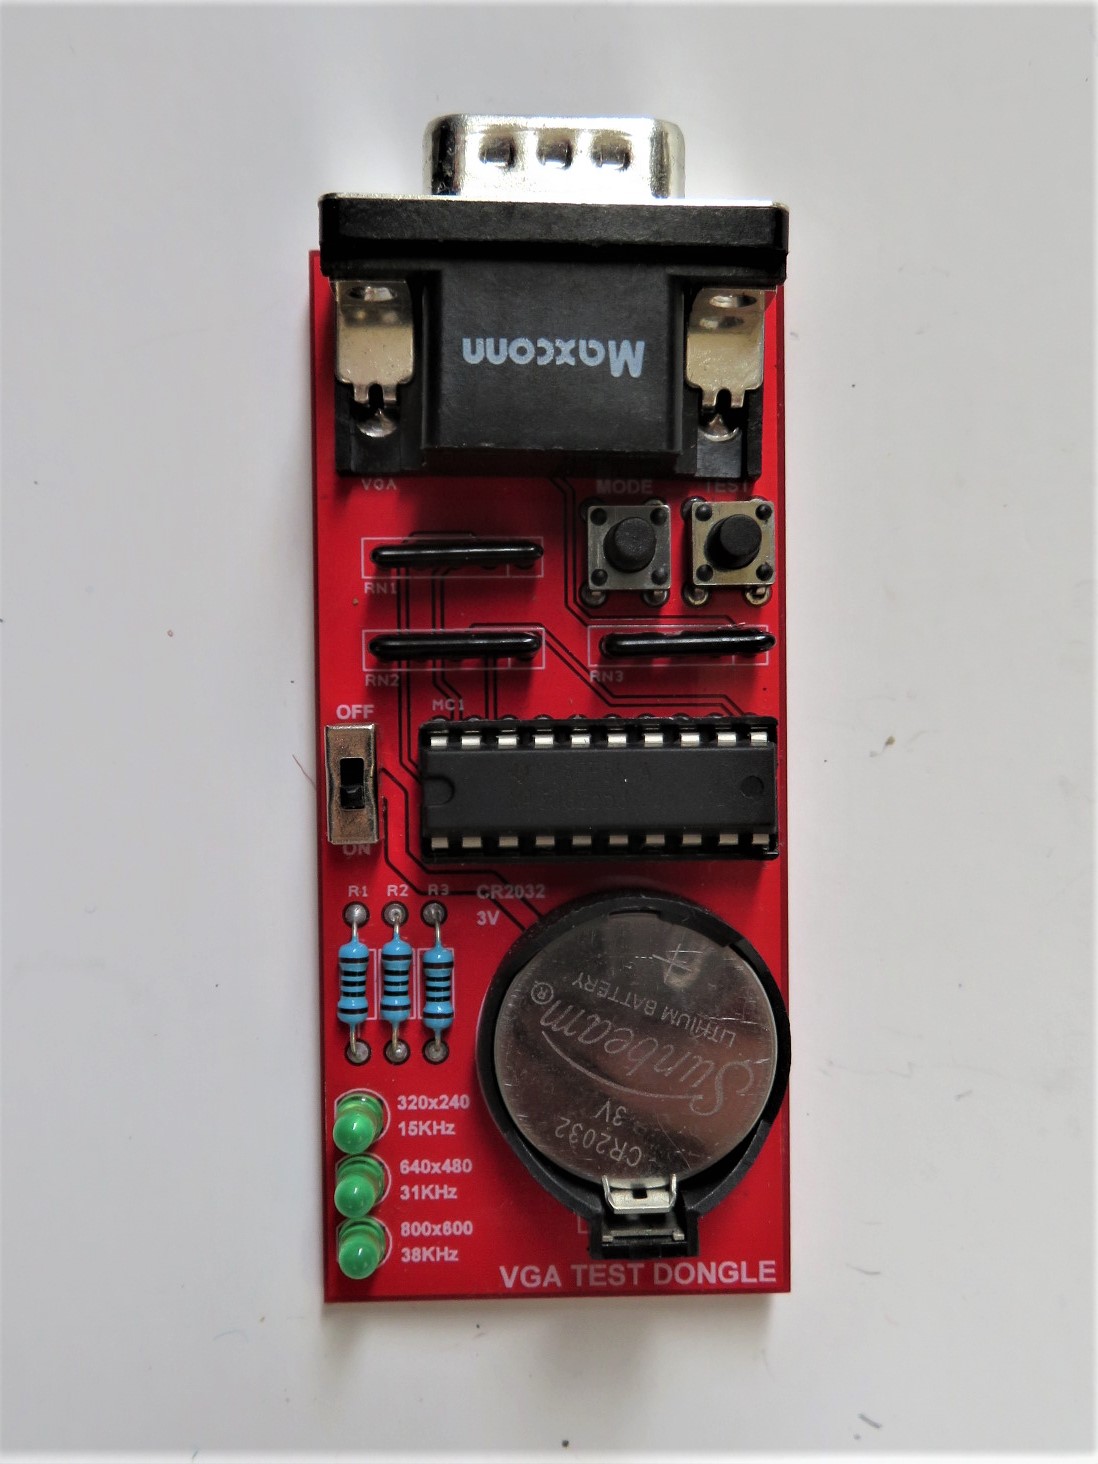
I made a couple of battery powered CR2032, TV and monitor test donges, using an MSP430 microcontroller. These dongles plug into either a VGA port or the RGB or Component plugs and allow you to test the TV or monitor without having to bring with you bulky test gear.
TV Test Dongle
VGA Monitor Test Dongle
I intend to use this to test TVs and monitors when I go thrift hunting.
I’ll put up a page with more information soon. While these are already usable, they wont be released for a while longer due to some minor design issues that have to be dealt with.
While I haven’t made any recent updates for a while, there is actually a lot of stuff going on. I put aside some of the long term projects (probably a bad idea) in favor of some quickies.
I spent the last few weeks working on RGB modding Sony Trinitron TVs. I ran into some issues with that but in the end was able to overcome them. As a result I made a Sony modchip board that can be used to enable an unused RGB input on Sony YC Junge chips inside of their TVs. I’ll put up a page with more details soon, but in the meantime here’s a link to the Youtube videos I made on the subject.
While working on the videos I decided to make a small dongle boards for testing TVs and monitors. These dongles will be battery powered and will output various signals to allow you to quickly test the equipment. Mainly this is for people that go thrifting and need to make sure the gear is working as expected. The vga dongle will output a 15khz test signal to help you find those elusive 15khz capable lcd panels.
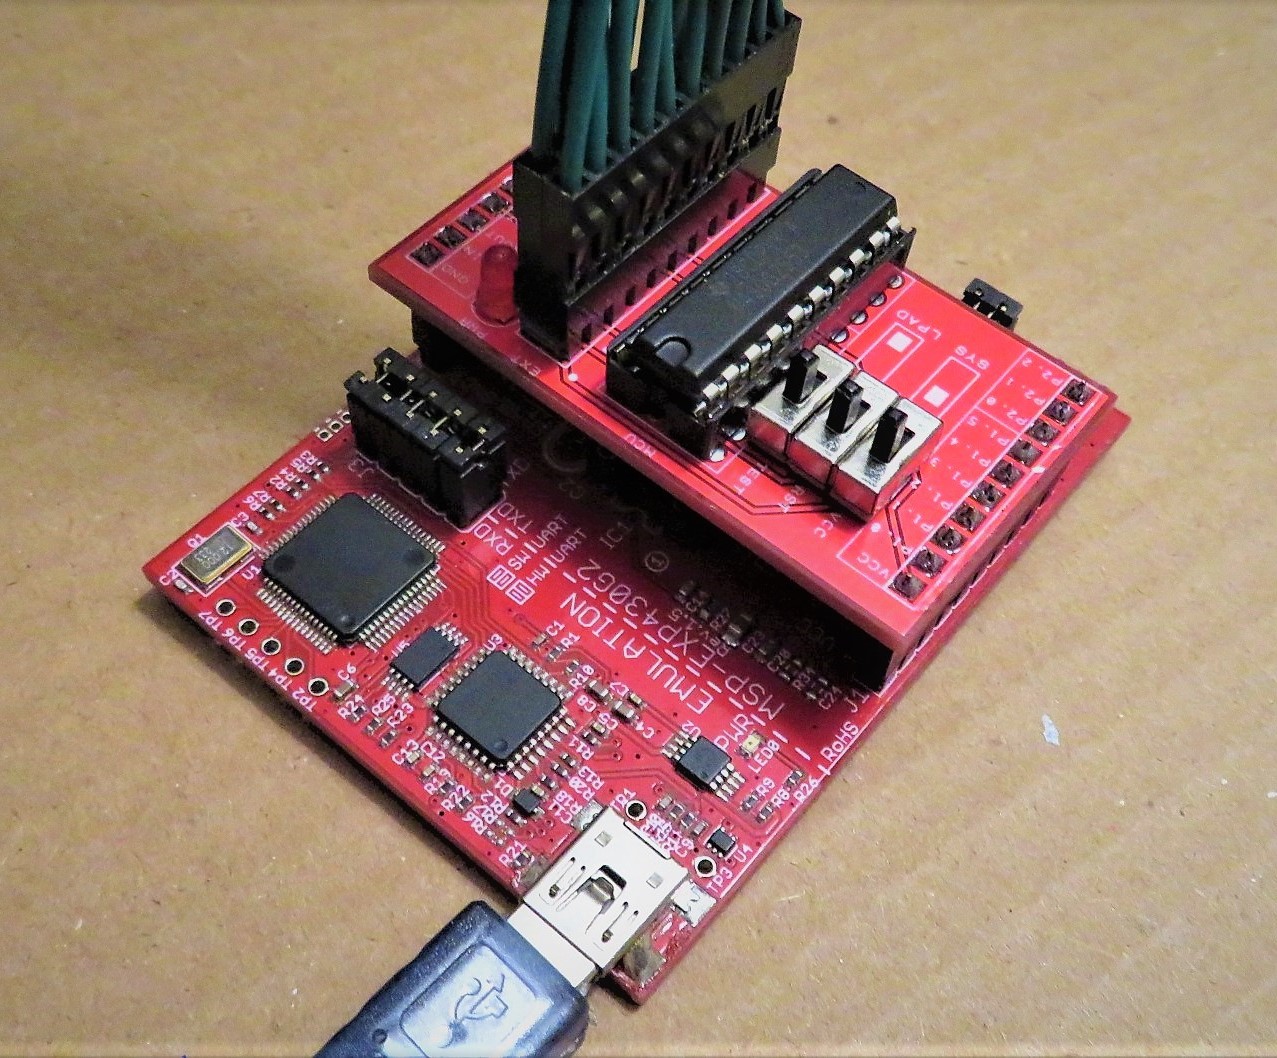
In addition to that I made a simple yet effective in system debugging board for value line msp430 microcontrollers. The idea here is to use your existing msp launchpad and connect it with an extension ribbon cable to your system. The board provides switches for the TEST, RESET and VCC pins to quickly go from programming to in system debugging.
This board design is available for free, but if you want to get a fully assembled kit I will make it available that way as well (coming soon).
Finally I’ve been working on more JAMMA adapters. The current batch consists of adapters for Exidy, Nintendo Playchoice 10, standard 8-liner pcbs with 72pin + 20pin edge connectors, Space Invades with virtual color overlay, and improved designs for the existing Nintendo adapters.
I spent the last couple of weeks or so testing the new JAMMA adapters, and updating this site. Most of the JAMMA adapter pages are now online and are complete.
According to what’s on the site, I have 30 game / conversion class specific adapters listed, 3 universal adapters listed, and 2 more adapters which are work in progress. The 2 unlisted adapters are the Orca Type B adapter (needs redesign for 2 button games) and the Space Invaders adapter which I literally just assembled and still need to write the code for.
I will also be working on a couple more adapters. One that I’m kind of excited about is a Sega Naomi to JAMMA adapter which will eliminate the need for a Naomi / Capcom adapter and will allow the use of a ATX power supply with your Naomi system.
I’ll post some news on this as the project moves forward.
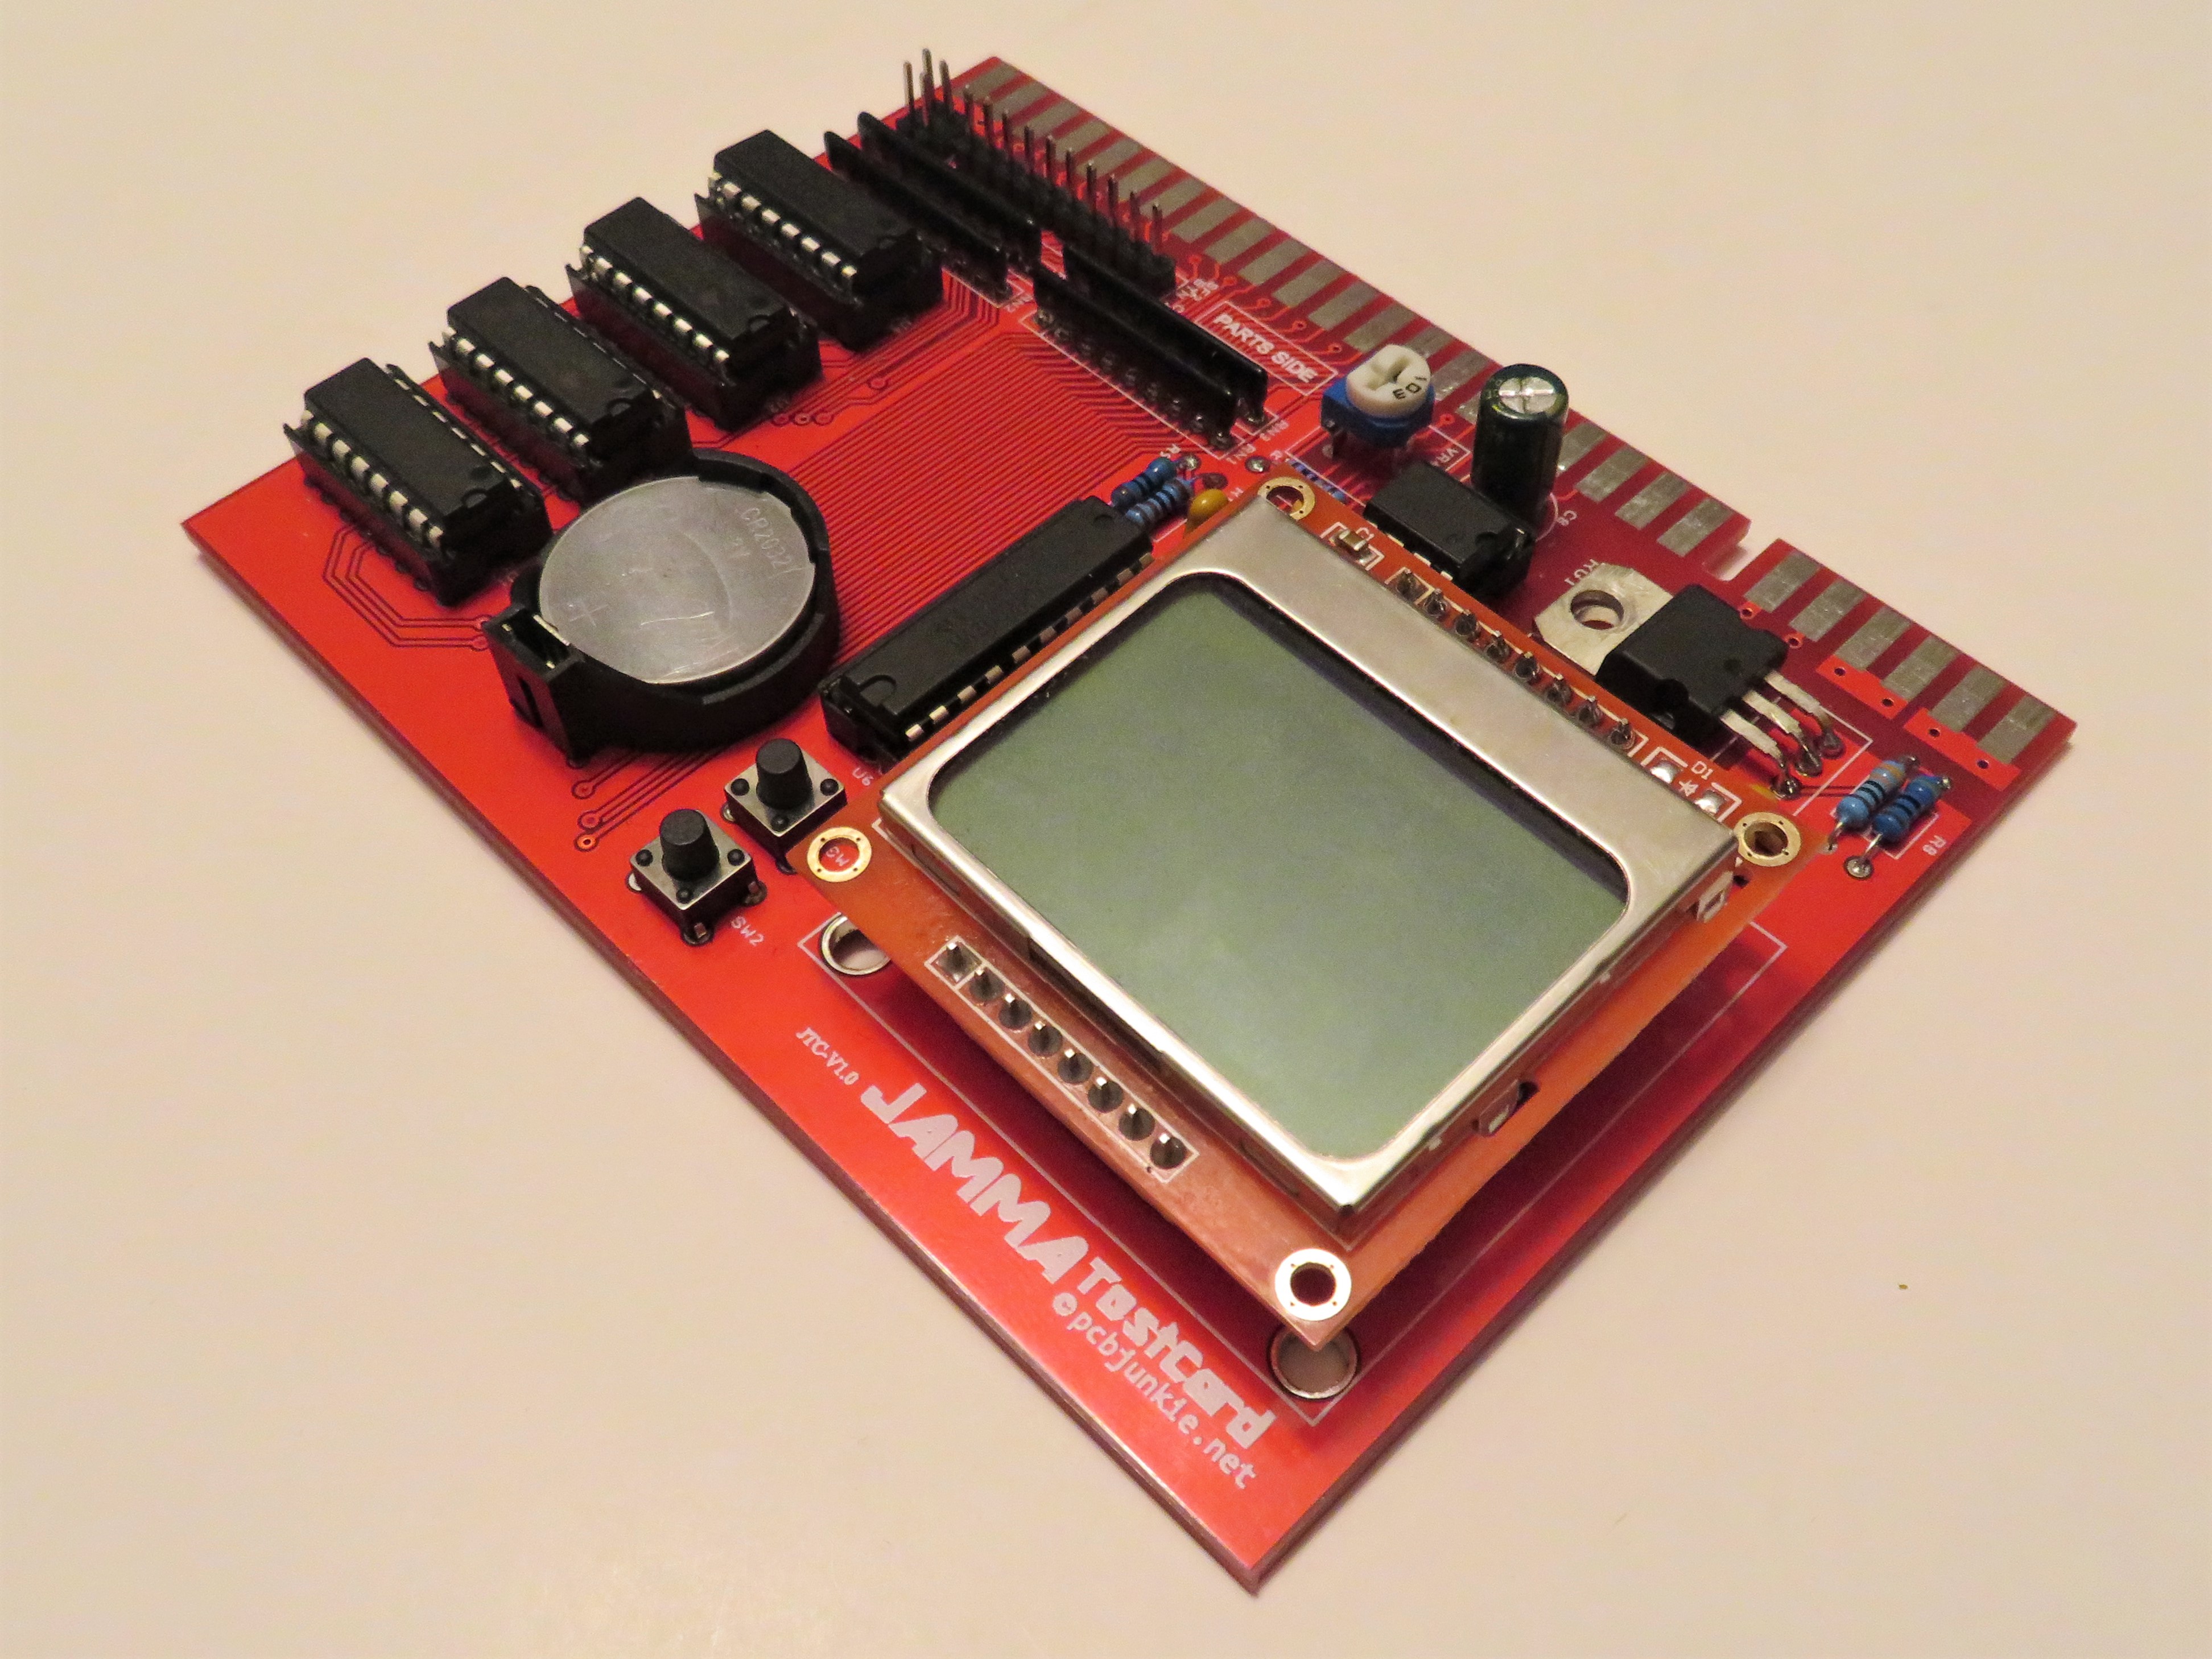
Given how I need to perfect my on screen display and video code, and the input and lcd interface that will be used in subsequent JAMMA project like the PJ (Pi to Jamma), Minigun and the JammaMate cards, I decided to concentrate on the JAMMA TestCard to finish this one completely before focusing on the other projects.
TestCard prototype is almost complete.
I made a separate project page dedicated to the TestCard. You can find it here.
This project is about 80% complete I would say. Not sure how long before I wrap it up but it should be not much more than a month or so. It all depends whether I get distracted with other stuff, and that’s very, very likely.
Since this project isn’t 100% completed yet, the price isn’t final, but I’m aiming to initially price these at around $40USD or $50CAD.
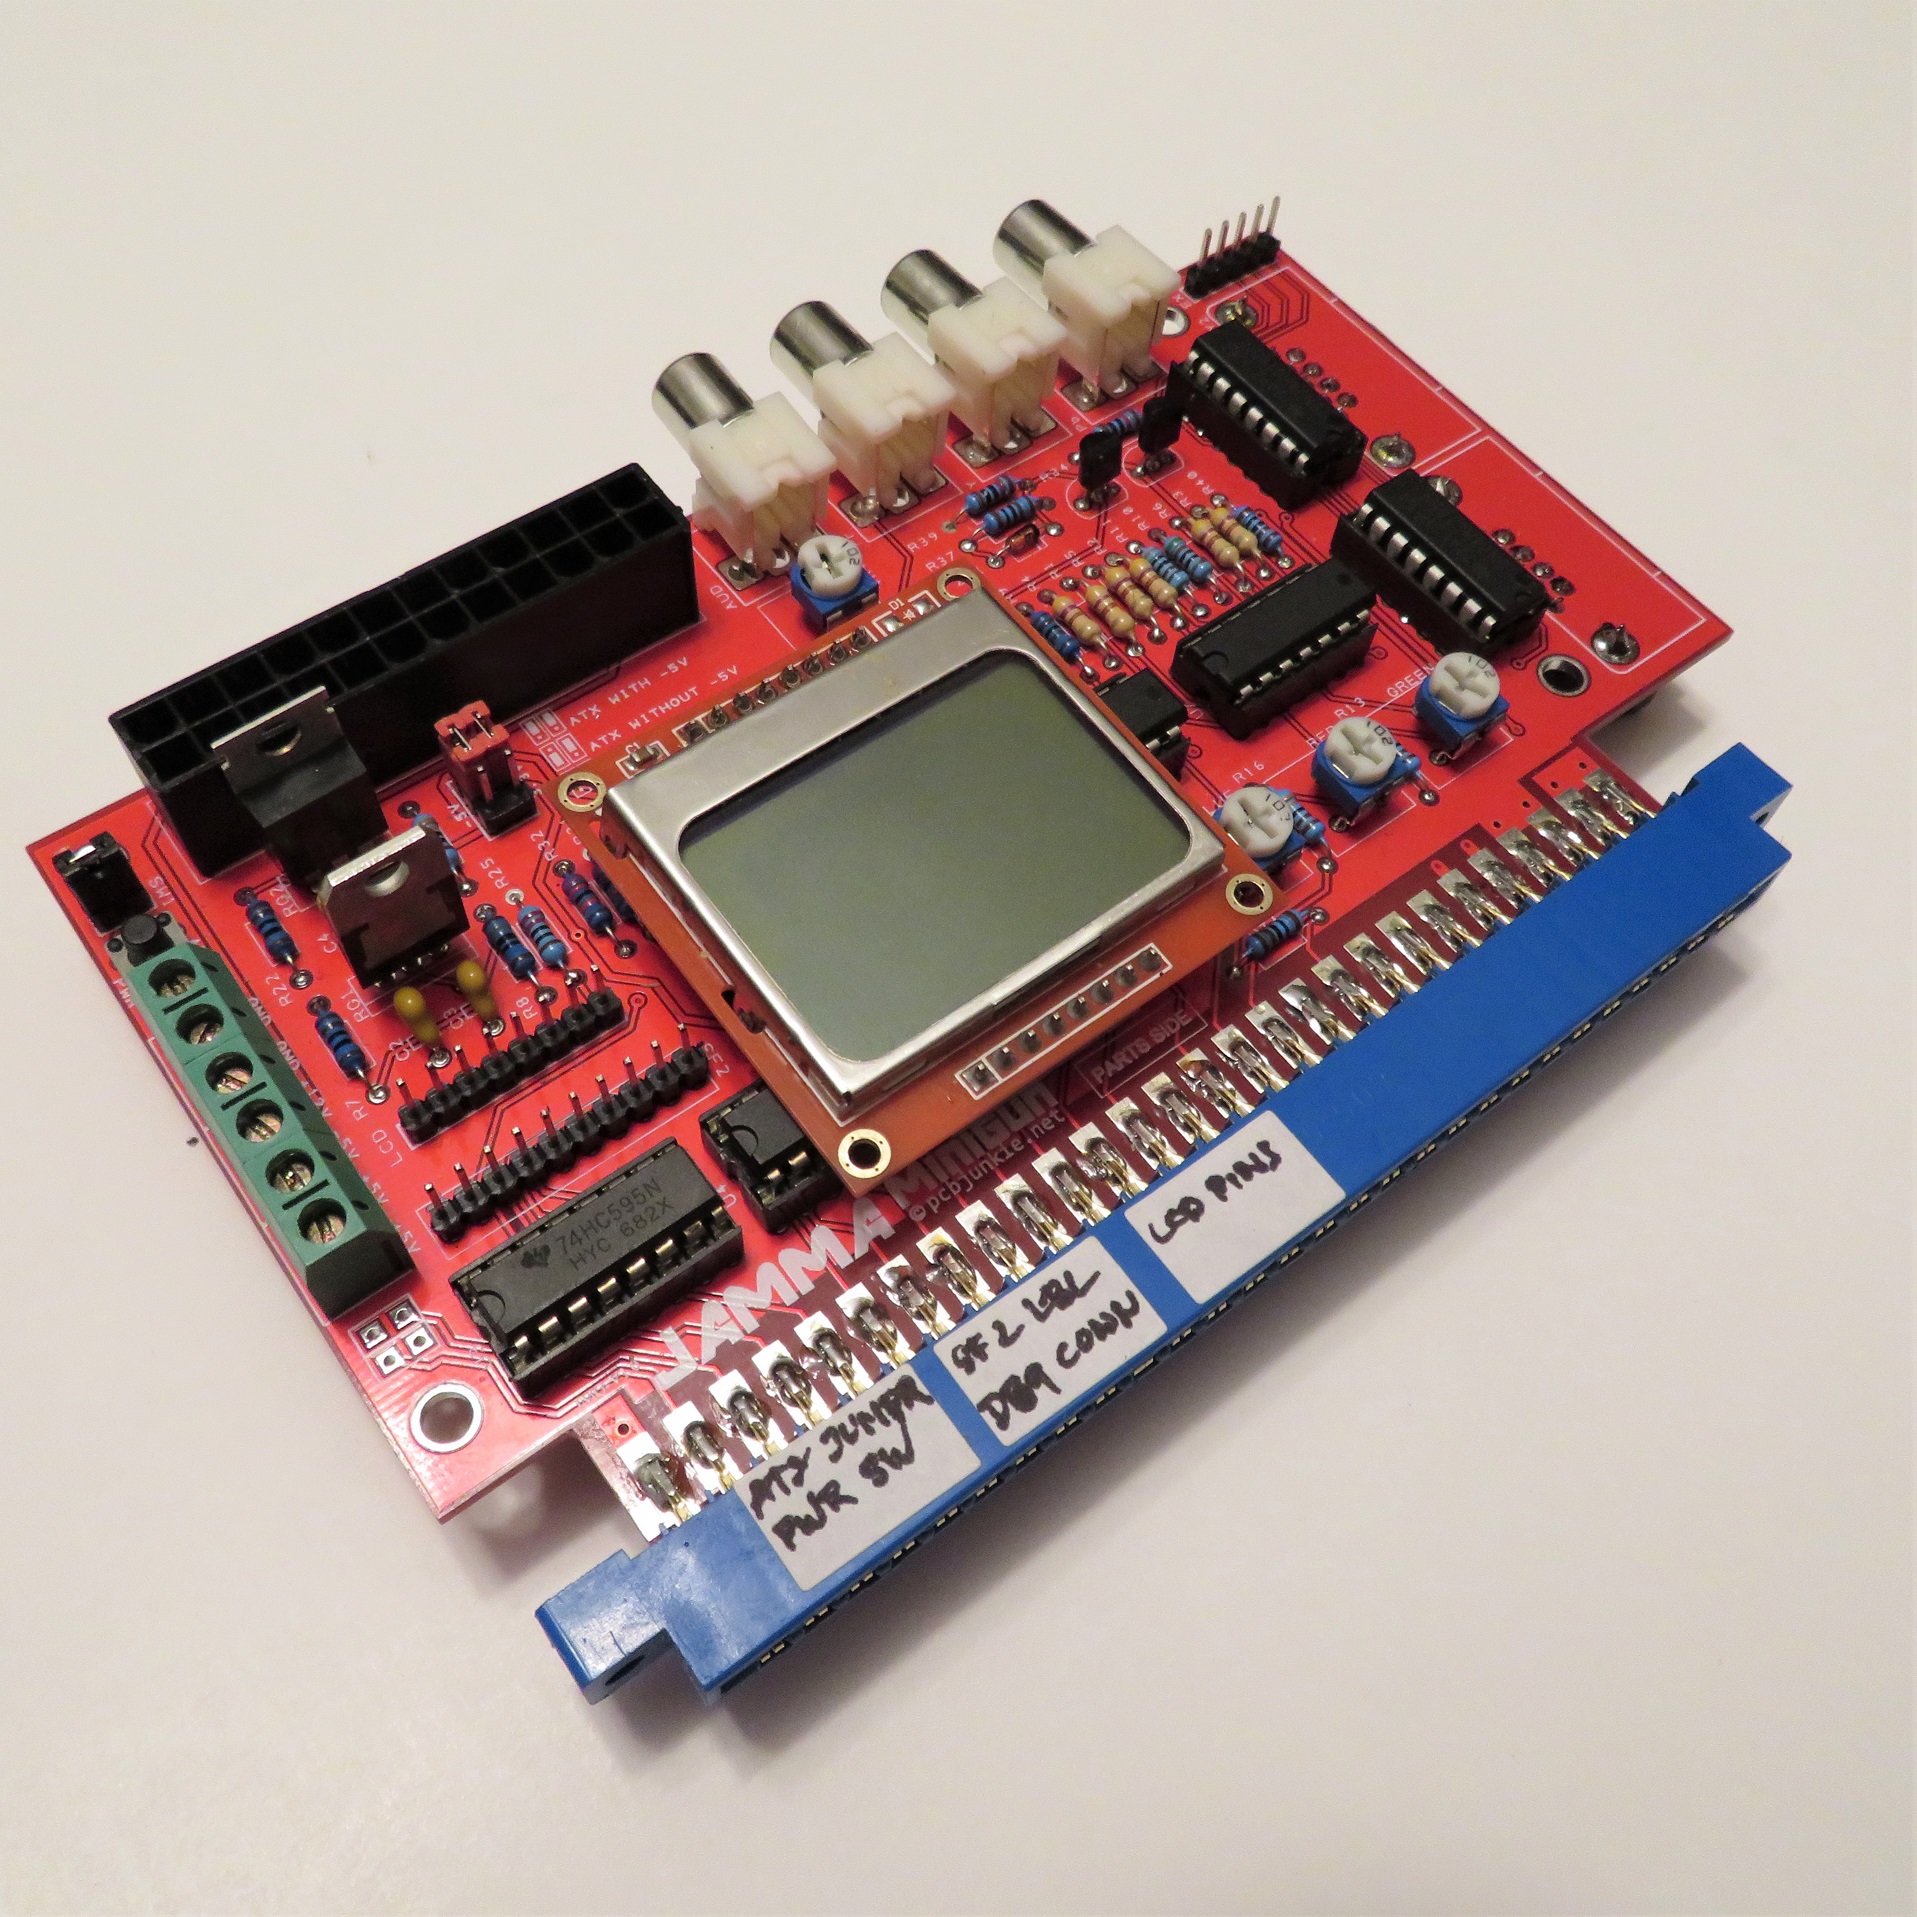
In addition to this, I’ve also been working on a couple of other side projects. I have now assembled and have done some light testing with the Minigun prototype board.
This is a device that is a single PCB supergun that has some neat functionality not found elsewhere. The main features that separate it from the crowd are the ability to use Sega Genesis 6 button controllers, or any other DB9 compatible joystick for that matter, RGB to Component video conversion (requires a TV capable of displaying 240p video) and most importantly, the price.
I’m planning to price is well below any competition, even though I would consider this product to be superior. The price point I’m aiming at is about $70CAD or $60USD without controllers.
As the project continues to move forward I’ll try to update this site with additional information. For now there is very little information on the Minigun page here, but feel free to check it out nonetheless.
I’ve been running low on existing adapter boards as they’ve been selling quite well. Since I had to reorder these, it made sense to expand the order to include alongside some of the other adapter types I’ve been working on recently.
I put aside the JAMMA TestCard and the Minigun work for a couple of days to finish up the design for these adapters, and while they’re in production, the plan was to switch back and work on the code for the TestCard and the Minigun again.
This type of efficiency is so unlike me.
So now, while I wait for the order to arrive, I am back working on the TestCard again. Given how the libraries I’m trying to write will be reused in later projects, the TestCard makes it easy to test the code before it gets reused elsewhere.
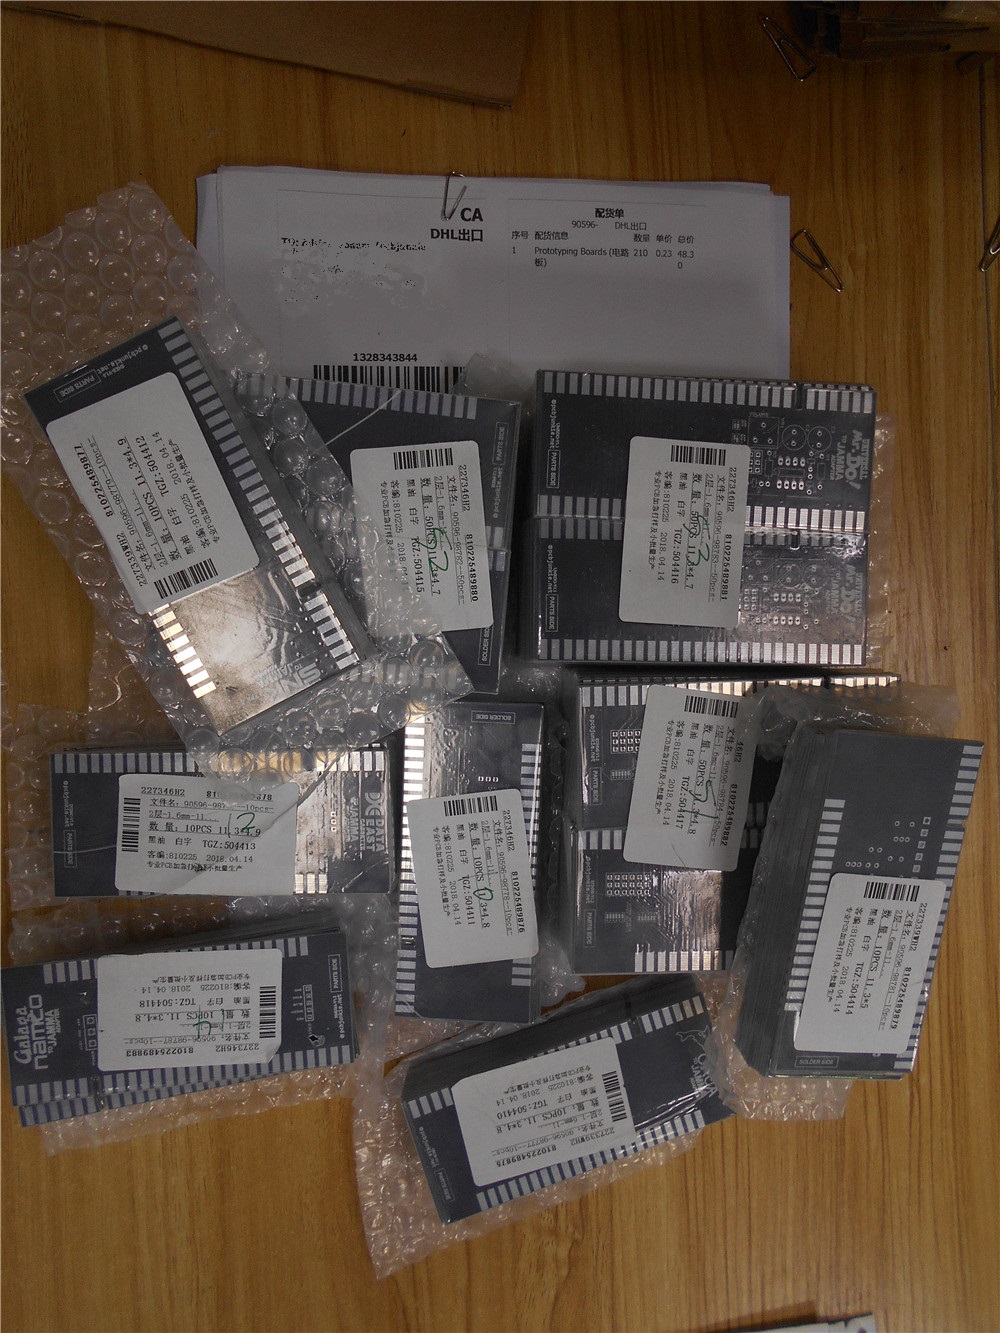
The new adapters have now left the fabrication process and are on the way. In the new batch we have:
Midway Space Invaders
This unique adapter will not only convert the composite video to JAMMA compatible RGB video but also create a virtual color overlay that simulates the original cellophane overlay that was used in the original arcade machines. This adapter is for the Midway board variant. I’ll create a Taito version as well as soon as I get my hands on a Taito SI board.
Orca Type B
For orca boards like Espial, Vastar, Zodiack and others. This is a redo of an adapter that I made in the last batch which had the pin order swapped left to right. That’s what I get for not double checking my design!
Data East Cassette
For Data East boards that used the cassette system pinout. This includes games like BurgerTime and Bump’n’Jump on either the cassette type boards or the plain rom based pcbs.
SNK Type B
For boards like ASO, Alpha Mission, Gladiator and others. This is a different pinout used by the Rockola games and in Vanguard.
Gallag
For the awseome and quite popular bootleg of Namco’s Galaga game. I believe there are a lot more of these than the original Galaga pcbs. At least I keep running into those a lot more.
There are also some redesigned adapters in this batch like the Namco Galaga adapter what just simply hell to assemble. I sold as many of the original Galaga adapters to break even, and then immediately redesigned it.
I think the new version will be quite a bit better, at least I’m a lot more happy with it.
With this batch of adapters, I believe this puts the total number of adapter designs to around 35. Not bad for about a year of spare time work.
With every new batch, I’m moving closer and closer to the end of this project, and at this point the next adapters in my sights are going to be for the Nintendo Playchoice systems and Exidy boards.
However, if you have any JAMMA adapter requests that you would like me to make, you can message me through here, and if the board is relatively popular I will likely put in on my list.
I now need to update the JAMMA Adapter project page which is quite out of date. For a more recent list, please check my Ebay listings here.
I’m currently working on the JAMMA TestCard, which is a small card that is meant to allow you to test and troubleshoot a JAMMA cabinet. Simply plug it into your JAMMA harness and you can start testing immediately.
JAMMA Test Card, current prototype version.
This can come in handy in a number of circumstances, whether you’re building your own cabinet, modifying something or adding additional controls and don’t want to risk testing with and possibly damaging a real game.
The most likely scenario where you’d want to use the TestCard is when testing a cabinet just before a purchase, a cabinet that you’re not familiar with that may or may not be working 100%, to make sure you pay exactly what it’s worth.
The card allows you to perform the following test functions:
Power Supply Test
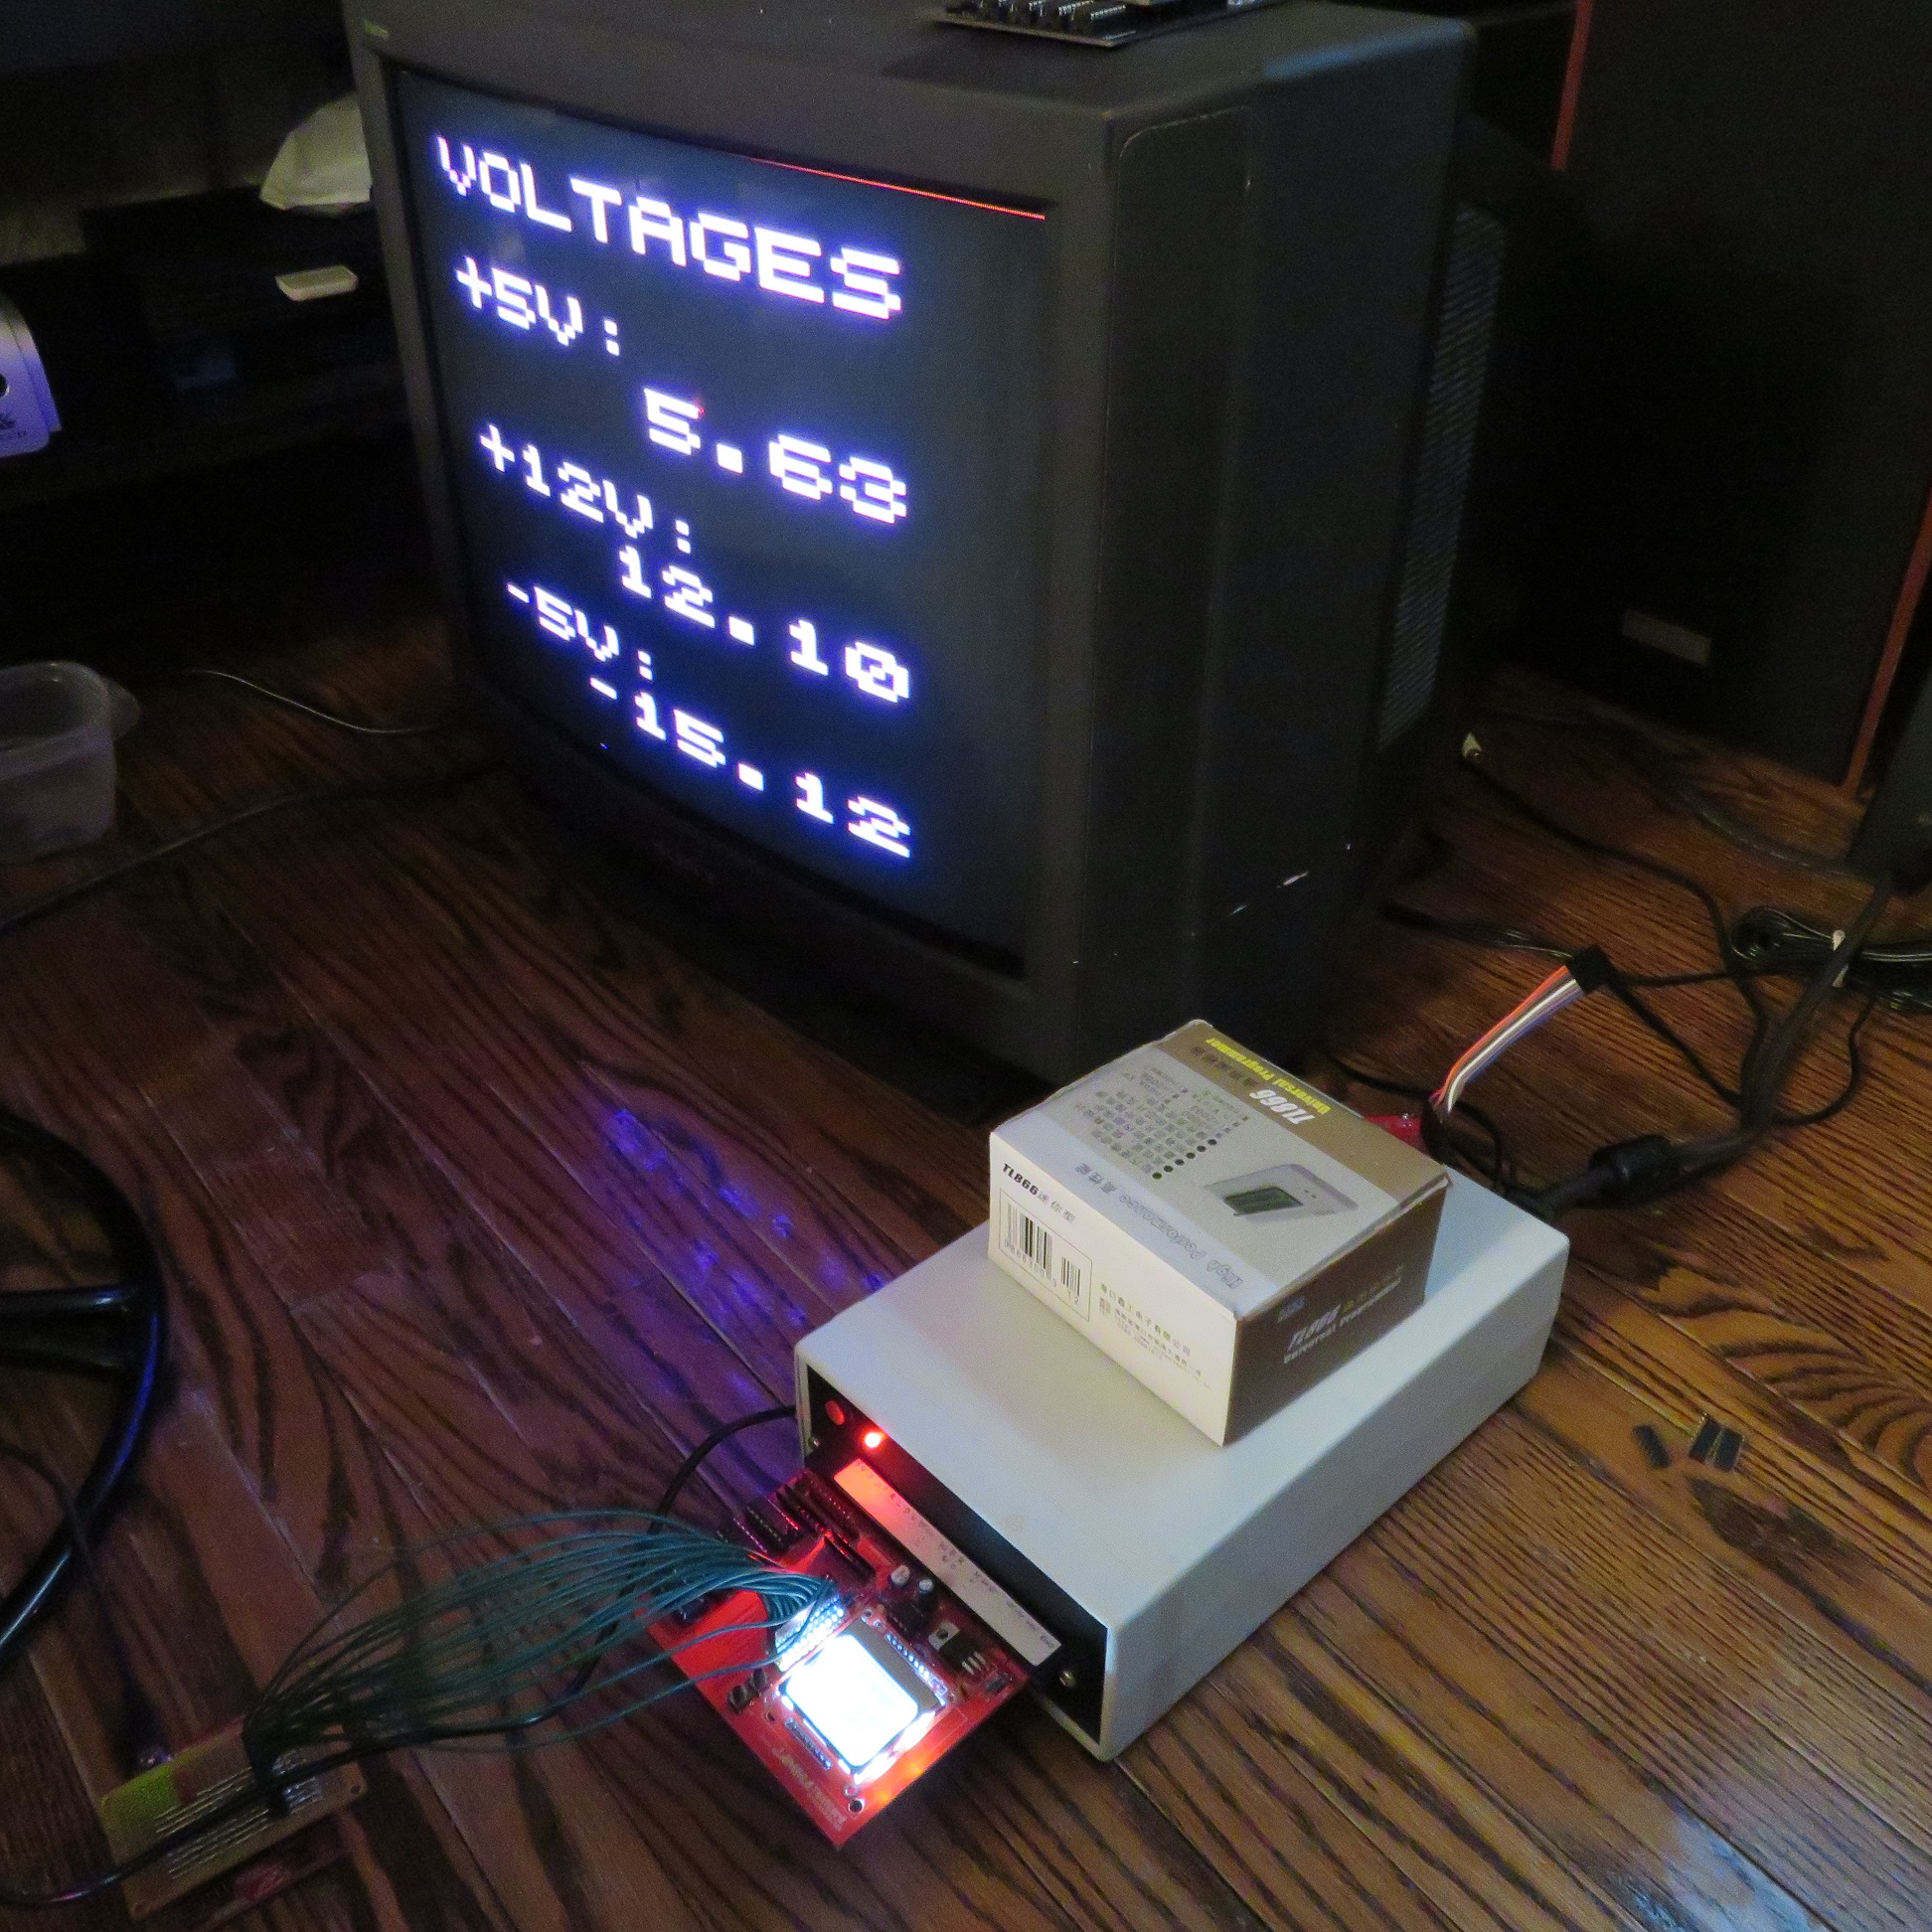
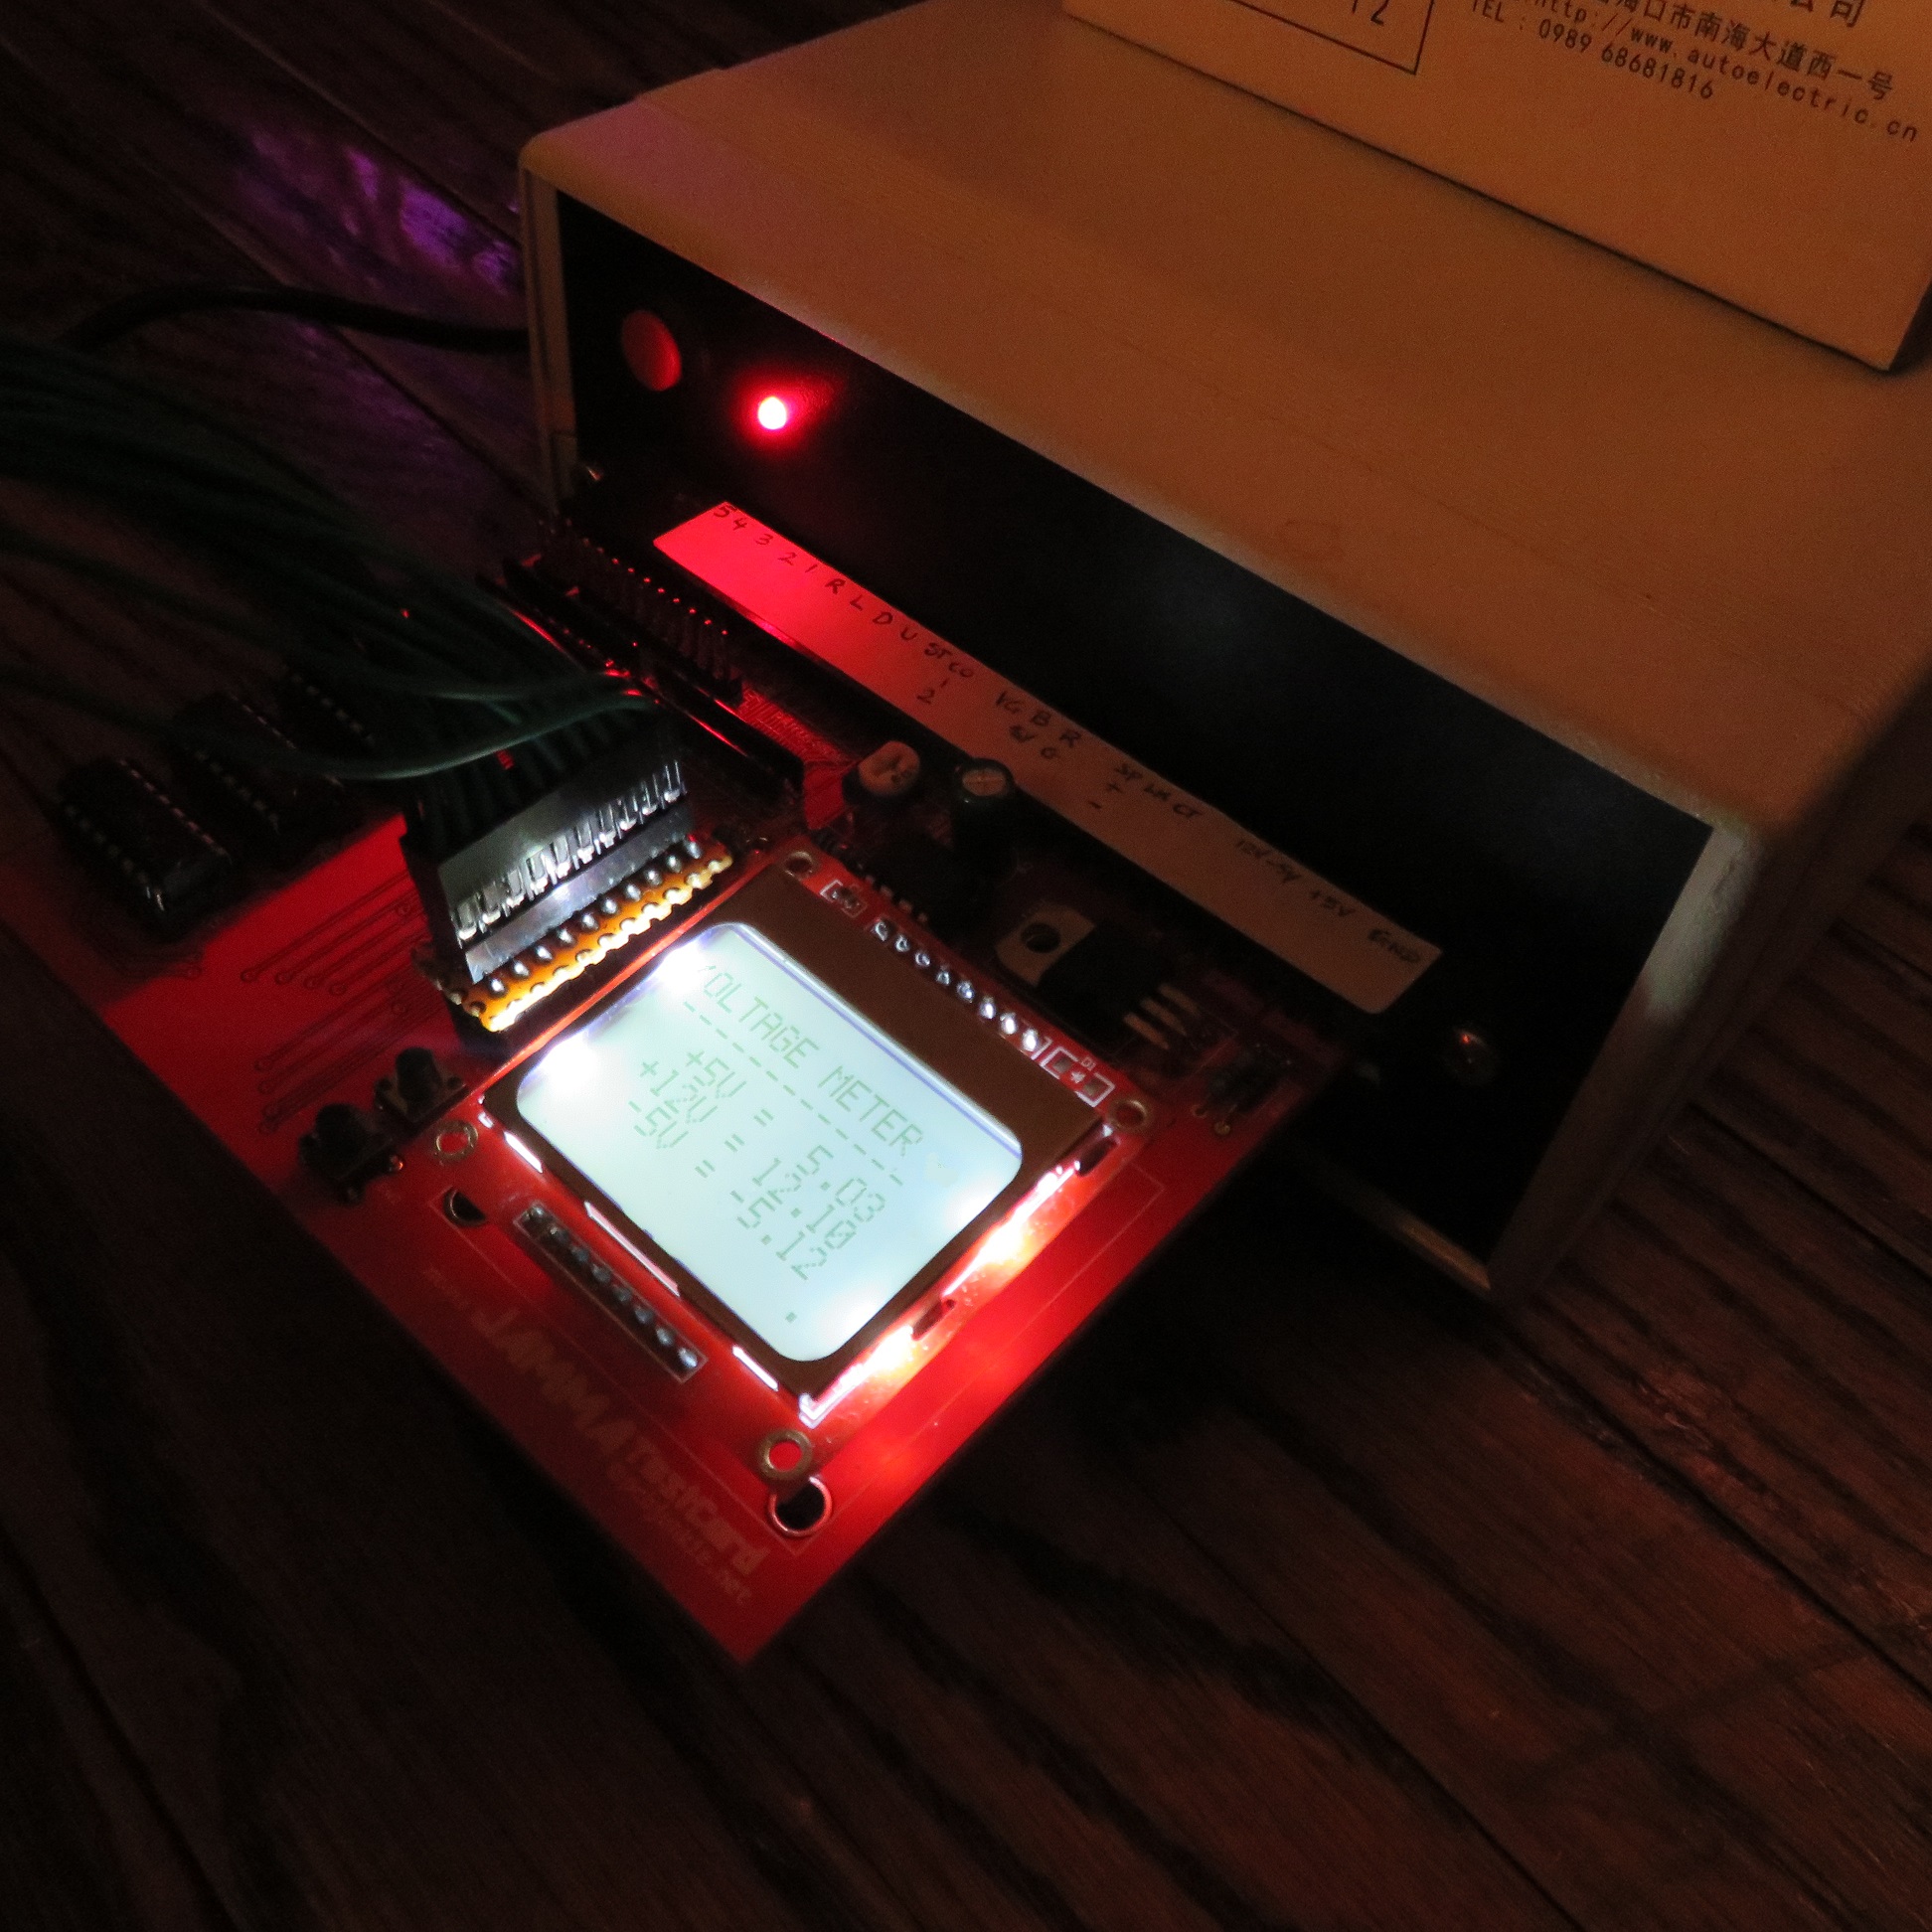
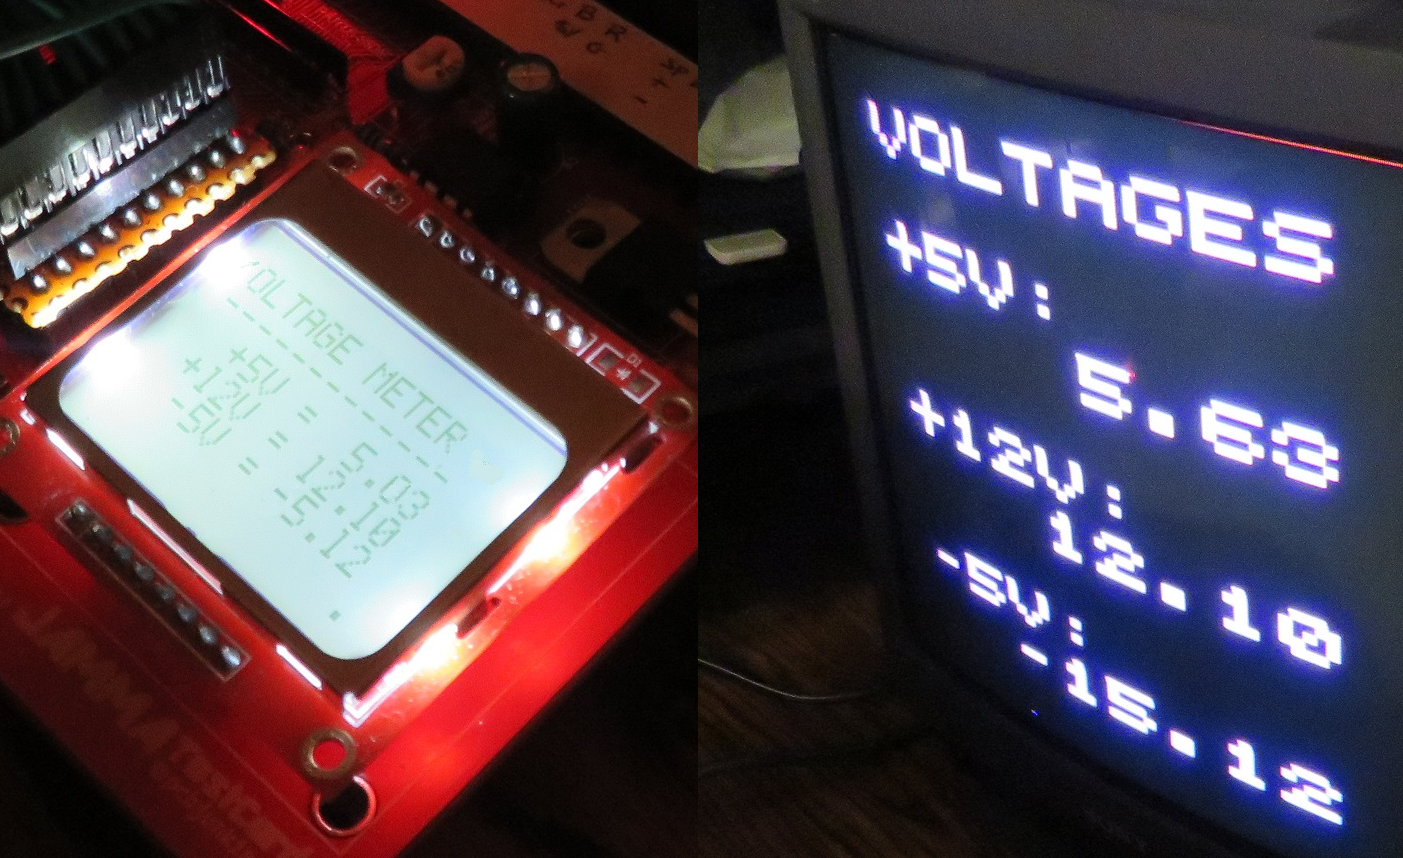
Voltage testing for the +5V, +12V and the -5V JAMMA power rails. The results are displayed on screen and on the LCD display in case the monitor is dead or not working as expected.
Debugging the TestCard on my homegrown Supergun and my Sony RGB modded TV. Power Supply Test shown, values displayed on-screen.Test results also reported on the LCD display.
Test Control Wiring and Switches
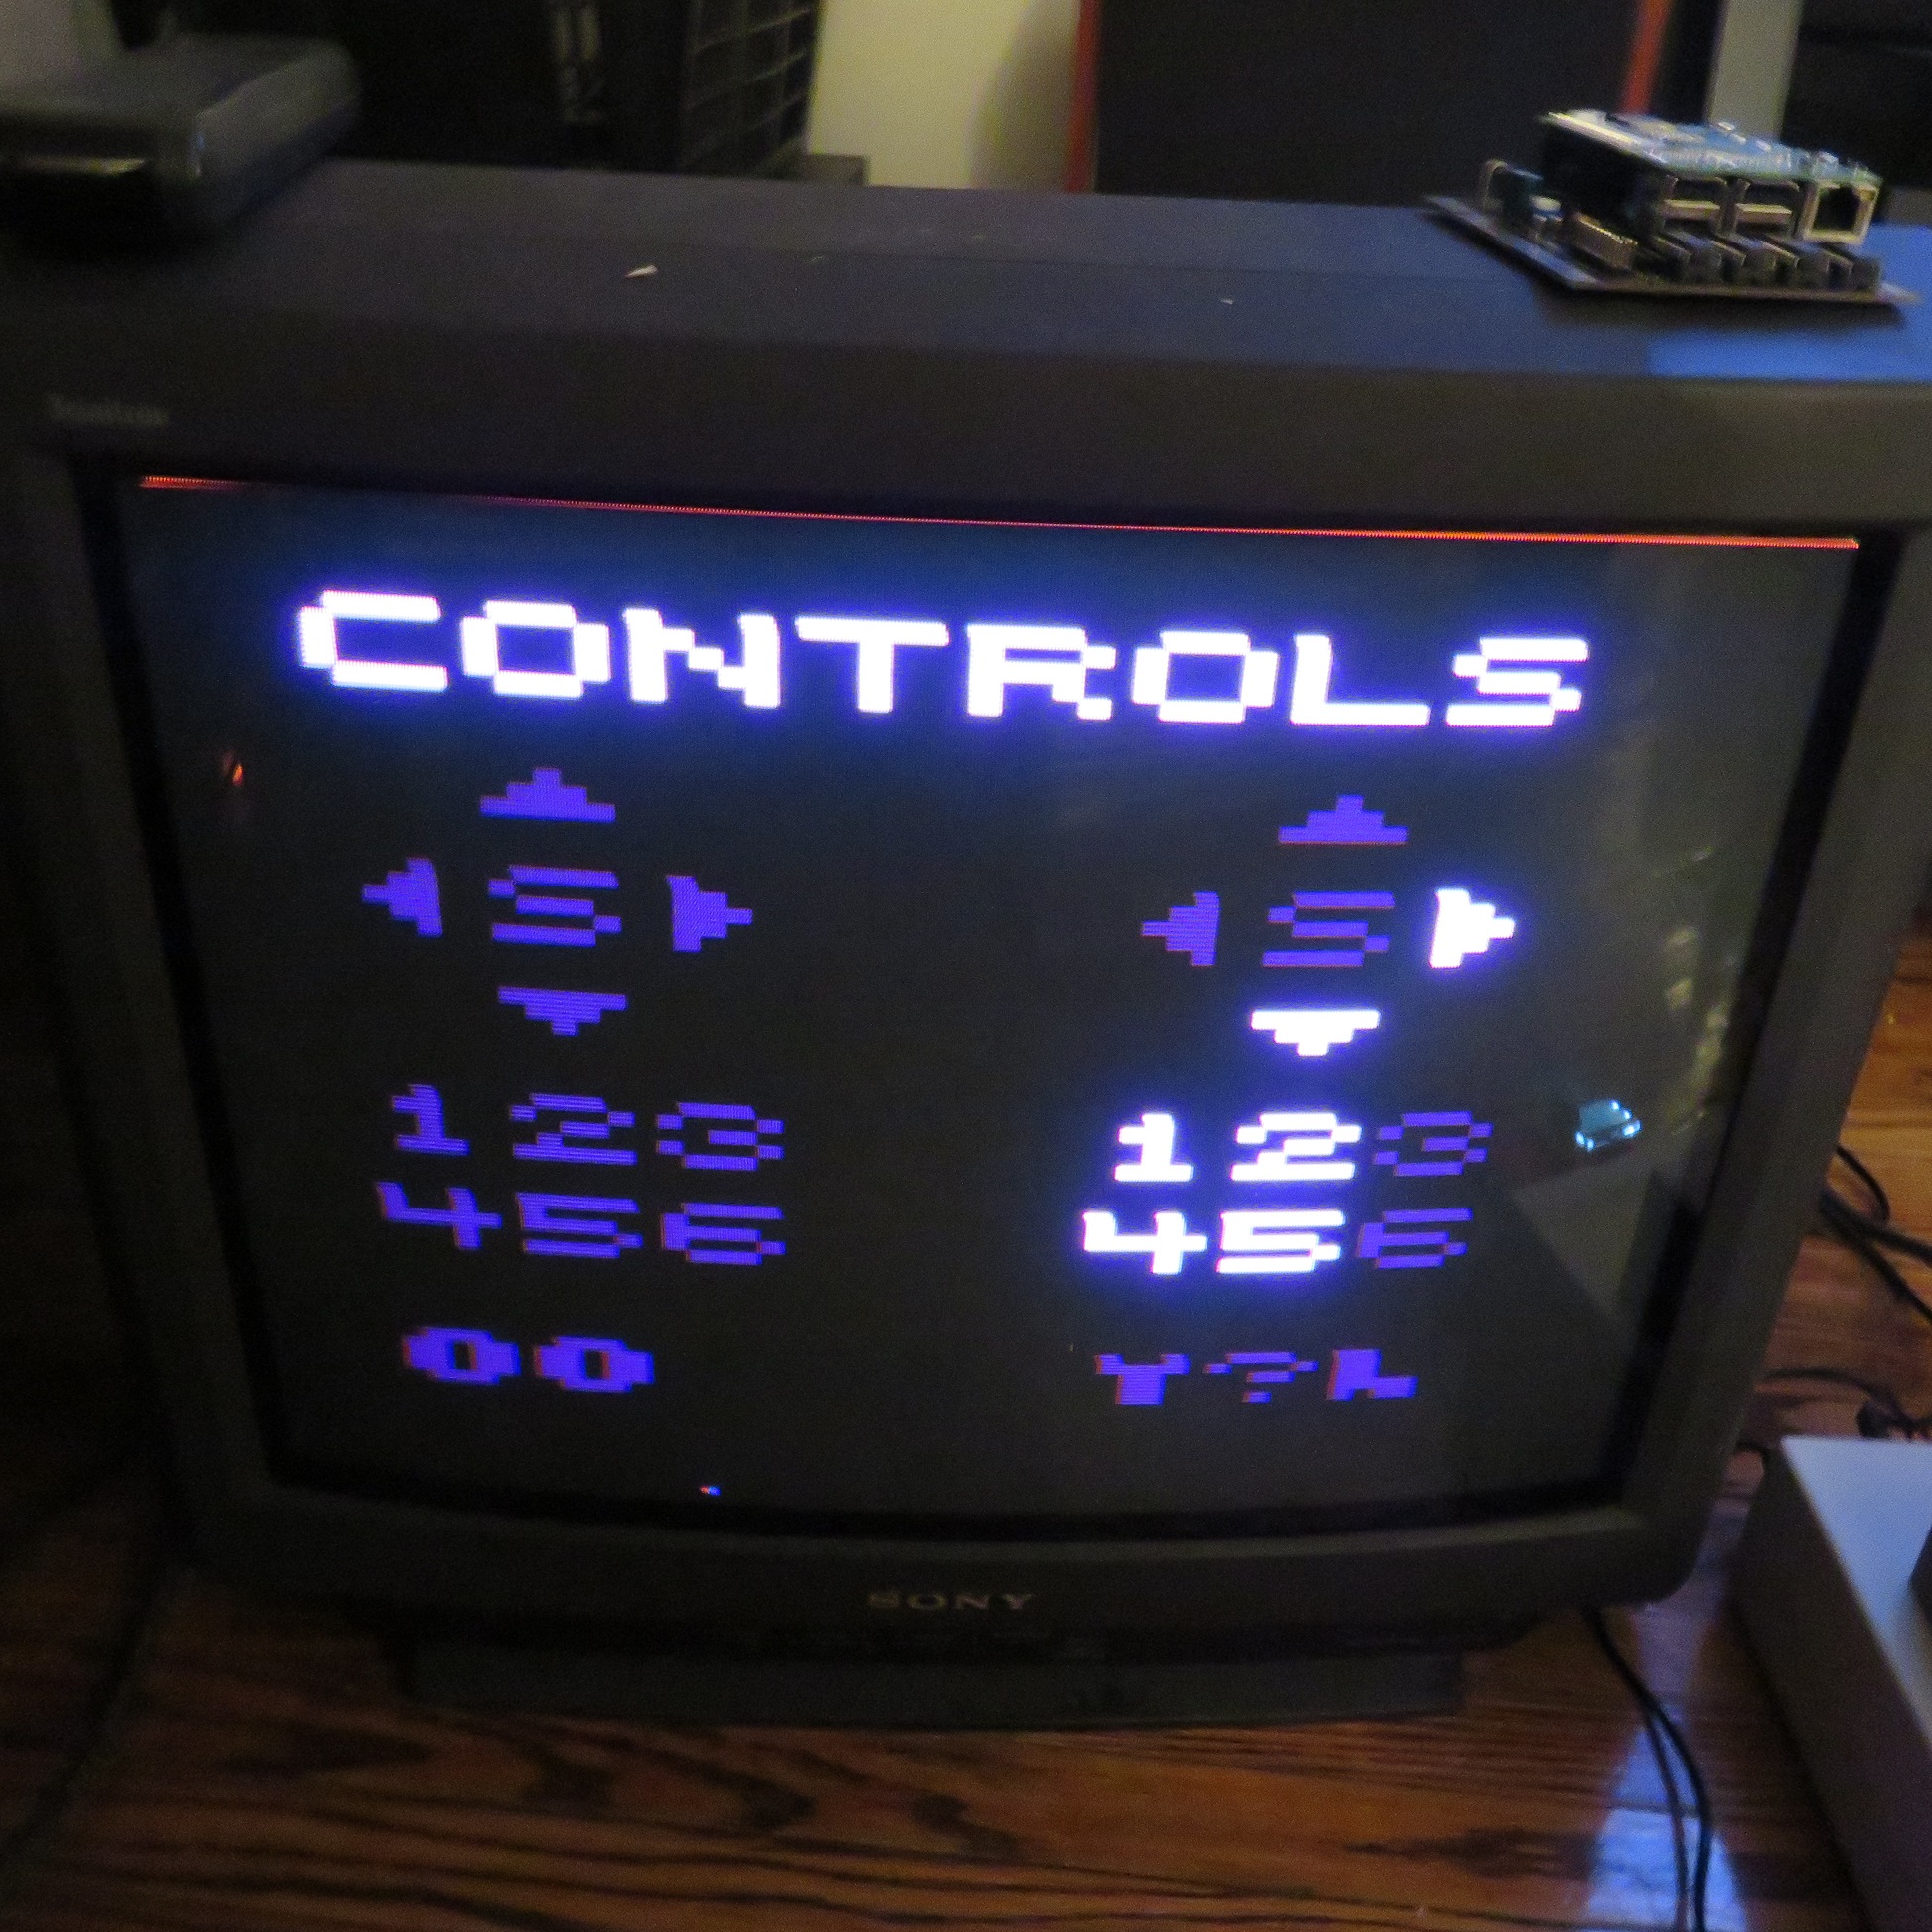
Control Test. All input JAMMA switches and buttons are supported.
Check the controls by pushing a button and watching the on-screen display or LCD display for feedback. All input switches are tested including the service, test and tilt switches as well as 6 buttons on the edge connector and Street Fighter 2 kick button harness header.
Monitor Test
Test the monitor in various ways to ensure it’s functioning correctly. The tests include:
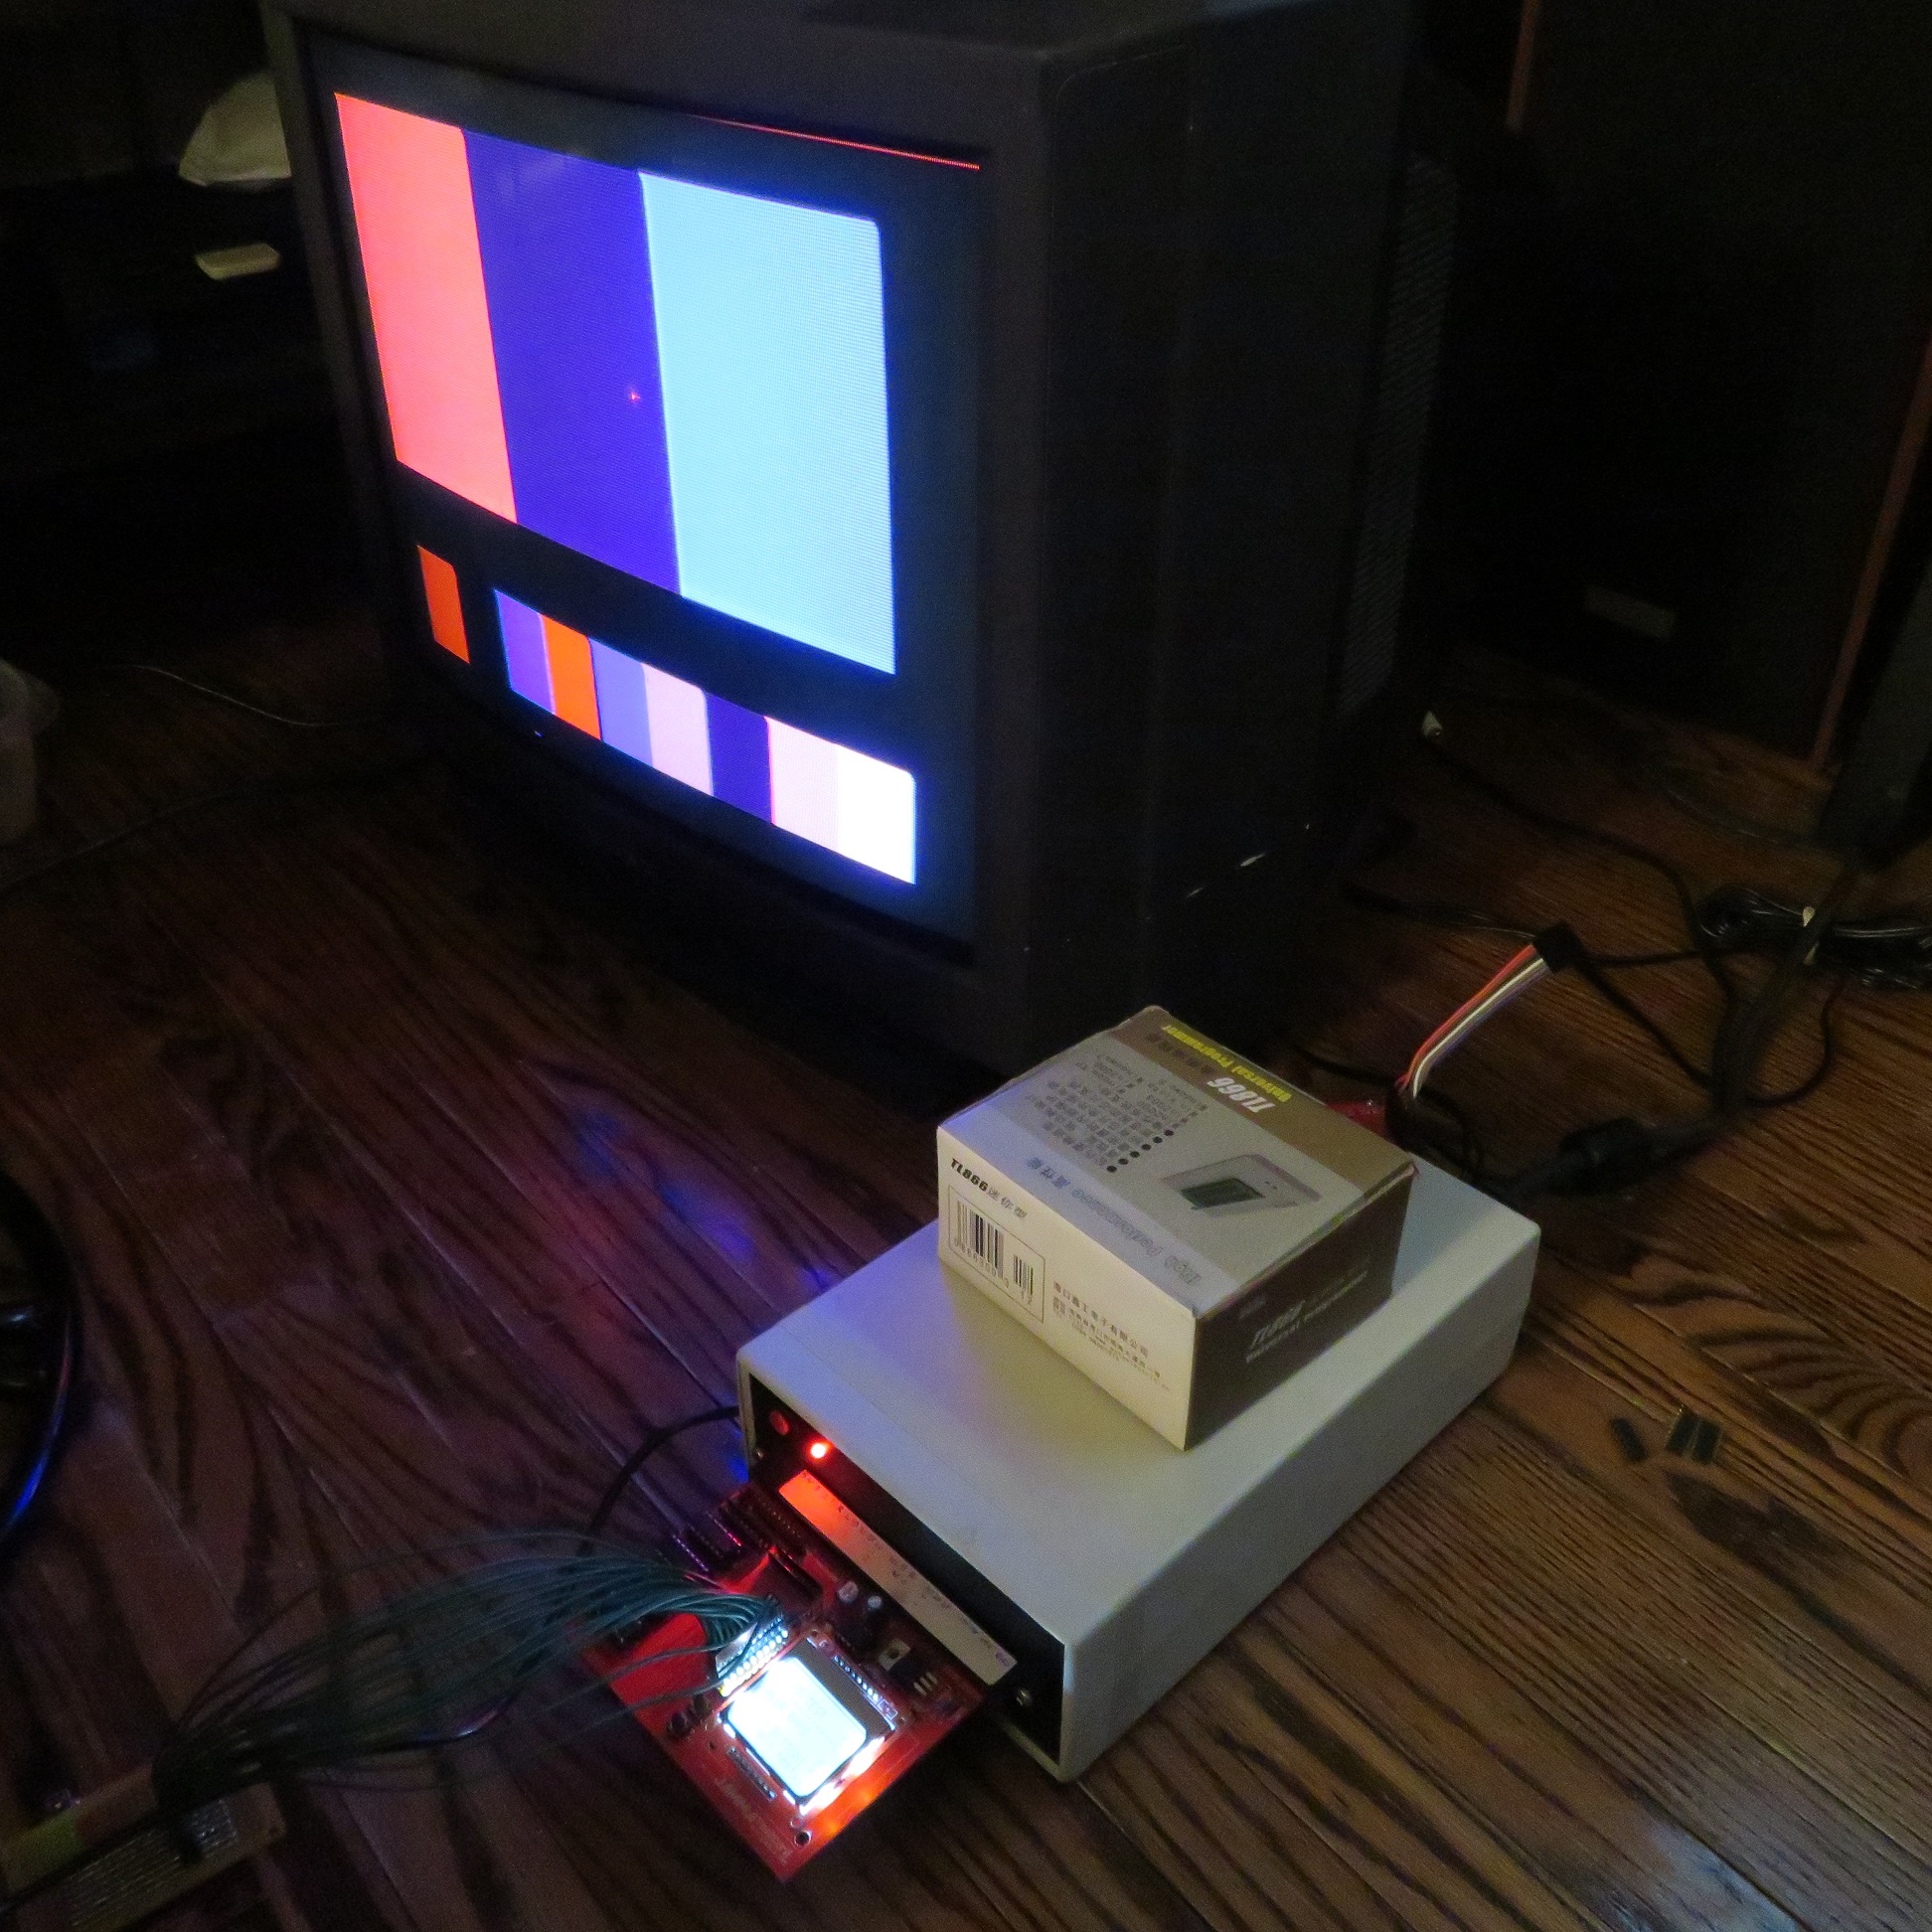
Color Bars.
Color Bars on screen. The G in RGB died recently in this TV. 95% it’s a dead electrolytic cap as the green color on the TV was acting up in the typical dying cap way (until the TV warmed up) before it died completely.
Make sure all of the RGB lines are connected and display properly. Also check for any color bleeding or balance problems.
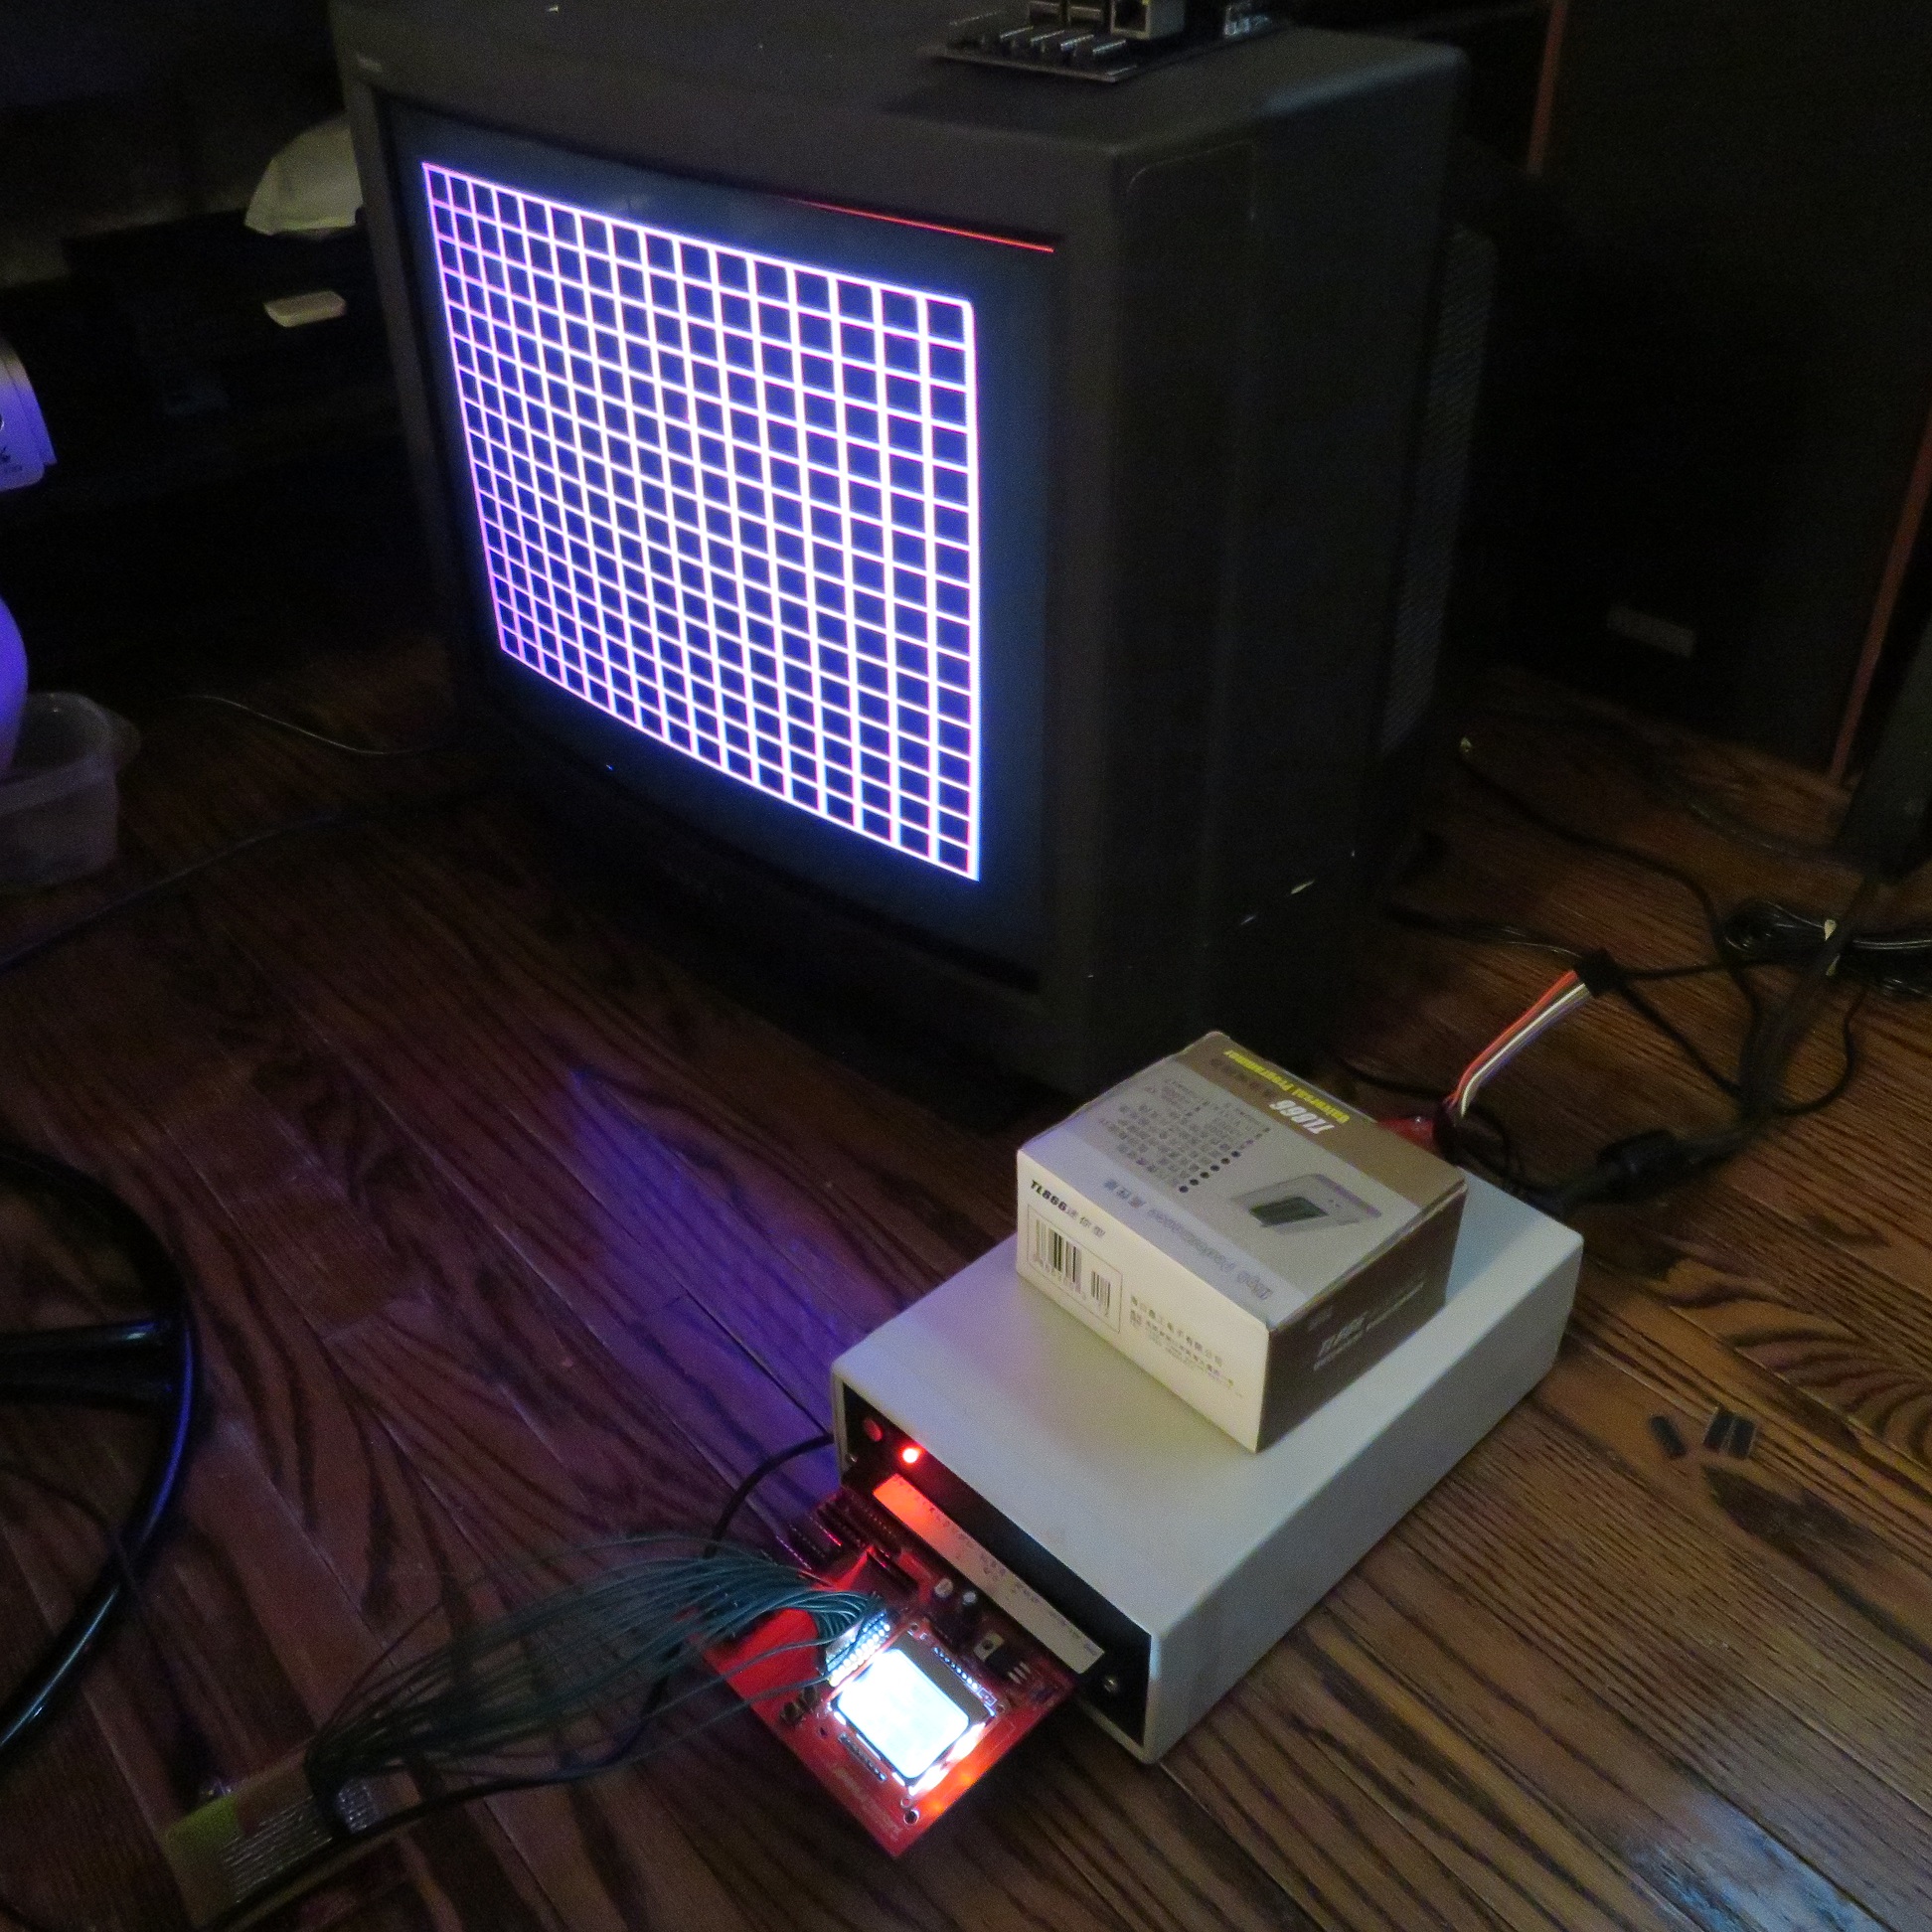
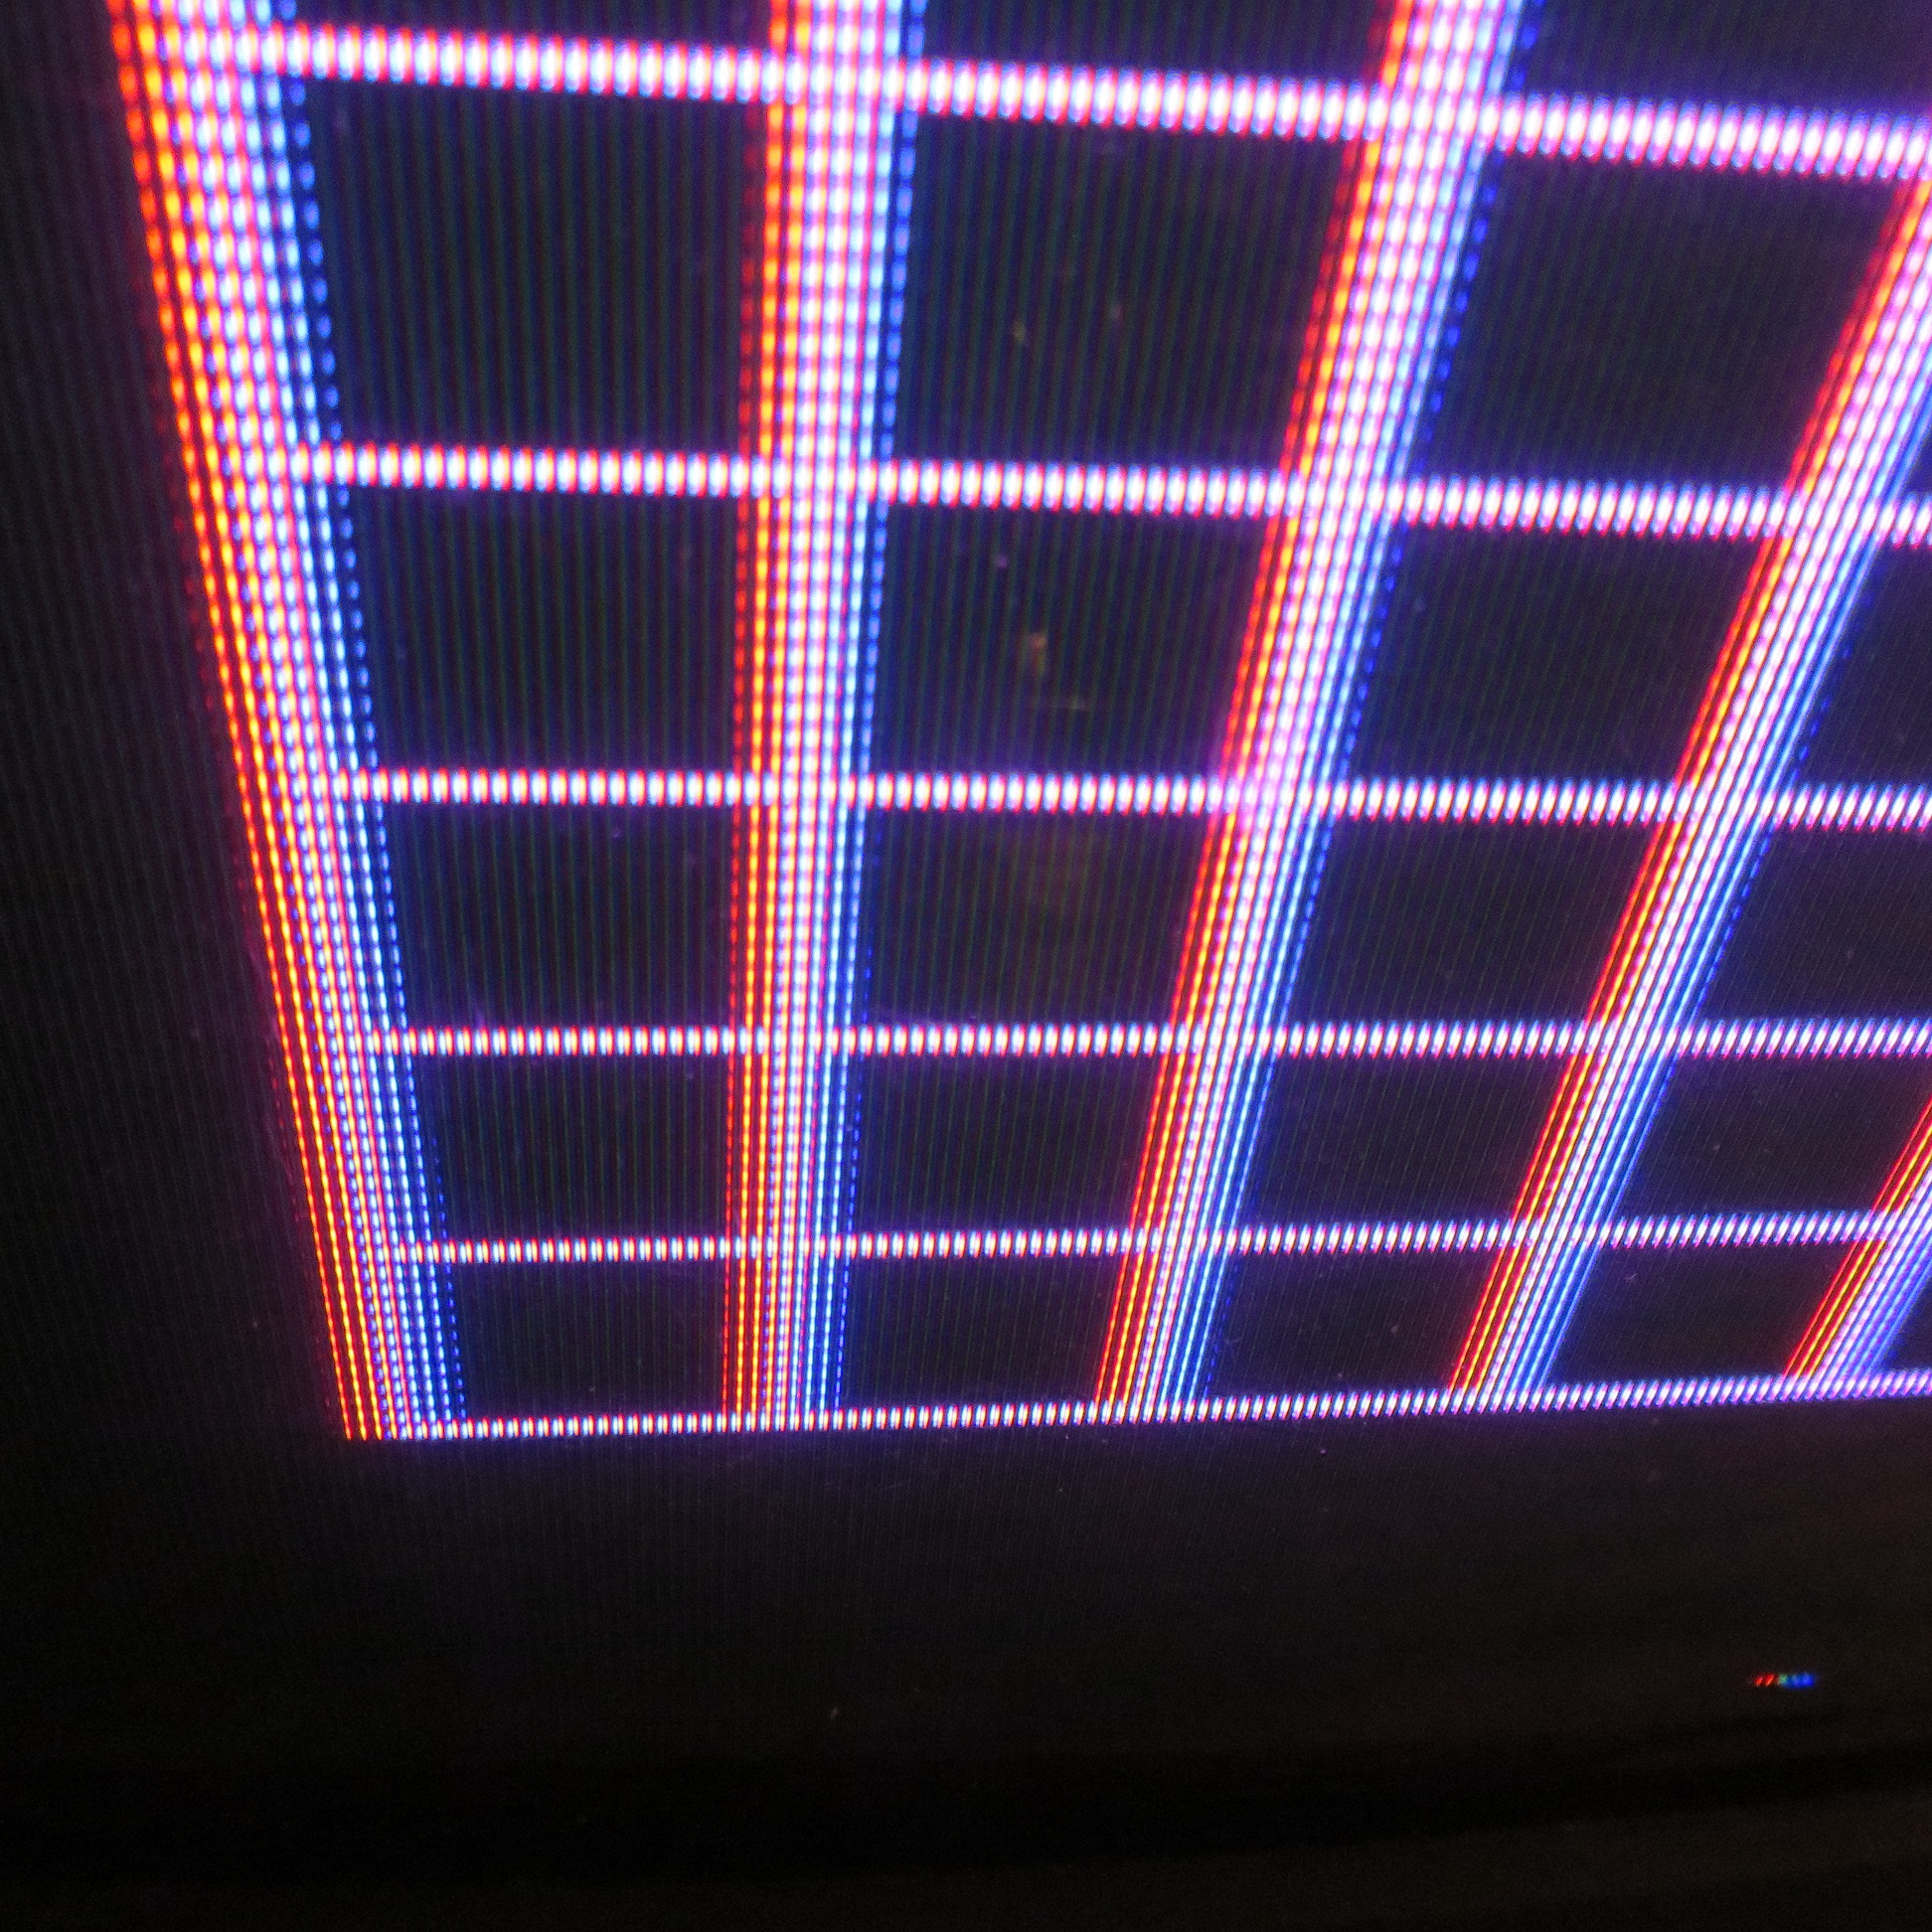
Alignment and Convergence Grid
Grid test in action.
Check to see whether the display geometry is correct and whether the color converges in all area of the display. The grid can also be used to see if any color bleeding is occurring, and to help to center the display.
My Sony RGB has a bad convergence problem in the lower corners. This card will help me align the yoke.
Burn-In Check
A white screen is displayed to reveal any burn-in that might have occured from prior games.
Sound Test
A simple sound test outputs various frequencies to the cabinet speaker to test the connection to the speaker and to confirm that the speaker is able to generate a distortion free sound.
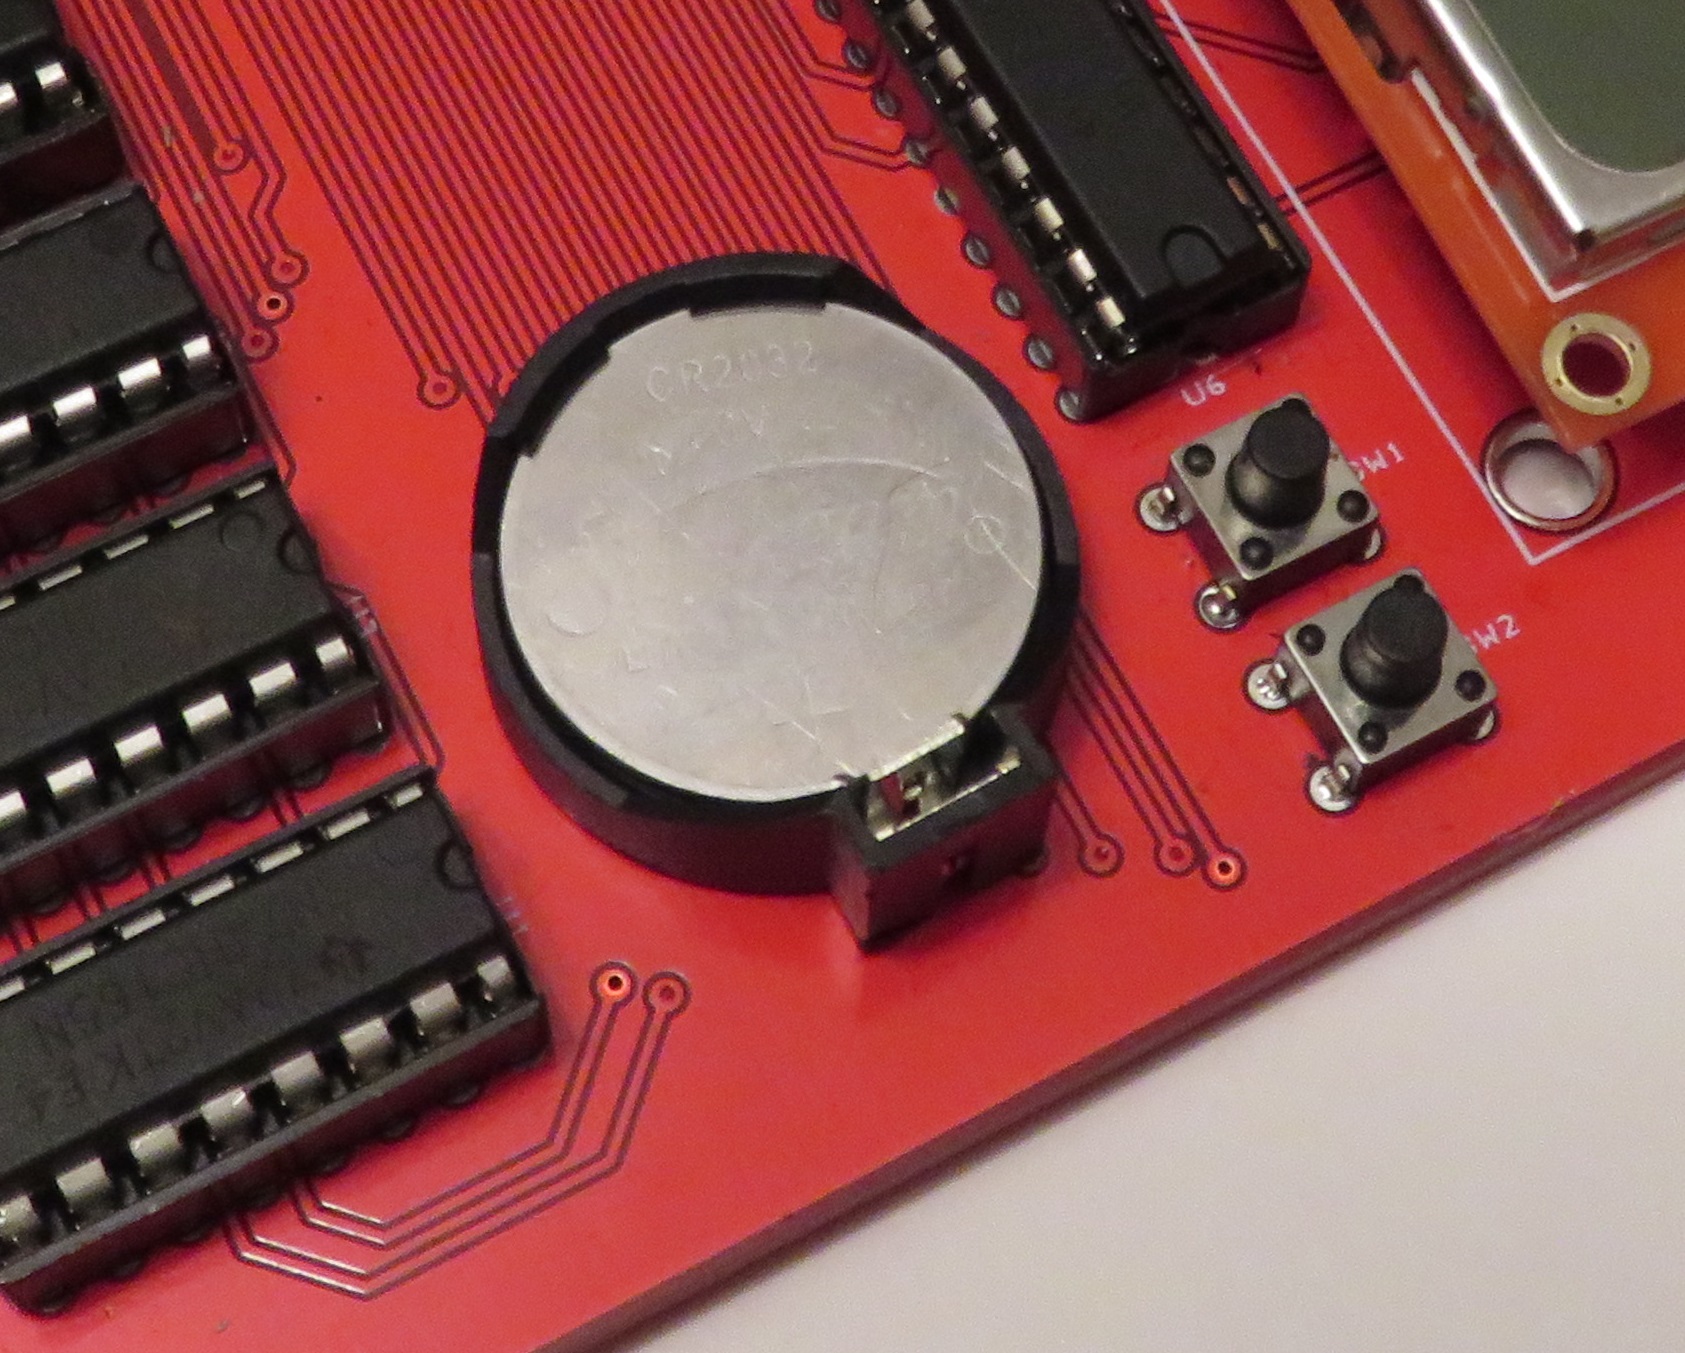
Battery Powered
The JAMMA TestCard can be optionally powered by a 3V button battery and will allow you to check the monitor and control switch functionality even if the power supply inside the cabinet is dead.
Test a cabinet that has a dead power supply.
Dual Display
If the monitor is dead or malfunctioning, you’ll still be able to gather some information on the remaining state of the cabinet by checking the build in LCD display. All functions and feedback are displayed on both the monitor and the LCD. Try to do this with a real game, or any other test board for that matter.
So the next time you go out to buy another arcade cabinet, don’t take a real game to test with. Take the TestCard instead and you can be certain that you’ll get the best possible cabinet testing experience in a tiny package
Easy to Fix
If anything goes wrong with the card, it can be fixed easily. There are only 6 ICs on board, the main MCU (microcontroller) responsible for most of the magic, 4 ICs that deal with the inputs and protect the MCU from the dangers of a potentially messed up cabinet. There is also a sound amplifier and a voltage regulator. Most active parts, with the exception of the voltage regulator, are socketed and can be replaced easily if needed.
Save Money!
Now that you know what the TestCard is capable of, I hope you will find it as useful as I have, testing the various monitors and cabinets while developing this product.
Now you can identify issues with your cabinet yourself without having to call a professional.
You can also use it to find issues (what used arcade cabinet doesn’t have issues?) and use it as leverage to get a deal on your purchase! 🙂 The first time you use it, it will likely pay for itself.
Since this project isn’t 100% completed yet, the price isn’t final, but I’m aiming to initially price these at around $40USD or $50CAD.