I decided to spend the last couple of days working on completing the IC Pin Label / Sticker project and it is now online.
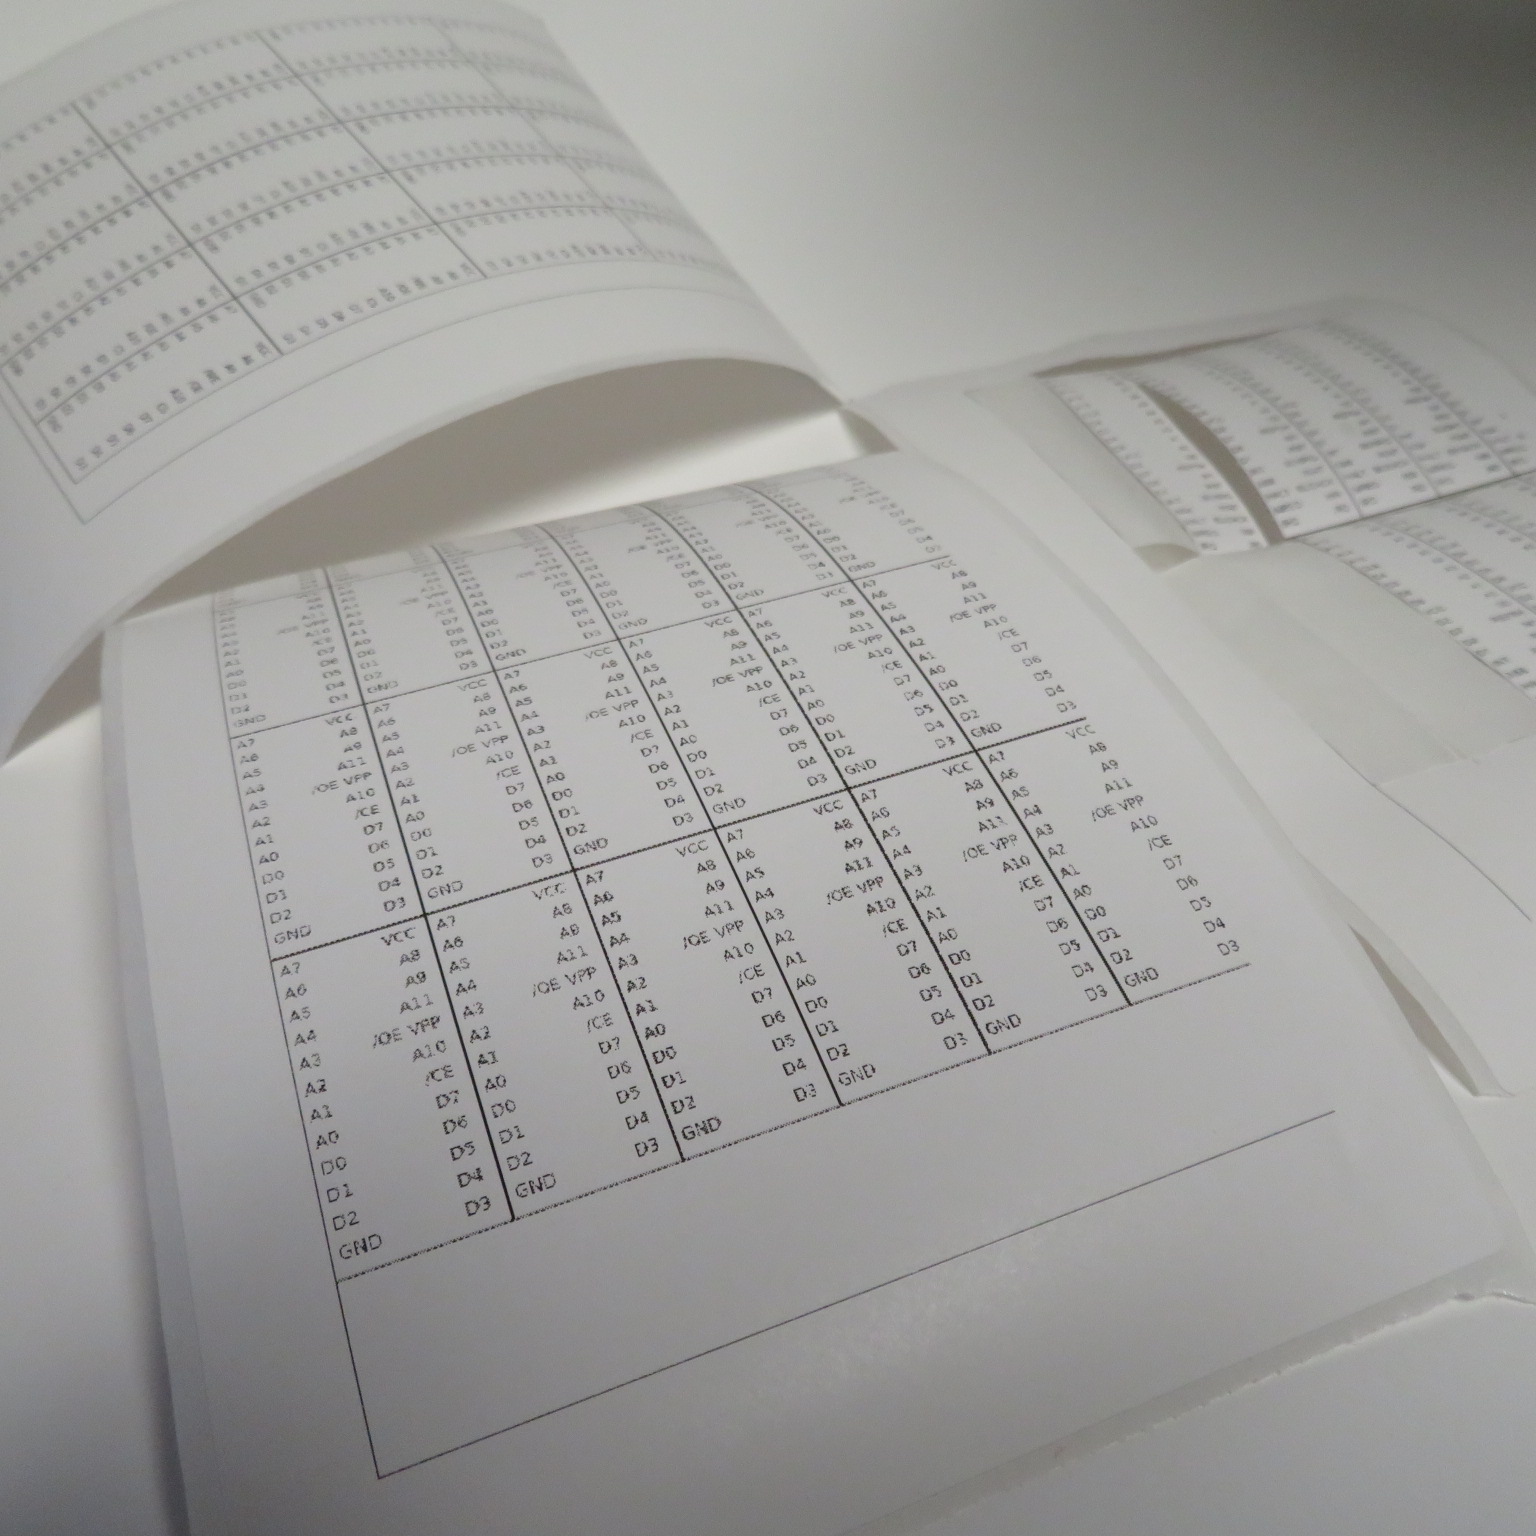
The tool will allow you to create an IC or a connector pinout label, on your label printer or a regular household printer, that will actually fit! The tool needs your printer’s DPI, pin list and pin spacing and it will generate any arbitrary pinout label. When printing you will need to disable scaling and print actual size for the label to fit.
Two sets of images can be created. A single image for small label makers, or tiled version for larger label maker (4×6″ or larger) so that labels can be fully utilized.
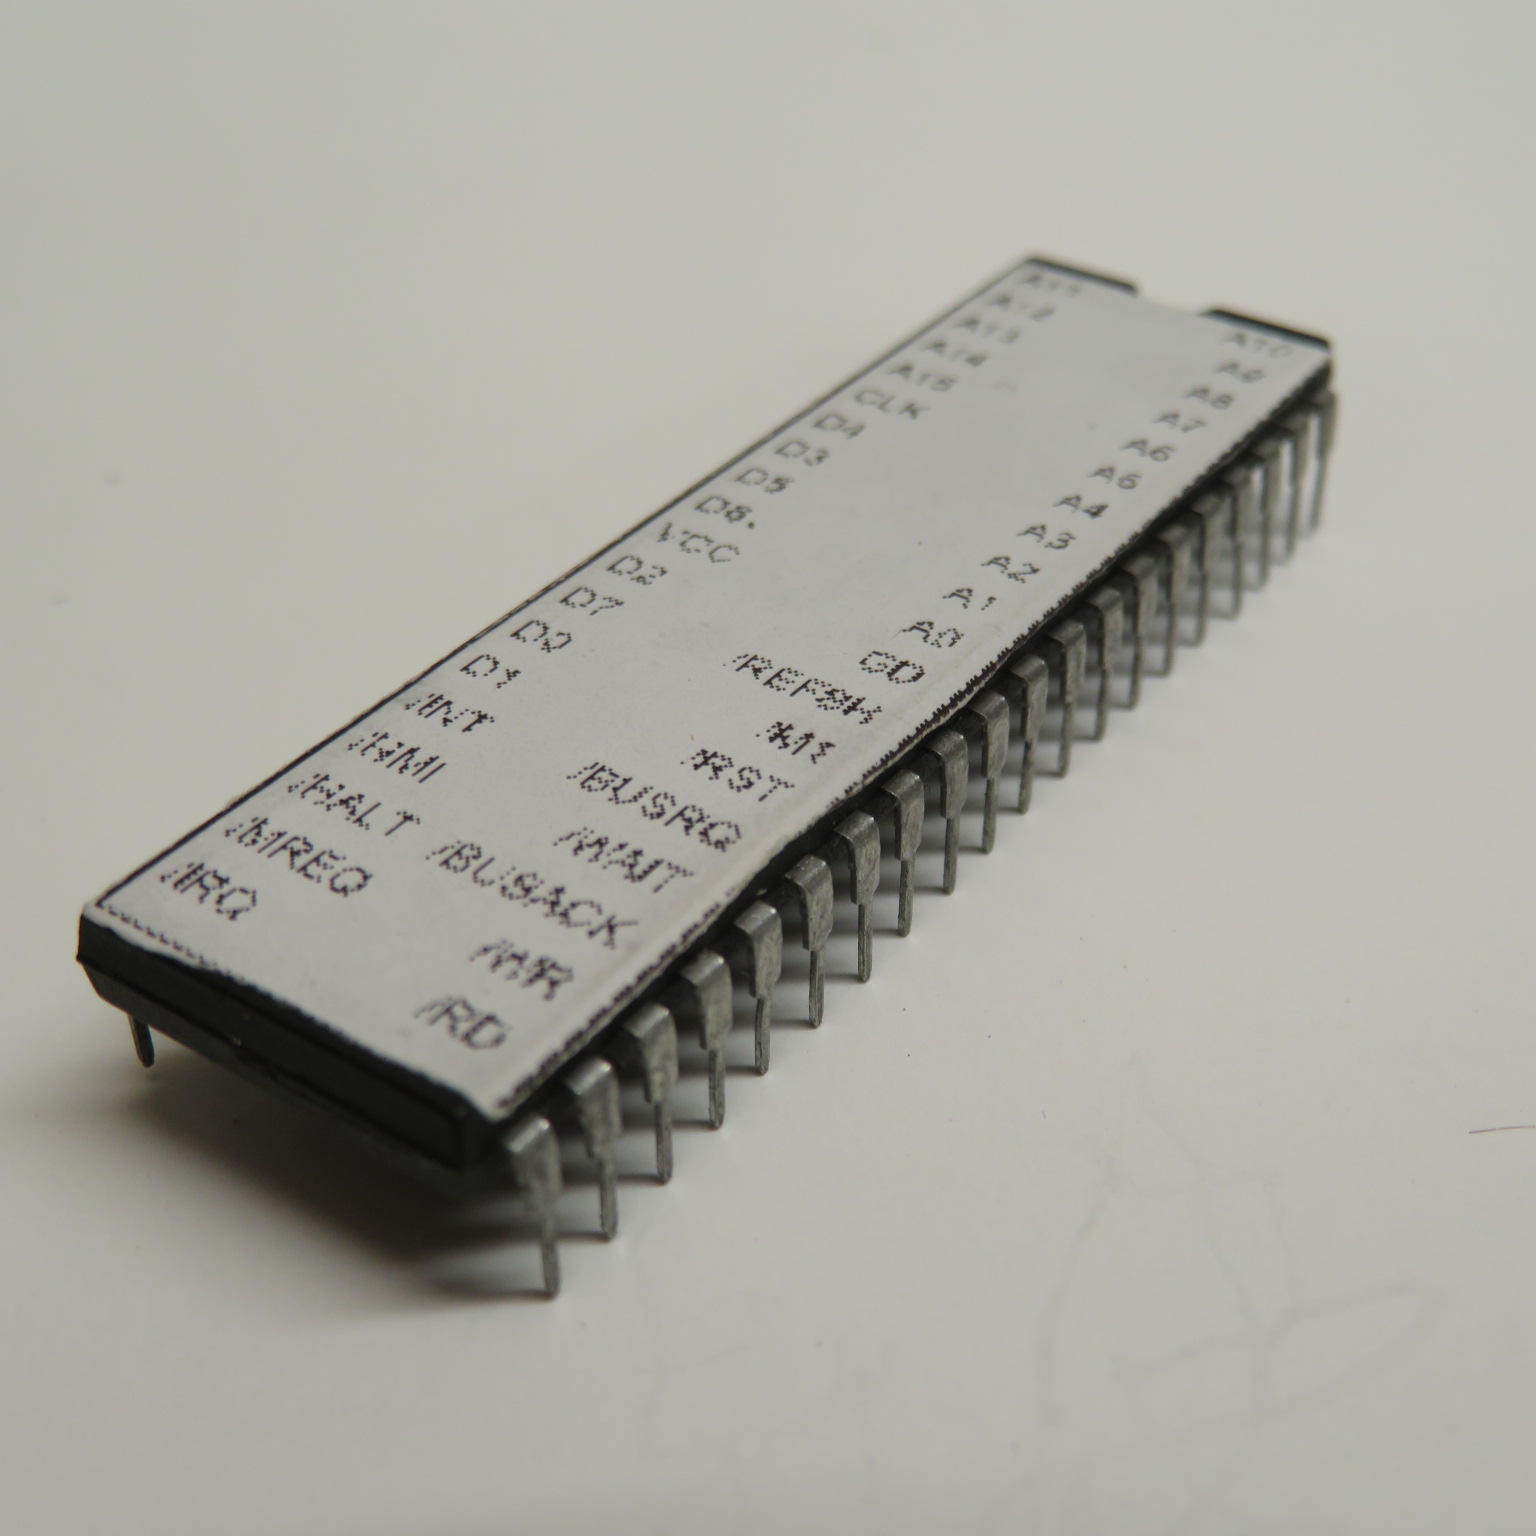
Thermal label printouts of Z80, 2732 ROM and 6116 RAM labels for my Dig Dug repair.
Once you create a label you can bookmark the URL and reprint it when needed without having to recreate it each time.
There is also a pretty comprehensive list of already predefined devices for you to use here. These can be edited before the labels are created.
There is a couple of bugs and missing functionality that still needs to be dealt with but 95%+ of the work has been done. Not bad for a couple of day’s effort.
Made a small program to generate IC pinouts that can be stuck on a chip for easy pin identification. The difficult part here is to get the image to come out the correct size.
People have been asking me about the current projects that I’ve posted about here. Here’s a more detailed look at where things are with the projects that are work in progress or not currently available:
Major Arcade Projects:
PJ – Pi to Jamma – mostly tested working, last revision in fabrication
JammaTest – mostly tested working, last revision in fabrication
JammaMate – mostly tested working, last revision in fabrication
JammaMinigun – working on video conversion issues, release unknown at this point.
JAMMA Adapters – Here’s a list of the adapters that are work in progress and status:
Midway Space Invaders – avaliable at limited quantities
Alpha Denshi – available but unlisted
Gottlieb – testing (need Qbert sound and Krull / Mad Planets pcb)
Rally-X – available but unlisted
Taito – available but unlisted
Tecfri – available but unlisted
Atari DigDug – testing (my Digdug board is busted)
Nintendo Playchoice 10 Single – tested working
Nichibutsu A (Frisky Tom, Seicross, Radical Radial) – tested working
Taiyo – available but unlisted
Bagman – in fabrication
Taito Space Invaders – in fabrication
Miscellaneous Arcade – Projects for the modular supergun or misc arcade boards.
JAMMA Generic Adapter PCB – available but unlisted
Fingerboard – available but unlisted
JAMMA to Headers – available but unlisted
Genesis Controller Module – available but unlisted
Video Testers:
Arcade Monitor Tester – last revision in fabrication
VGA Monitor Dongle – last revision in fabrication
TV Tester – last revision in fabrication
Logic Analyzer Probes – I have had difficulty manufacturing these while making them reasonable priced. As a result I am not selling these at the moment until I come up with a good strategy on how to do this. May involve gettin a pick and place machine and making them myself.
Other Electronics:
Reflow Oven Controller – available, contact me for details
As you can see I piled a bunch of outstanding stuff with the goal of wrapping up most of these at the end of the year. While most of these are completed and ready to be released it will take the next few weeks (January and February) to document everything and get it out there. Stay tuned for more info.
I ended up buying a few arcade cabinets recently. These were a bulk purchase that were sitting in a barn for too long. I’ll spare you the details.
This was in preparation for setting up my gameroom in the new place, and to give me something to do over the winter and spring. In the end, I ended up trading some of these cabinets and plan to restore the rest. In the process I made a video on a Wei Ya Chinese monitor chassis that decided to put into one on these cabs.
I also pretty much perfected my monitor testers (featured in the video) that I’ve been working on for the last few months, and I think these are ready to go. The last hardware updates have been sent to the PCB fabrication place and I’m just waiting for the boards to come back to start putting the final product together.
I’ll update this page with more information soon. There has been a number of new developments on various projects that I haven’t had a chance to document yet.
I have submitted a couple of new adapter designs and they are currently in production. With these two new designs, I have now created exactly 50 unique designs that cover approximately 500 unique PCBs. This took about 2 years, so that averages about one new adapter every two weeks. Not too bad considering all the other stuff going on.
The two new adapters are:
Taiyo – for games like Chinese Hero and Shanghai Kid
Nichibutsu Type A – for Frisky Tom, Seicross, Radical Radial
A few more designs and the project is pretty much completed. On the immediate to do list we now have:
Atari – for the most popular Atari games. Unfortunately most of those are unique
Taito Space Invaders – to complement the Midway boardset
Zaccaria – for some old faves like Money Money and Jackrabbit
Bally MCR – for Tapper, Tron and the other Midway games
Bally Sente SAC – For Night Stocker, Hat Trick, etc…
… and maybe a few others that are not on the top of my mind. After that it’s requests only, for not uncommon games.
I’m moving. Actually I already moved in April, but the process has been ongoing for a while, since January to be exact. There have been no posts or updates to projects since I don’t have a lot of time to focus on that at the moment.
The new place is about 4 hours away. It’s on old home with some history and charm. I took it on as a project too. It’s got great bones and lots of potential, although it has been neglected the last few years and needs a lot of TLC. It’s taking most of my time but I am really enjoying doing something different for a change.
Once everything is settled and more organized I’ll be able to dedicate more time to my projects again. More space means a new lab and rec room. Hopefully that means no more working on the floor and dining room table, and pissing off the wife, but we’ll have to see about that.
I live in Canada. Unfortunately the arcade market in Canada is pretty weak most of the time, so to get all the good stuff I have to buy games from the US every so often.
Most eBay users that sell internationally from the US, are “encouraged” into using Pitney Bowes’ GSP program for shipping abroad.
Ebay users pay for shipping to the Pitney Bowes GSP hub in Kentucky, which is cheap. What they don’t realize is that the cost that they see for shipping is only a fraction of what GSP will cost the buyer. As an example, a $100USD PCB may cost around $10USD to ship a typical PCB to KY, but a Canadian user will likely pay around $35USD plus about $15USD in customs fees. A similar package to Canada via USPS direct, would cost about $16-20USD and it would most likely avoid customs fees.
The benefit to the sellers are pretty obvious though. There is no need to fill out customs forms and GSP shields the sellers from negative feedback as long as the item arrives at the hub in one piece.
Upon receiving the items Pitney Bowes will typically repack the items to save on the remaining shipping costs. This is where my story begins.
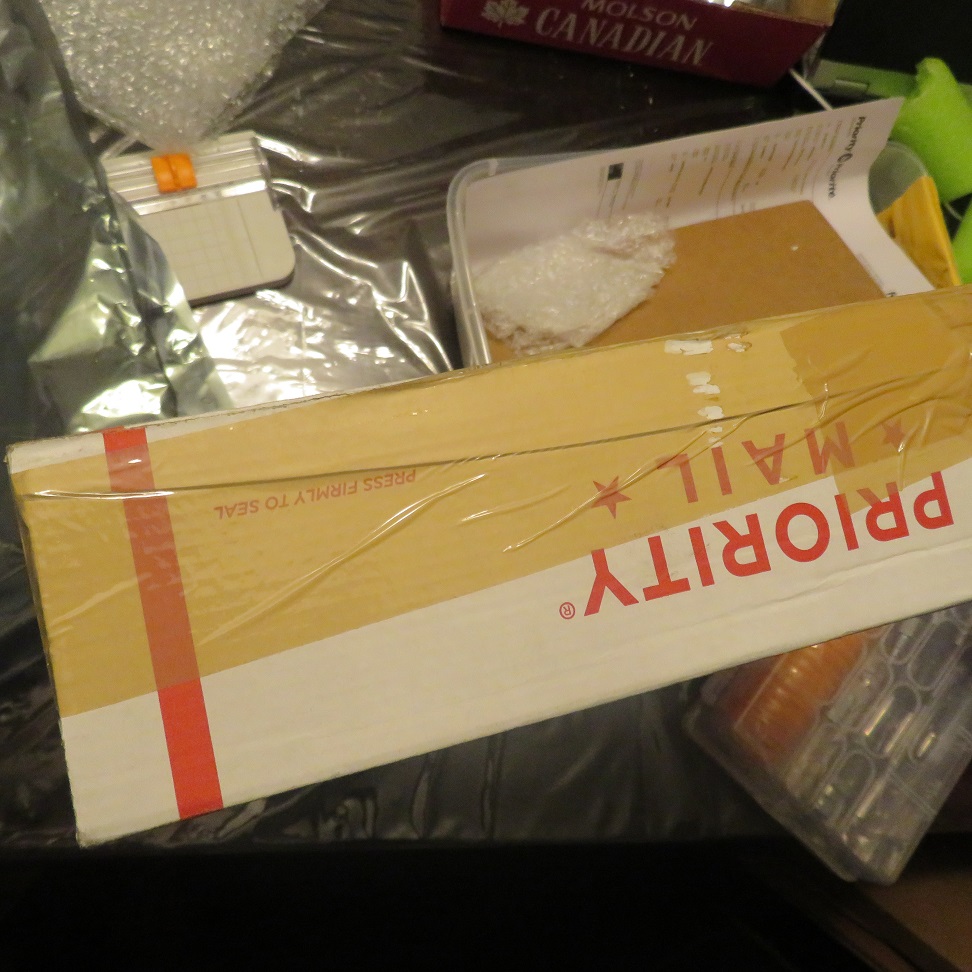
A few months ago, I ordered a Sega ST-V motherboard and Die Hard Arcade cart. The package arrived in a crushed box. There was very little protection in the box, basically only the anti-static bag and the PCB itself.
I connected the PCB and turned in on and got nothing… black screen… DOA. Upon closer inspection I noticed a long, deep gash on the PCB that ran across at least 2 inches in length. It looked hopeless. The cut went across several small pitch IC legs knocking them completely off. It severed many, very thin traces, it damaged vias, and appeared to be deep enough to penetrate at least a couple of inner layers of the PCB.
GSP repacking gone too far.
I contacted the seller. Seller swears the game was tested and worked before he sent it. I check the packaging and sure enough, the gash appears in both the anti-static bag and the box iteself.
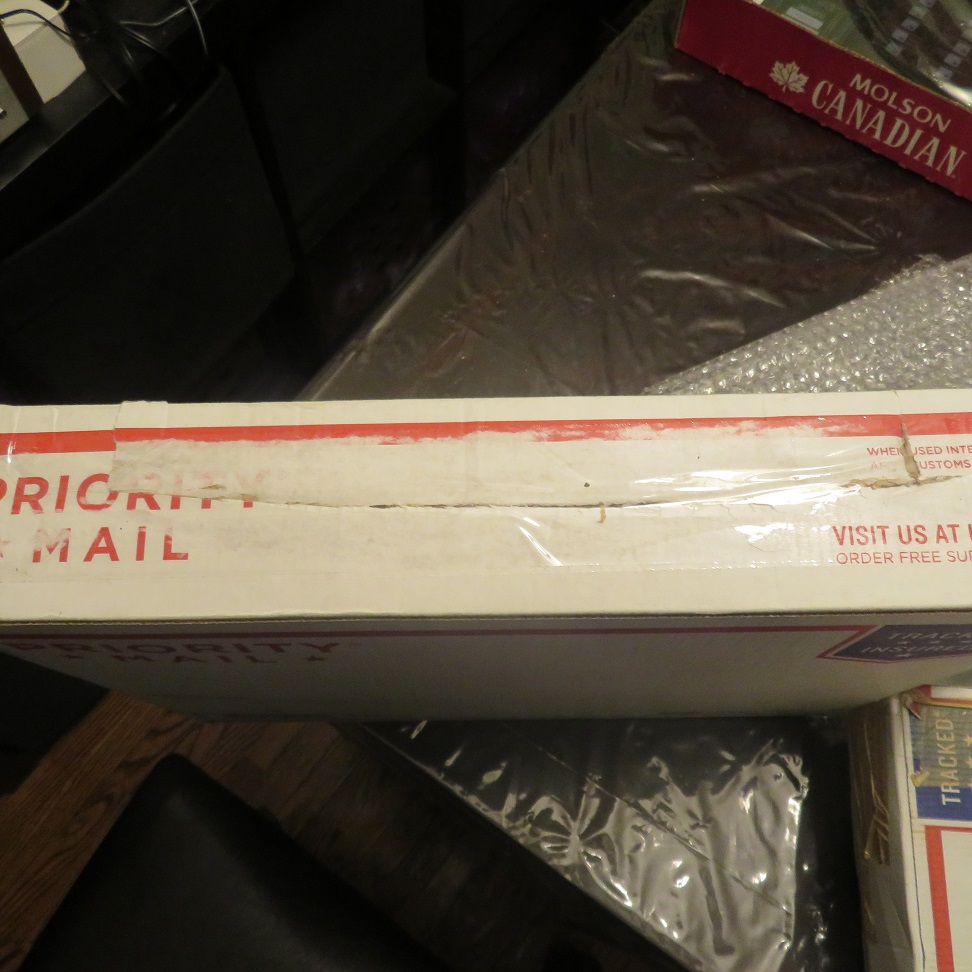
Cut right through anti-static bag… proof that the blade that cut open the box, got too close to the PCB.…and here’s how they sealed the box after cutting it open and removing “excess” padding.
I became curious, and went through all the boxes that I still had from previous purchases, and sure enough, similar cuts appear on those boxes as well.
Another sliced box from earlier.
I contacted eBay about the situation. They made it very easy to get my money back for this purchase, but I was made to feel like they’re doing me a favor and in the future this favor may no longer be available. Strange, because I’ve been seeing lots of similar problems from other eBay users, and you’d think they would take more ownership of something that seems to be a pretty widespread problem.
This item was easily replaced, but what if you bought something that’s one of a kind? What if Ebay or Pitney Bowes deny any wrong doing and you are stuck with a broken item? They obviously don’t care about your items to begin with if they’re willing to slice the packaging open in this manner and remove padding to save a few bucks.
You may want to keep this in mind the next time you chose to use eBay’s GSP program.
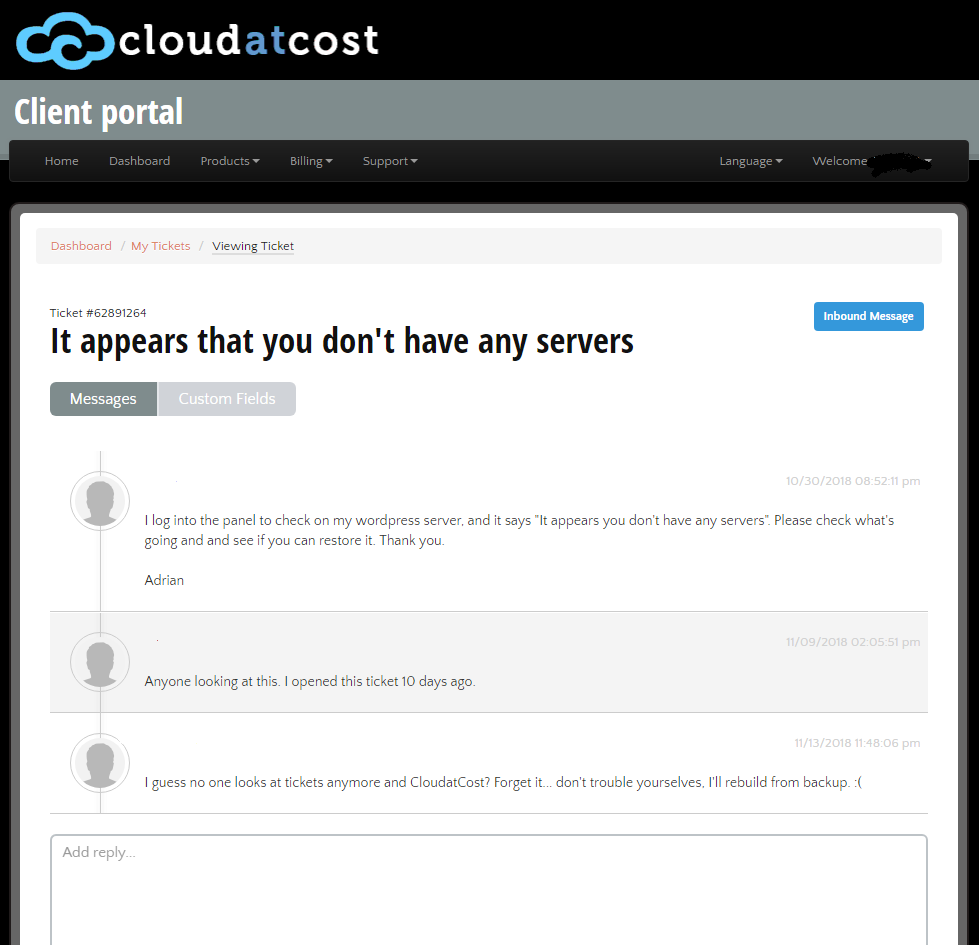
They lost my site again. Hilarious and sad at the same time, because I just made a number of updates and I thought that I made backups along the way. It turns out that the backups I made stayed on the VM and were not all downloaded to my home PC.
I normally keep a backup of this site on a secondary VM that can be swapped in when the primary is lost. The backup site was almost up to date too. I thought I was pretty safe here, and since there hasn’t been a major problem in a while, I let my guard down.
But, Cloud at Cost is awesome at keeping you on your toes. They showed me that I’m not as clever as I seem to think I am. By wiping all of my VMs simultaneously, they made it clear who’s the boss around here.
So I managed to combine a 2 month old backup along with some info from Google cache to restore this to what you are seeing right now.
Silly me, I even opened a ticket to inquire, politely at first, to see whether there is a way to maybe find out what happened, and maybe get my data back. Given how it’s been 3 weeks and I don’t even have an acknowledgment yet, I may be waiting on this for a while I think.
While I haven’t made any recent updates for a while, there is actually a lot of stuff going on. I put aside some of the long term projects (probably a bad idea) in favor of some quickies.
I spent the last few weeks working on RGB modding Sony Trinitron TVs. I ran into some issues with that but in the end was able to overcome them. As a result I made a Sony modchip board that can be used to enable an unused RGB input on Sony YC Junge chips inside of their TVs. I’ll put up a page with more details soon, but in the meantime here’s a link to the Youtube videos I made on the subject.
While working on the videos I decided to make a small dongle boards for testing TVs and monitors. These dongles will be battery powered and will output various signals to allow you to quickly test the equipment. Mainly this is for people that go thrifting and need to make sure the gear is working as expected. The vga dongle will output a 15khz test signal to help you find those elusive 15khz capable lcd panels.
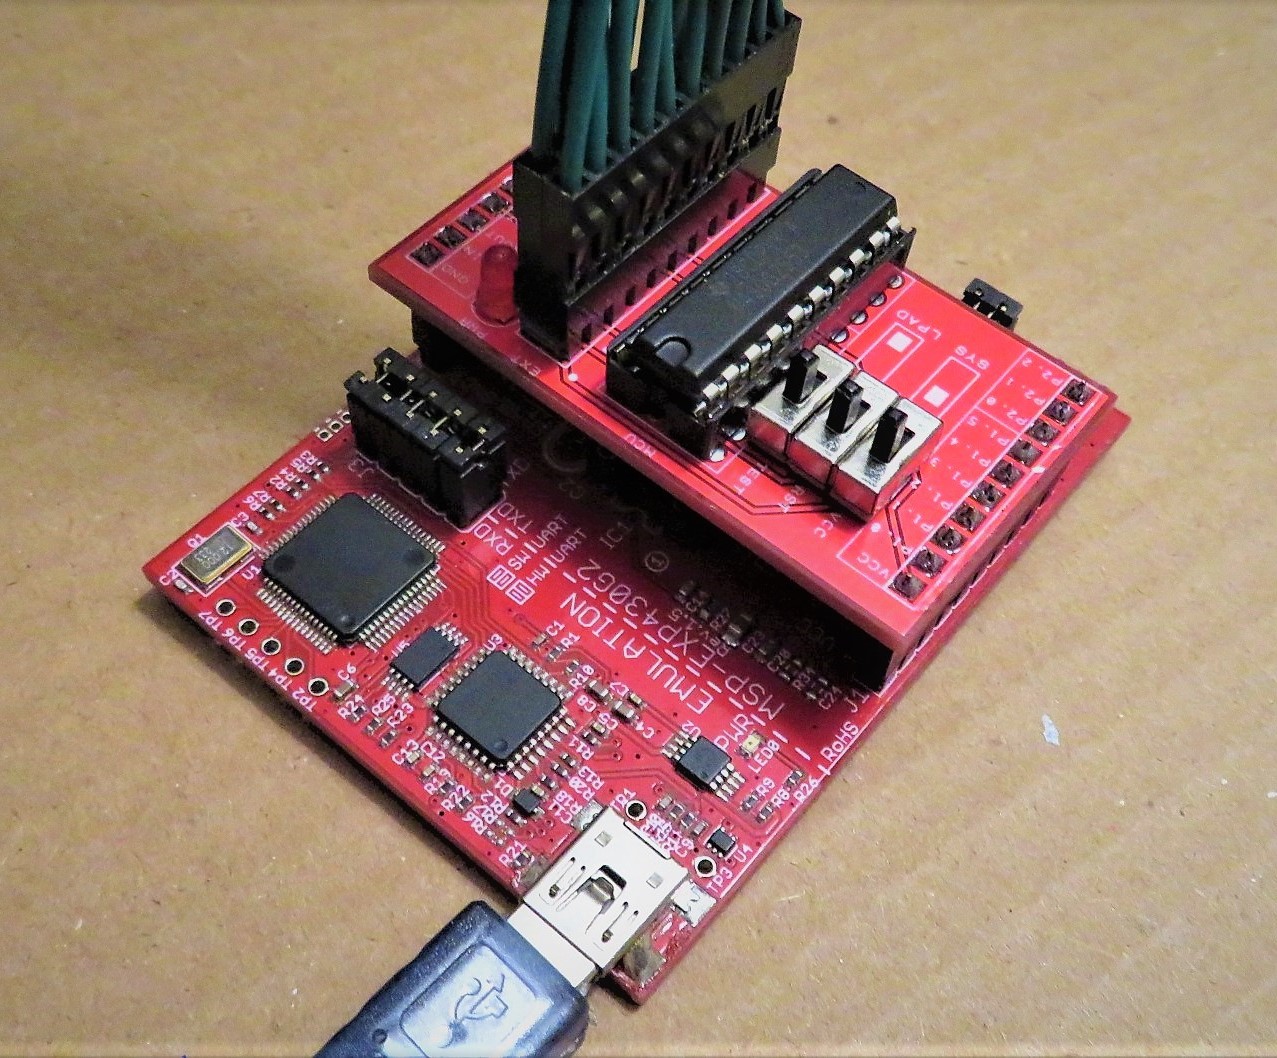
In addition to that I made a simple yet effective in system debugging board for value line msp430 microcontrollers. The idea here is to use your existing msp launchpad and connect it with an extension ribbon cable to your system. The board provides switches for the TEST, RESET and VCC pins to quickly go from programming to in system debugging.
This board design is available for free, but if you want to get a fully assembled kit I will make it available that way as well (coming soon).
Finally I’ve been working on more JAMMA adapters. The current batch consists of adapters for Exidy, Nintendo Playchoice 10, standard 8-liner pcbs with 72pin + 20pin edge connectors, Space Invades with virtual color overlay, and improved designs for the existing Nintendo adapters.
I spent the last couple of weeks or so testing the new JAMMA adapters, and updating this site. Most of the JAMMA adapter pages are now online and are complete.
According to what’s on the site, I have 30 game / conversion class specific adapters listed, 3 universal adapters listed, and 2 more adapters which are work in progress. The 2 unlisted adapters are the Orca Type B adapter (needs redesign for 2 button games) and the Space Invaders adapter which I literally just assembled and still need to write the code for.
I will also be working on a couple more adapters. One that I’m kind of excited about is a Sega Naomi to JAMMA adapter which will eliminate the need for a Naomi / Capcom adapter and will allow the use of a ATX power supply with your Naomi system.
I’ll post some news on this as the project moves forward.