You just spent a couple of hundred and got yourself your favorite Capcom CPS-2 game… or your favorite game has been in the closet for the last decade and you pulled it out to reminisce of the old days in your local arcade. You’re probably wondering whether that battery of death is still holding up in there, especially if the battery’s never been changed. After all, it’s likely been close 20 years since the game was made.
The good news is that even after 20 years the battery is still likely in pretty decent shape. The not so good news is, that it’s probably a good time to finally address it.
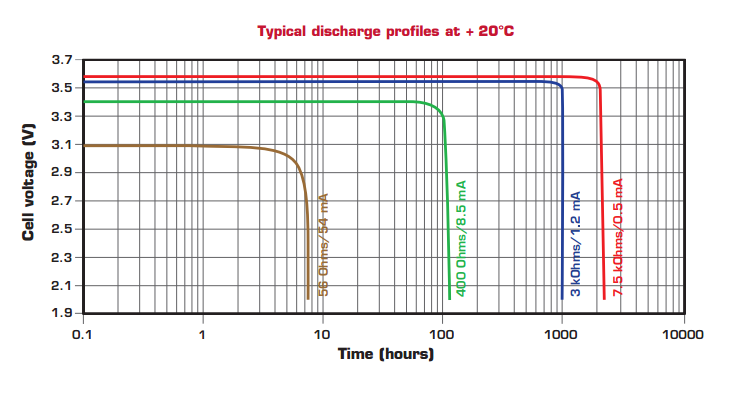
I recently replaced the batteries in my CPS-2 boards, and I thought I’d do a simple tutorial on how to do it. Now, the batteries that are on these boards are very good quality. Never did I see one go dead, leak, or even go below rated output voltage, and I’ve looked at at least a couple of dozen of these batteries over these years. The oldest couple of batteries that I had to change, were initially installed in 1995 and first replaced just now, in 2017. That’s 22 years, and even after all this time, the battery still held at full 3.69V. Pretty amazing if you ask me. Just because the battery is still at full rated voltage doesn’t mean it’s going to last a lot longer. The voltage will drop off a cliff towards end of life. If you see anything less that the operating voltage, it’s time to replace the battery ASAP!
I recommend doing the battery replacement procedure as follows:
Step 1 – Check the game.
Boot it up to make sure it’s still working. If you get a screen of a single solid color, I’m afraid it’s too late for the battery replacement. In addition to changing the battery, you’ll also need to restore your game’s encryption keys. Here’s a link to a rather complicated process on how to do this. No doubt, a fantastic accomplishment by a small group of CPS-2 enthusiasts!
Step 2 – Buy new 1/2 AA batteries.
You’ll want a good quality battery from a reputable source. I’m cheap too, but the last thing you want, is a fake or a crappy battery that’s going to die in there after 2 years. Spend the extra couple of bucks here for piece of mind. I can’t comment on the quality of batteries from all sources, but Tadiran and Saft batteries are typically regarded as top quality, and I’ve used both without any issues so far so that’s what I can recommend. They’re not super expensive either. I bought a pack of 10 Saft batteries this time around from an Amazon third party seller with excellent reviews, for about $30USD shipped.
There are actually different chemistries when it comes to these batteries, each optimized for different application. One type will be a low current drain (Tadiran SL-300) mainly used for battery backup applications, and another high current drain types (Tadiran SL-700) for systems that require higher pulses of current, like alarms for example. You’ll want the first type. The Saft (LS 14250) batteries are a compromise between these two types and are suitable for both.
If you’re unable to get these for whatever reason, try to avoid batteries that are labeled “High Energy” and look for key phrases like low self discharge (of around 1%), 10+ year shelf life, etc.. to maximize the time between changes.
Step 3 – Prepare your workspace.
You’ll need a Torx security screwdriver set, at least size T20. If you don’t have one or can’t get it, you can unscrew the security screws with a flat head screwdriver of a specific size. More on that later.
Remove any screws, tools, wires, long lengths of solder or anything metal from your workspace, that could potentially short the board while you’re working on it. Make sure you have a soldering iron and solder.
You’ll have about 20 minutes to put the new battery in after removing the old one, so you want to be certain that everything is ready before you begin. Test the new battery’s voltage (should be at least 3.67V) and make sure you have a battery holder handy if you are going to be using batteries that require a holder.
When using a holder, you’ll need some small zip ties to hold the battery in place. Also, you’ll likely find that the holder leads are too thick to fit though the hole in the pcb, so if possible, you can take this time to file or crimp them to make them more narrow. I use pliers to pinch the wider side of the lead to round it off, but this has to be done with care as the leads may break.
Don’t forget to take on all the necessary steps to minimize ESD discharge as well.
Step 4 – Open the B board plastic shell and remove the pcb.
There are 4 security screws holding the plastic shell of a B board together. The holes are located as indicated by the red circles. Some may be under the warranty void stickers.
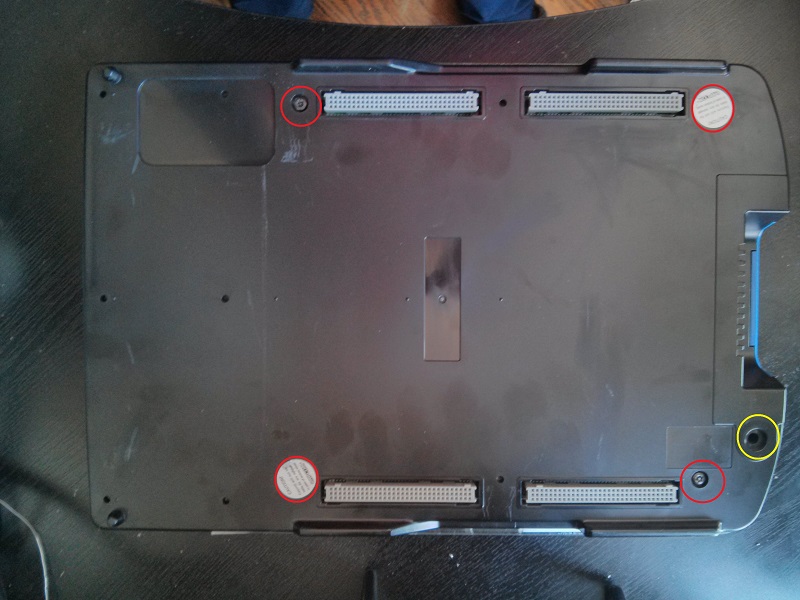
The location of the yellow circle may contain another security bold with a strange pattern on it. I found this on only one board so far, but it’s possible to remove the pcb from the shell without removing this screw by prying the case apart far enough and sliding the board out through the gap.
It’s up to you whether you want to leave the warranty stickers or take them off completely. I pry them partially off and leave them on after i put everything back. It saves me from cleaning up the sticky VOID lettering after the sticker has been removed.
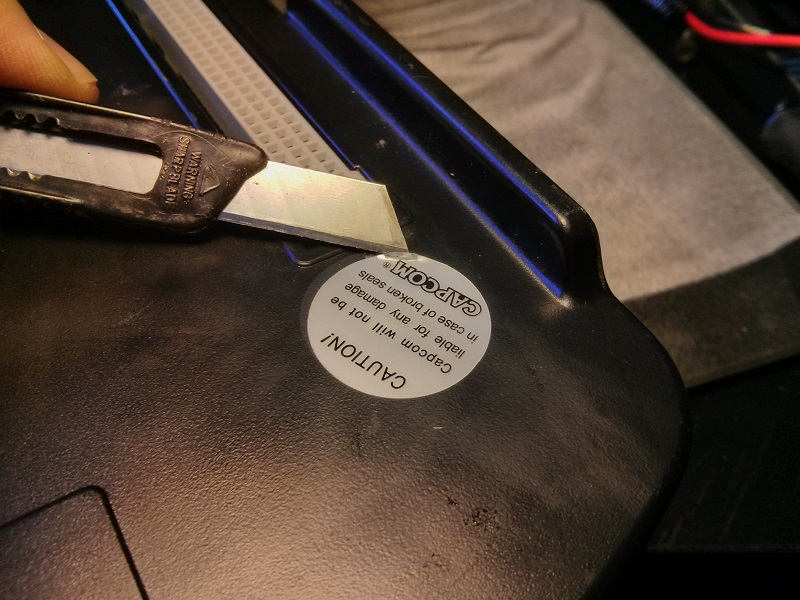
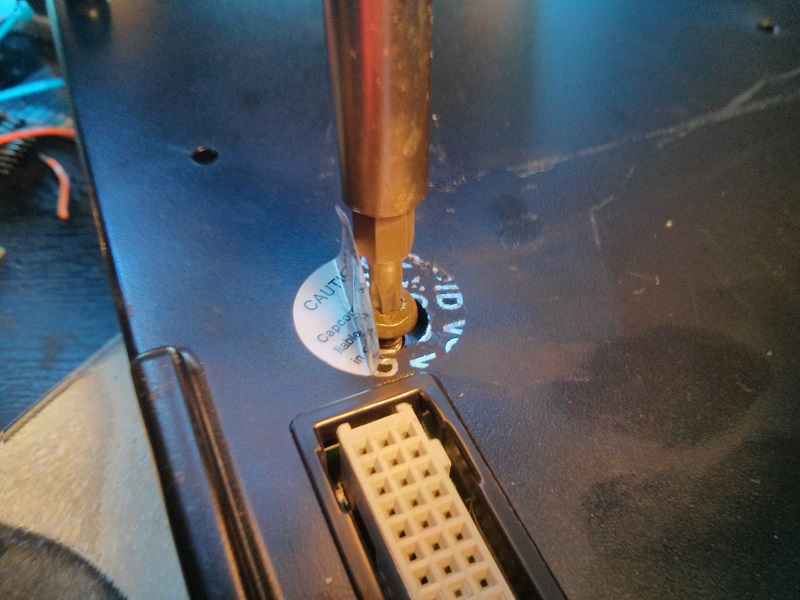
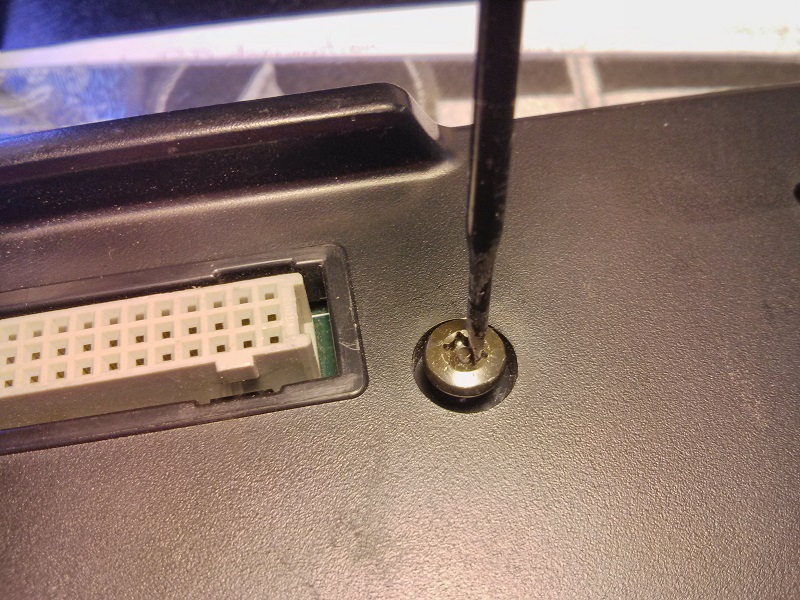
In order to remove the 4 security screws with a flat head screwdriver, insert the screwdriver as shown in the picture and turn it as you’d normally turn it to unscrew the screw. The flat part must fit snugly between the center bit and the two adjacent points of the star pattern on the head of the screw.
I’ve done this with many torx security screws and it works great.
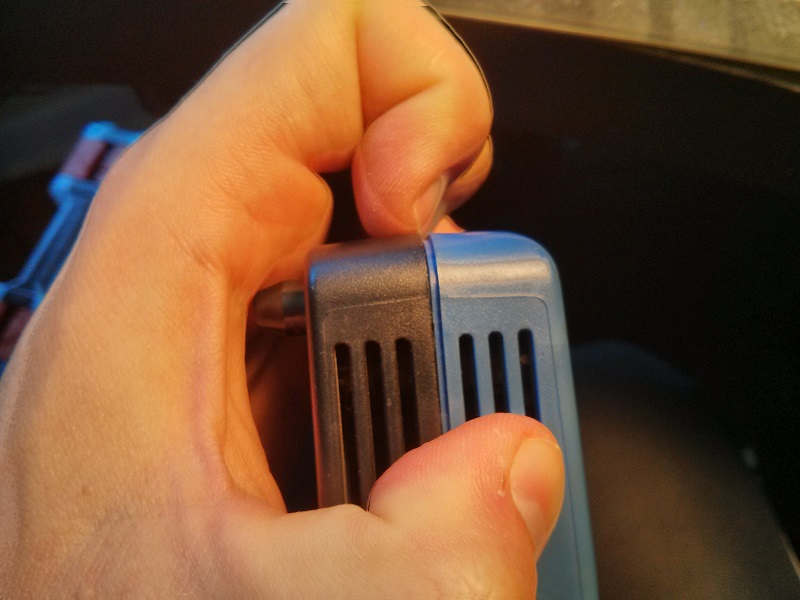
Once the 4 screws are out, pry the two sides of the shell with your fingernail, starting from the side opposite of the fan grill, where the coin counter and the network expansion holes are are located. If you don’t have those, you’ll likely have 3 plastic inserts there instead. When you pry the sides apart, those inserts will fall out and drop into the case for easy retrieval.
Disconnect any plugs that may be connected to the pcb. A few games will have a coin counter installed. There is a latch on this connector which has to be lifted first before the plug can be pulled out.
Finally remove the board and place it on a non conductive surface. I use the shell and keep it there for the duration of the procedure.
5 – Locate and remove the old battery
The battery will be located on the side of the fan grill, to the right when looking at the component side of the board. You can’t really miss it. It’ll be a round cylinder, 1/2 size of a AA battery to be exact, with two leads.
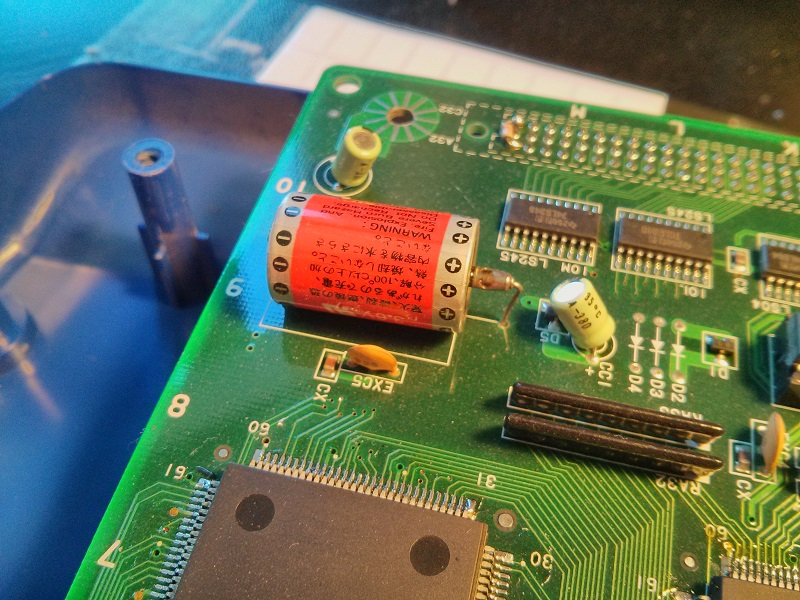
Flip the board over and desolder the existing battery, while gently pulling down on it with your fingers from the other side. As you do this, and going forward, on you have to be extremely careful not to allow the battery leads to touch any part of the pcb.
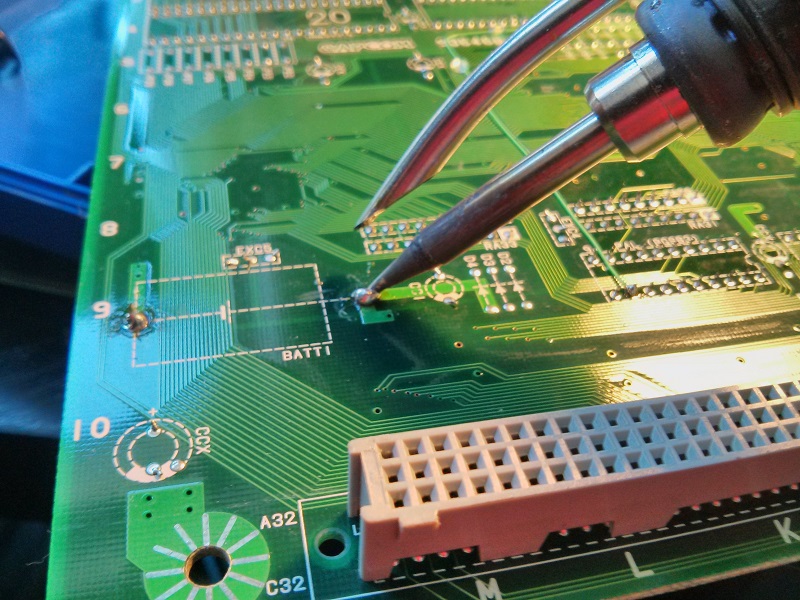
When the battery is removed, clean the holes with solder wick, a desoldering suction pump, or pull the solder off with the tip of the iron. Again, be super careful not to short any traces or component leads as that may drain any leftover charge that is keeping the SRAM alive. The holes must be clean and open for the next step.
6 – Installing a battery holder
If you’re installing a battery holder, you’ll probably need to enlarge the holes a tad bit, as the typical battery holder leads are thicker than those of the battery. If you’re using a battery with leads you can skip this step.
To make the holes larger you can use a drill with a small bit. Make sure to drill into the side with the solder pads. Drilling from the other side may lift the pads.
If you don’t have a drill and a small bit, you can use a small Phillips screwdriver, a back and forth twisting action and some pressure to do this, again starting from the solder pad side. Even though this is a multi-layer board and I would never recommend doing this elsewhere as you can short out the inner layers with this approach, it’s safe to do it here. The battery pads are the only copper present in the immediate area around the hole.
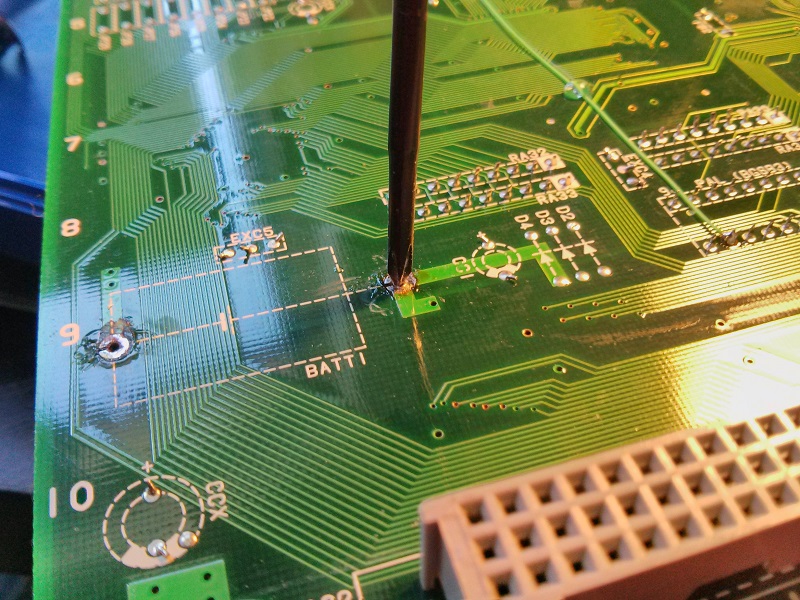
When the holes are large enough, you can now install the holder. If the holder doesn’t fit through, make the holes a little larger and try again. Depending on the battery holder, you can also try squeezing its leads with pliers to make them more narrow. You have about 20 minutes to do this. I took longer than 15 minutes more than once, and never did I have any problems. I wouldn’t go much longer than 20 minutes though.
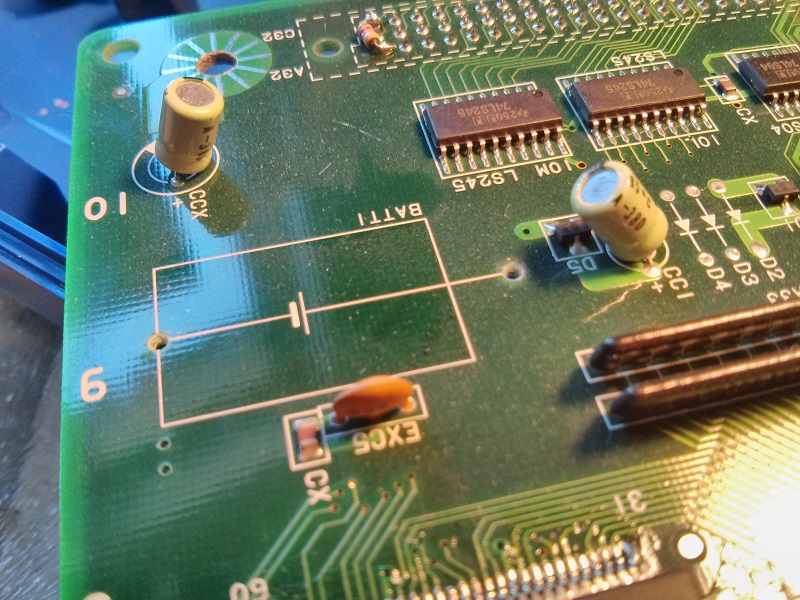
As always, you need to be precise and make sure the tools don’t slip and short any pads or components, especially the battery terminals. Don’t get any dust or solder flakes on the leads of the adjacent ASIC chip.
Before soldering the battery holder in place check the label on the holder and make sure the polarity is correct. Solder the holder terminals to the board using a generous amount of solder and heat.
7 – Installing the new battery
This is going to be super easy if you installed a battery holder in step 6, and almost as easy if you didn’t. Before you install the new battery, check to make sure the polarity is correct. The positive (+) terminal will be facing the inside of the board and the negative (-) terminal will be facing the outside. Look at the pictures above and below for reference.
When you’ve done checking this, look at the battery again and double check once more. If you flip the polarity by mistake, you’ll surely wipe the encryption keys, and possibly damage the decoding ASIC.
Once the battery is installed solder the leads with generous amount of solder.
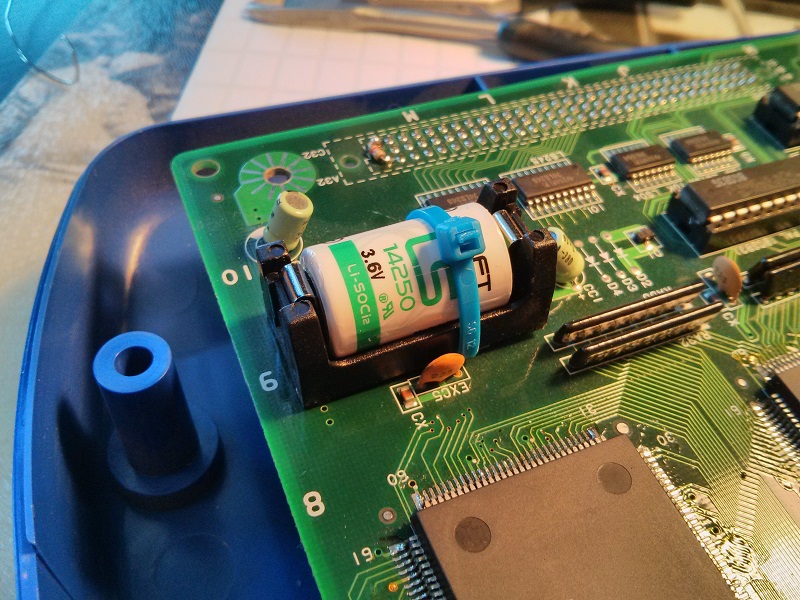
If you’re using a battery holder, check the polarity and snap the battery in and use a zip tie to secure the battery in place.
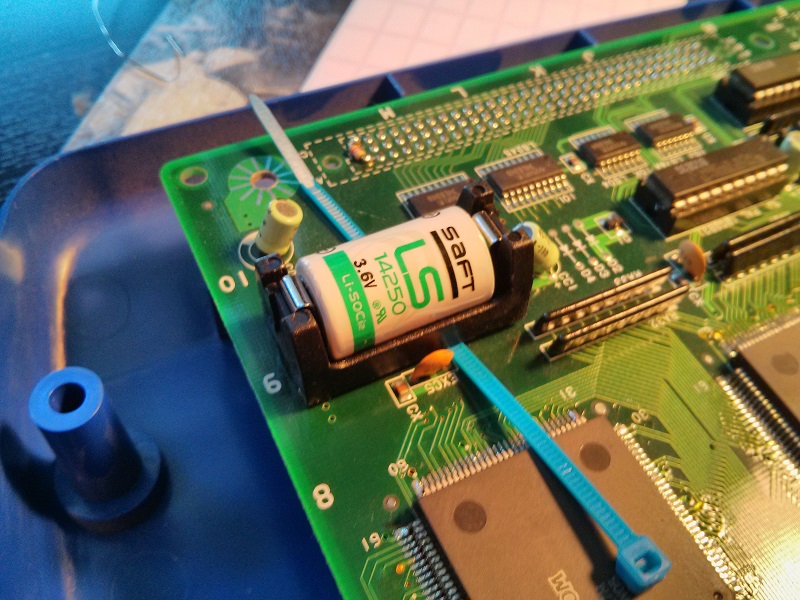
Slip the zip tie underneath the holder and tie it snugly around the battery. Most holders have a gap underneath so there should be some space for a zip tie. If this doesn’t work use good quality tape for some added security. We want to be sure that for the next 10 years or so, the battery doesn’t fall out of the holder under any circumstances.
8 – Reassemble the board in its shell
This is pretty straightforward. Place the board inside the bottom of the shell. First, make sure holes on the board line up with the plastic nubs that hold the board in place. Put the the other side of the shell on top and squeeze gently. You should hear the latches snap all around. Use the 4 screws to tighten both sides of the shell together. Replace the network hole covers if you have them.
The only thing left now is to record the date of the next battery change. I typically use 10 years as that is recommended by the manufacturer, but based on my experience, I suspect this can be a lot longer.
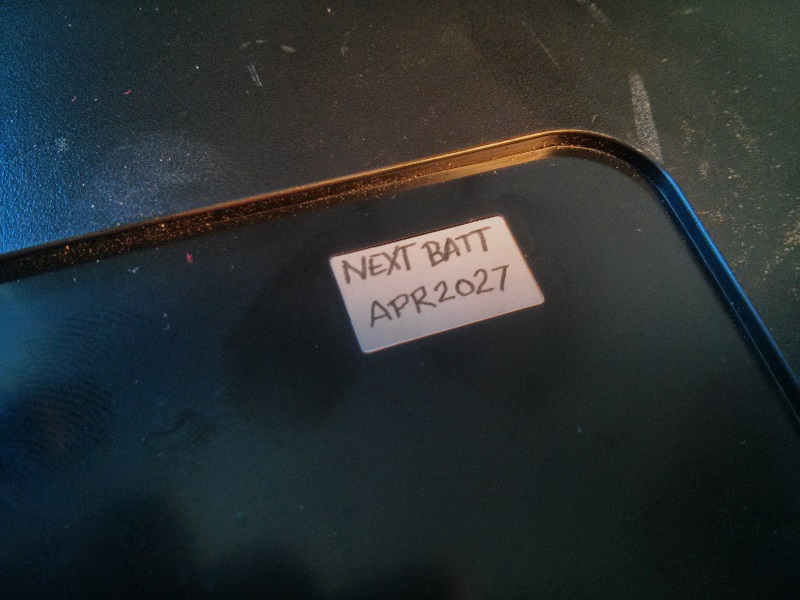
There is a recessed, smooth surface that’s perfect for stickers on the bottom of the shell. I place the date there on a small sticker or some masking tape. You can put some clear tape on top to protect the writing if you’d like.
9 – Test the game
I bet you’ll be pretty excited when the game boots up just fine after this procedure, and unless you screwed something up, this is most likely the outcome.
If you get a solid screen of color and no other activity most likely the contents of the SRAM holding the decryption keys have been wiped. Your only option is to check your work for shorts and correct battery polarity and attempt a recovery procedure from the top of this guide.
If you get something else while testing, either a black screen or some activity, check the connection (and pins) on the A board to make sure they’re not bent or broken.
Conclusion
I hope this guide has been helpful to you. If you attempt this work, please understand that you’re doing so at your own risk. The information provided here is free of charge and comes without any warranty. I will not be held liable for your screw ups.
As you can see, the battery change procedure isn’t that difficult, but it does require a high level of care and some skill.
While this has never happened to me, I have seen friends with an electronics background and good soldering skills mess up their CPS-2 boards while doing this, without a clear reason as to how it happened.
I’m telling you this because you should be aware that it’s possible to break your game even if you take all the necessary precautions.
If you don’t think you can handle this, I suggest you contact someone with a bit more experience to do the work for you.
